Site Links
Howdy, Stranger!
It looks like you're new here. If you want to get involved, click one of these buttons!
Quick Links
Categories
Who's Online (0)
ARTA jig from scraps

"Who needs a DATS, all you need is some scrap wire and a few resistors". That's what I've always said, and here's proof.
4thtry has put together a nice detail of his ARTA jig here, which he described as inexpensive, however as far as options for building this jig goes, he went on the more expensive side using name brand Neutrik components, a steel box, switches and terminal blocks, etc. So how cheap can this jig really be ?
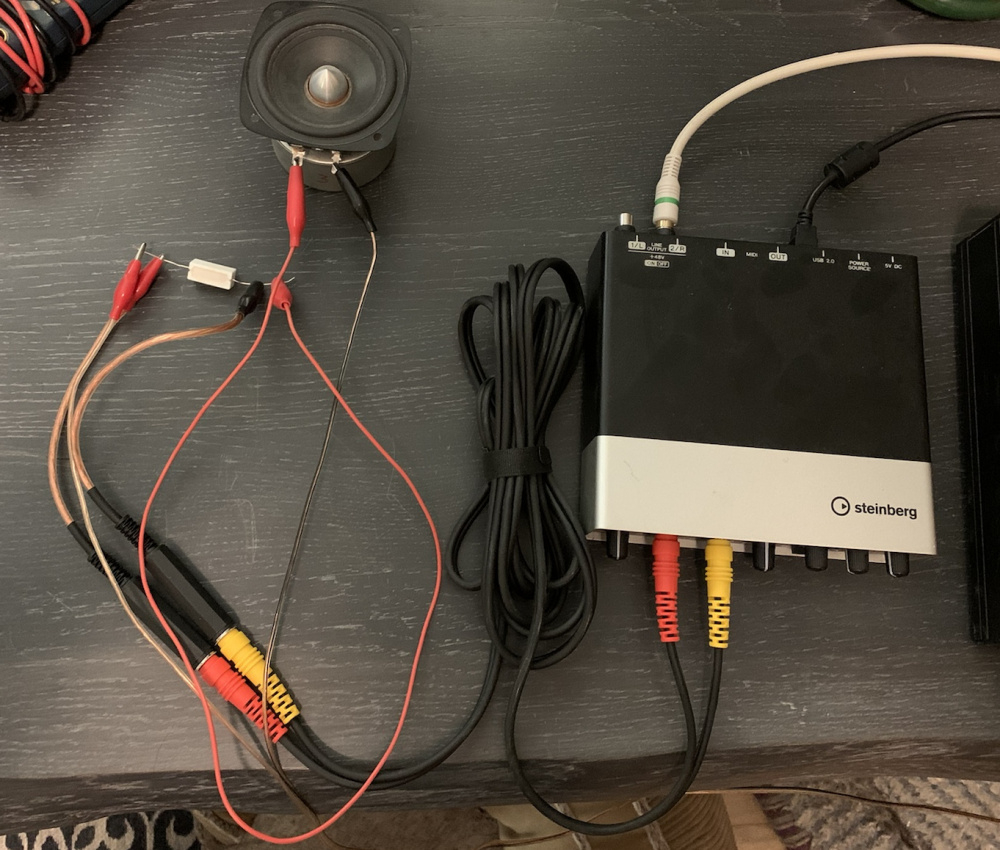
What's in the "jig box" can in fact be broken down into cable "probes", so the box with switches and connectors is really just a convenience factor option. Here's my jig schematic, and highlighted are the reference and impedance probes.
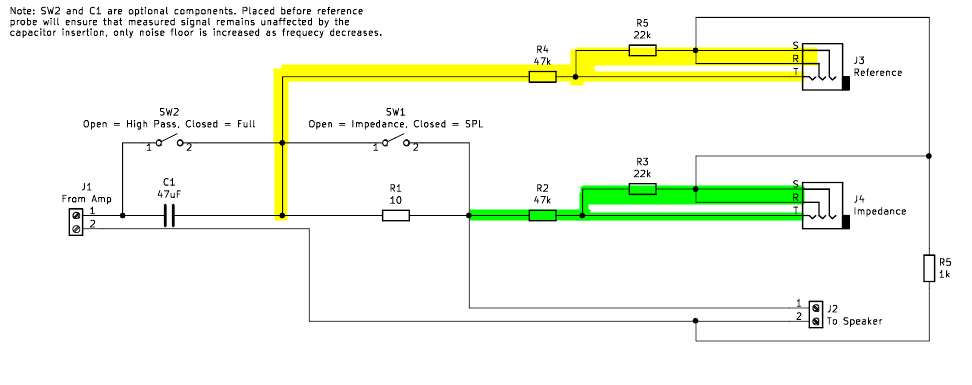
If all we build is the probes, the functionality of the jig can be completed by simply arranging the probes to different locations in the circuit. It's a bit more work than simply flipping a switch, but the point is "it can be done".
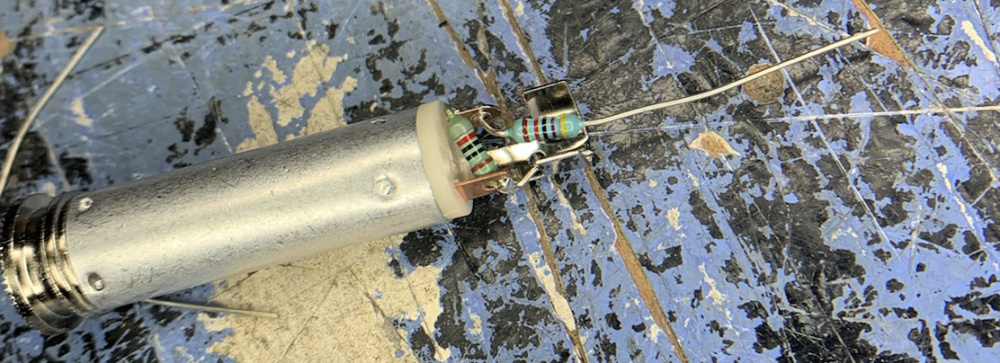
I use a USB audio interface with 1/4" TRS input, so for this you can either cut up a TRS patch cord and solder some resistors on the end, or what I did was purchase some cheap TRS jacks that I can plug onto the end of a patch cable, keeping the cable in tact for other uses.
I bought these jack ends for CAD$12 for qty 4, works out to $3ea and I have 2 left over. They're decent and came with some heat shrink as well which was nice.
https://www.amazon.ca/gp/product/B07K54XWFW/ref=ppx_yo_dt_b_asin_title_o00_s00?ie=UTF8&psc=1
Next, simply solder the resistors on the end as the schematic shows:
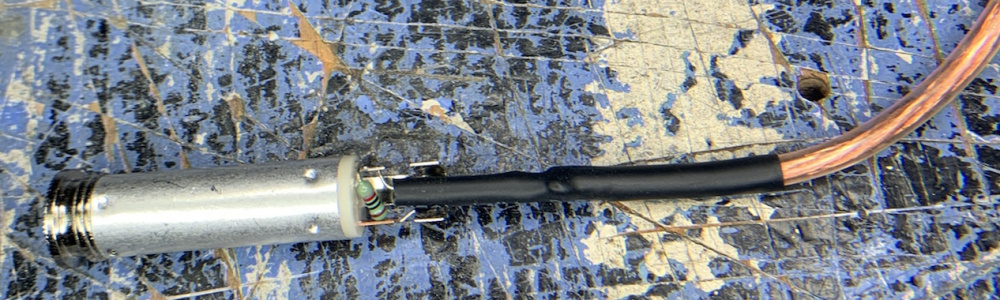
A short length of scrap wire is added as the probe, and heatshrink to prevent shorts:
That's it!
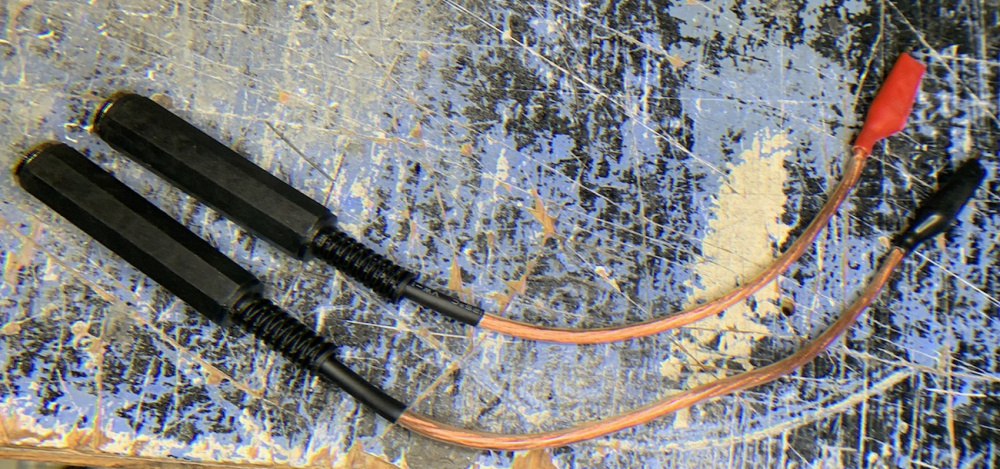
The end of the wire can have an alligator attached, or wago connector or whatever you prefer. Cheap alligators like the ones shown here (and WT3) have poor clamping force that often provides poor connection, so if using alligators get the strongest ones you can find. Repeat for the second probe. To complete the jig for impedance measurement, you'll need a resistor as well, I have a 10 ohm 5W on hand that I use.
In conclusion, what's needed for this jig is:
qty 4 1/2W or 1/4W resistors, 22k and 47k used here but there's a fair bit of flexibility, especially with a USB interface that has individual input gain/attenuation knobs
qty 2 1/4" jacks, or RCA or 3.5mm or whatever is most convenient for your audio gear.
qty 1 10-50 ohm resistor, 5-10W power rating.
some scrap wire
alligator ends if you wish
So...does it work?
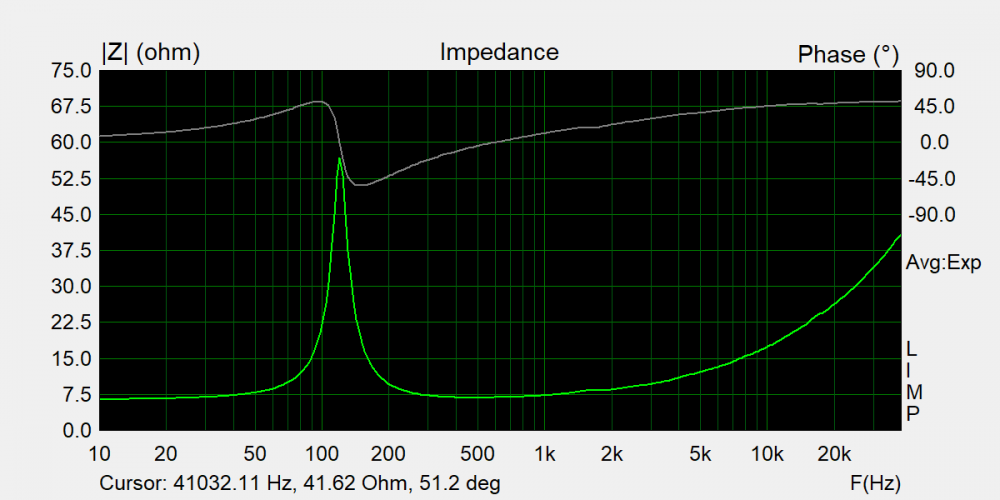
Yes, it works! With the USB interface, use with a single probe and XLR measurement mic for a complete dual channel measurement setup. Use with ARTA, REW, or SoundEasy.

