Please review the site Rules, Terms of Service, and Privacy Policy at your convenience. Rules, TOS, Privacy
Get familiar with the reaction system: Introducing the Reaction System

Nighthawks(my kids called them Darth Vader) build

This is my first real post so go easy on me lol. This is a build i did for my dad several years ago, I thought i would post some build pics as they have really only been to the KYDIY event and that's pretty much it. Really fun build but had a lot of challenges.

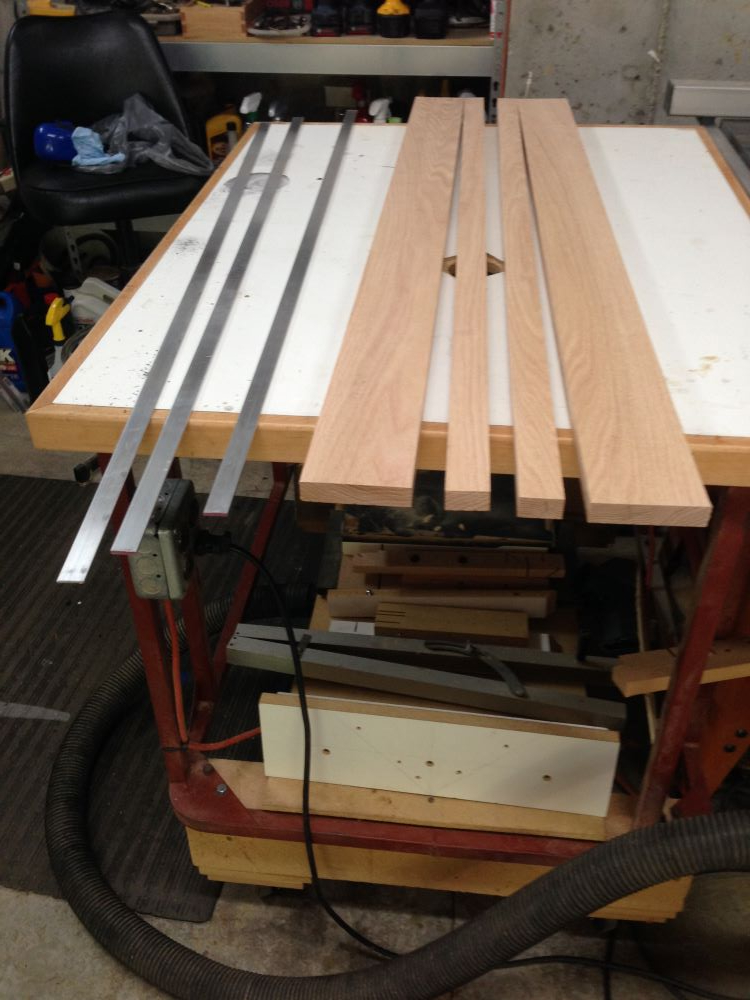
The baffles were made out of 7 pieces each. 3 strips of aluminum and 4 pieces of oak.


«13

Comments

  • Next was the glue up, kinda tricky because even though i roughed up the aluminum  it still tried to walk around as clamping pressure was applied.
  • Here is what it looked like after drying and a little bit of sanding
    H
    dcibelSilver1omojoeybutts
  • I want to that someday - what glue did you use to bond the aluminum to the hard wood?
    I have a signature.
  • Epoxy- but he'll get to that part as he posts more...
  • spoiler alert router and heat...
     John H, btw forum has decided I don't get emails
  • @#$%^$#@$% <---- Expletives uttered as well.
  • jr@mac said:
    I want to that someday - what glue did you use to bond the aluminum to the hard wood?
    Well that's a long painful story actually. I can tell you for a fact that system 3 epoxy appears to work until you take a router to it and heat up the aluminum. It de-bonded were the tweeter flush mounting machine work was done. I almost started a bonfire with the whole mess at that point lol. I ended up using loctite 5 minute epoxy which believe it or not was way more robust than the system 3. I did reinforce with pocket hole screws in various locations that were pretty much hidden. And of course there were many expletives uttered repeatedly for good measure.

  • Here is what the baffles looked like after the first round of machine work. The tweeter flush mount is where all the problems started with the epoxy. The complete top came apart and the section between the tweeter and the mid came apart as well. I didn't want to immortalize the "learning experience" at the time so no pics of the damage...

  • Angle jig on the table saw for cutting the long facets on the top and bottom on both sides of the baffle.


  • Another shot of the angle jig. You can just make out the pocket holes used to repair the debonding of the wonderful system 3 epoxy just above and below of the tweeter area. Not as elegant as I would have liked but saving it at all was amazing to me at the time..
  • I need to learn to build a jig like that. 

    Looks great!
    I have a signature.
  • Adam is a slick wood-worker for sure! I think I see a slot in the base with maybe a locking knob to set the angle point.
  • Good eyes, Yep that's exactly what the slot is for. The adjustment and slide are from a junk miter gauge i had laying around. That Jig has seen a lot of use for sure.

  • Angles cut on the top, pretty much all the machine work done on the baffles. I really loved the way the aluminum and raw oak looked together. If they were for me I probably would have tried a clear finish maybe matte, but my Dad wanted something different then that.
    tajanesSilver1omoPWRRYDkenrhodesS79106thplanetsquamishdrocdynamo
  • Used a little trick I learned from Eric, knock the phase plug out of the RS225. Interestingly I believe when he did it they were anodized, but these were just painted.

  • Drilled/tapped for a stud so it could be chucked in the drill press for sanding/polishing.


  • Not a perfect match but dang close to the phase plug on the tang band W5-1611SAF. the sanded/polished phase plug on the rs225 was clear coated so hopefully it wont oxide to much.

    PWRRYDJasonPdynamoS7910dcibelSilver1omosquamishdrocGowakenrhodesDanPand 1 other.
  • Man you do amazing work!

    I’ve always wanted to do aluminum inlays like that. So does a normal “wood” router bit and table saw blade work on it? Is it hard on bits?
  • Thanks for the compliment! Yeah normal bits work fine just mind your speed. It might wear them a little more but I still use those same bits/blade to this day. Heck I've cut some woods that seemed harder to cut than aluminum.
  • Unfortunately I couldnt find alot of contruction pics of the woofer section. Nothing to fancy, just a rs225-8 in about a 50 liter ported box with some bracing. I had to make the back removable for xover access and mounting of the baffle to the woofer section. Rattle can satin black finish.

    squamishdrocGowadynamo
  • So, I did find some pics of the damage on my phone. Enjoy the carnage:

  • This gives a better view. Ouch...

  • Here is a good shot of the repair.

    JasonPSilver1omo
  • Also was able to find a pic of cutting the facets on the woofer section.

    JasonP
  • Baffle/woofer sections test fit 

    dynamoGowaThumperTom
  • This is awesome, I'm inspired. Once I have a couple working legs (long story short, complications from an injection has taken out the thigh muscle in the one leg I have with a functioning knee), I'm building a statement speaker. I have a plethora of high end drivers to pick from. Let's do this!!!
    dynamoani_101joeybutts
    I have a signature.
  • I don't know if Adam can NOT build a statement speaker with his talents.
    dynamo
  • AdamM3 said:
    Thanks for the compliment! Yeah normal bits work fine just mind your speed. It might wear them a little more but I still use those same bits/blade to this day. Heck I've cut some woods that seemed harder to cut than aluminum.

    When you say mind the speed do you mean slower works better? Sorry to litter your thread with my dumb questions!
  • Yes- slower on aluminum.
  • These are really nice!
    I have a couple of suggestions for the aluminum/epoxy issue.  I'm not saying that you didn't do this or that it is a complete solution, but for anyone that wants to attempt a similar build, I would clean the aluminum with acetone, alcohol, lacquer thinner or anything that evaporates quickly with no residue.  The next thing that I find to be very important is that the epoxy needs tooth to grab onto, so sanding it with 40 grit seems to do the trick.  I'm sorry for taking up space in your thread.  Back to the regularly scheduled program.
    These are very pretty.

    kenrhodes
Sign In or Register to comment.