Site Links
Howdy, Stranger!
It looks like you're new here. If you want to get involved, click one of these buttons!
Quick Links
Categories
Who's Online (0)
Tablet cinema

in DIY
I can't take credit for this, it's something that Chris Perez brought to MWAF several years ago. I thought it was an interesting design so I set off to build it. I don't know if Chris ever published any information on it, but I just looked at it and winged it, so I guess you could say that it's my take on his design. Obviously it's not about absolute sound quality, as there is some comb filtering going on, and I haven't measured it yet, but I believe it needs a little tweaking. 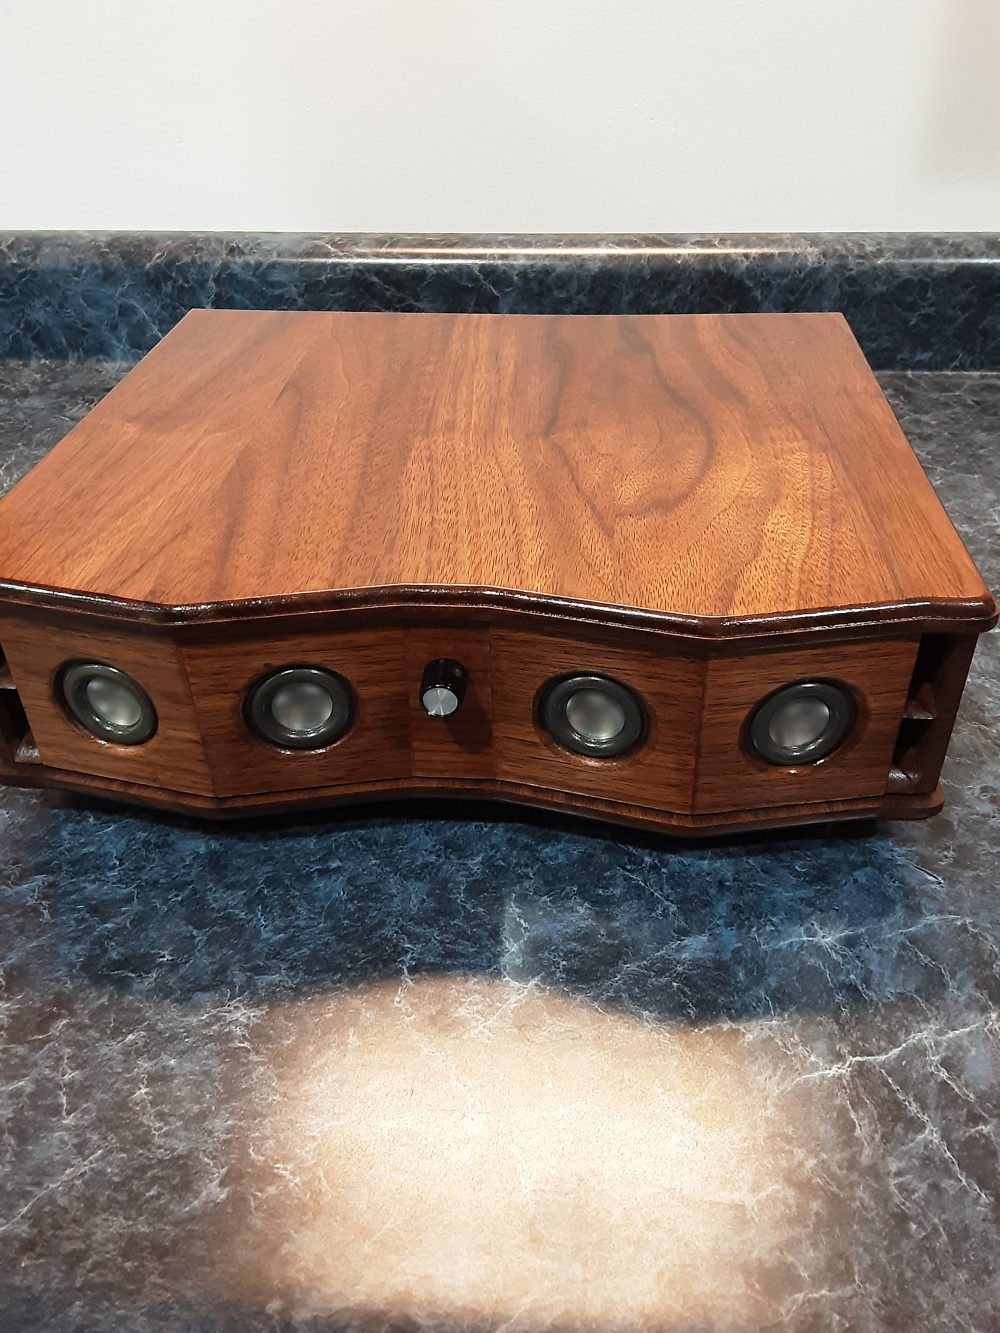
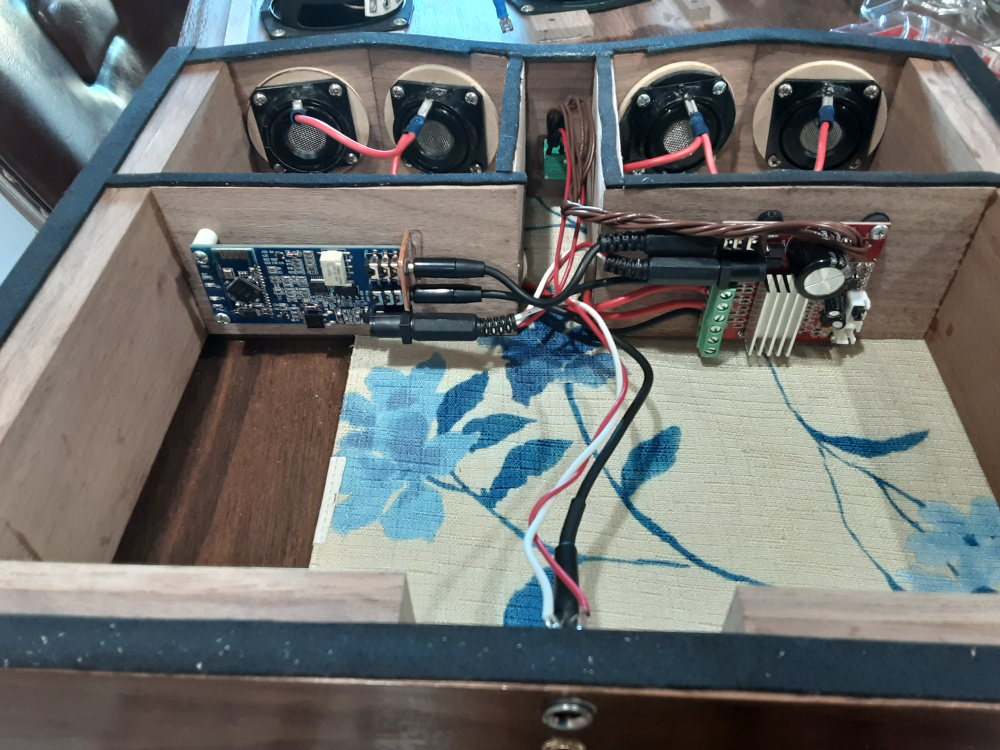
It uses Aura 1" full ranges and Nd91's driven by a little 2.1 amp and I added a Bluetooth board.


Comments
Looks great and I suspect the comb filtering issue is overrated. Let's not forget about the drastically reduced distortion of multiple drivers. A few tweaks and I'll bet it will sound pretty nice...
That's pretty cool. Has a classy old timey look going on.
That's what I was going for. Thanks
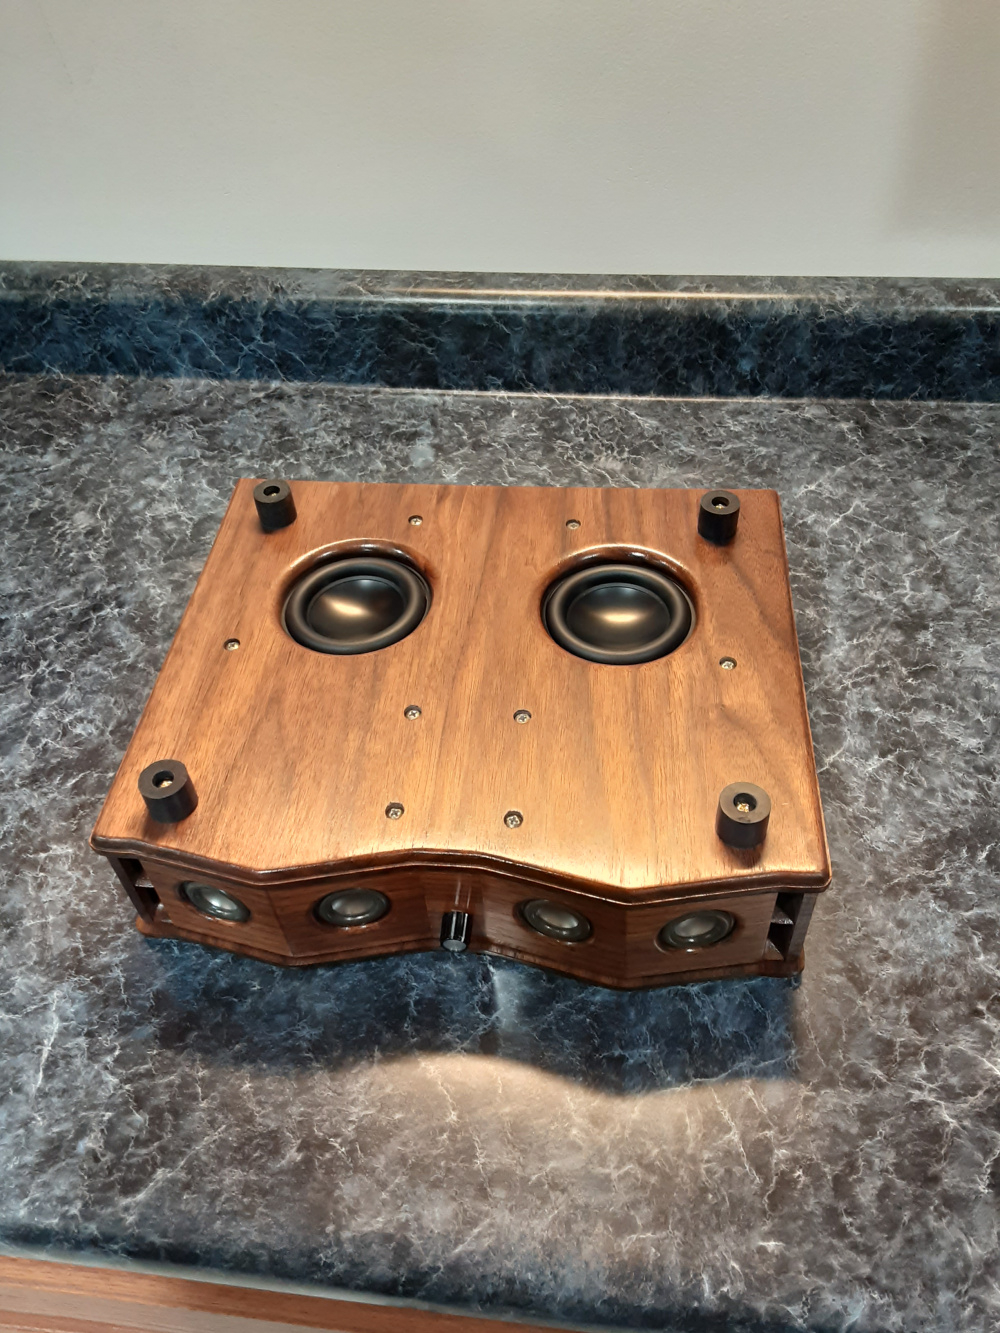
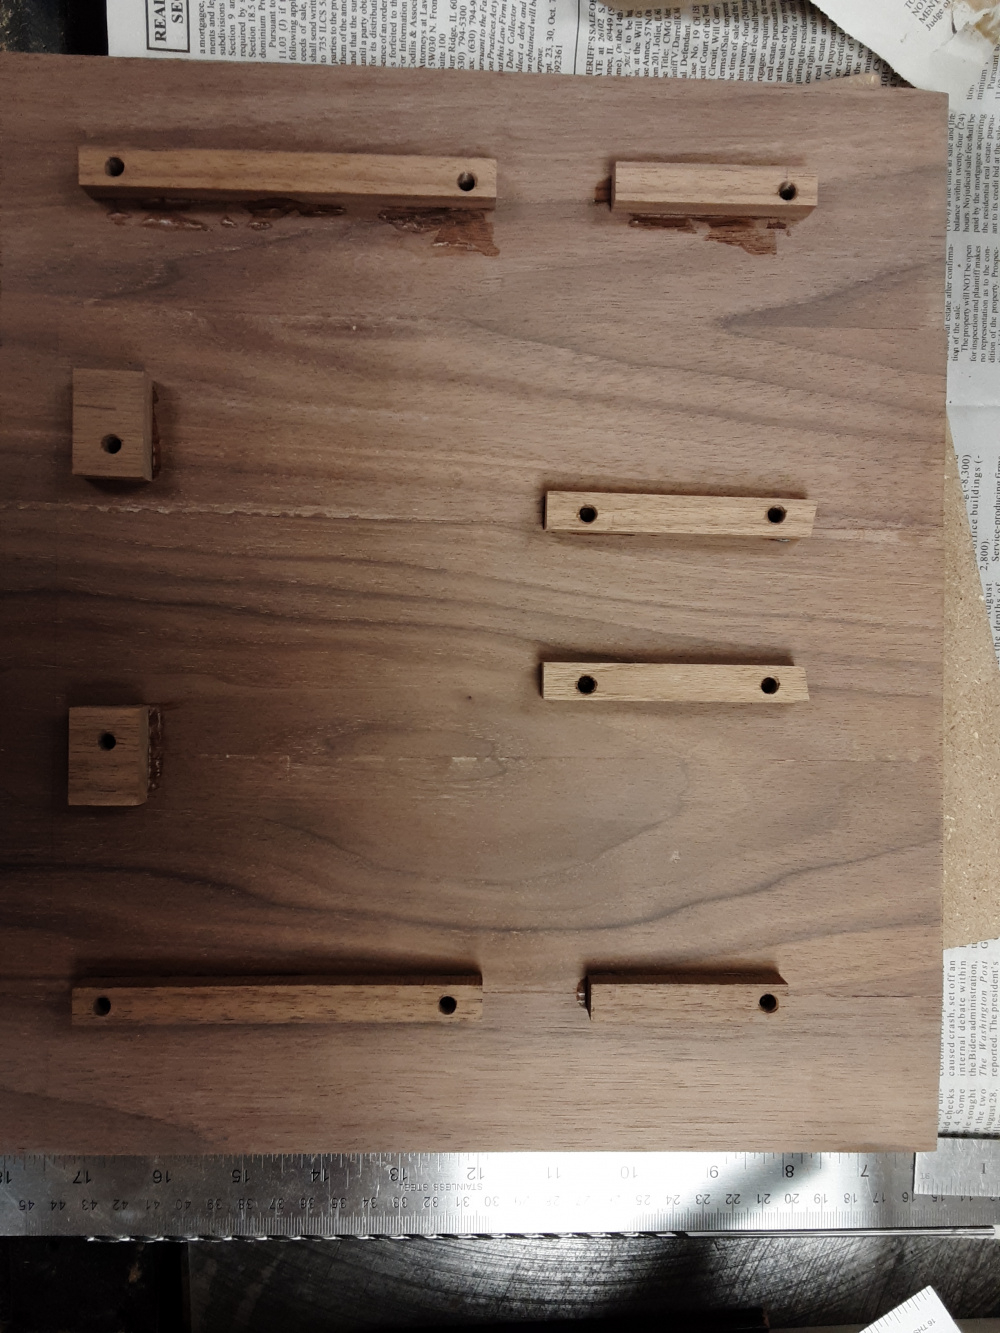
I build the center section years ago, but I couldn't decide how I wanted to construct and attach the top and bottom. I contemplated using a veneered plywood top and bottom with edging, but ultimately decided on solid walnut, matching the center. The next problem was how to attach the top and bottom, because I didn't want exposed screws on the top and I would never glue solid wood with the grains running perpendicular. My solution was to use cleats and aluminum posts, the cleats keep the top and bottom aligned and gave me a thicker point to attach the posts.
I made the posts from 1/4" aluminum rod, on which I created an external 1/4 - 20 threaded and tapped the other end for an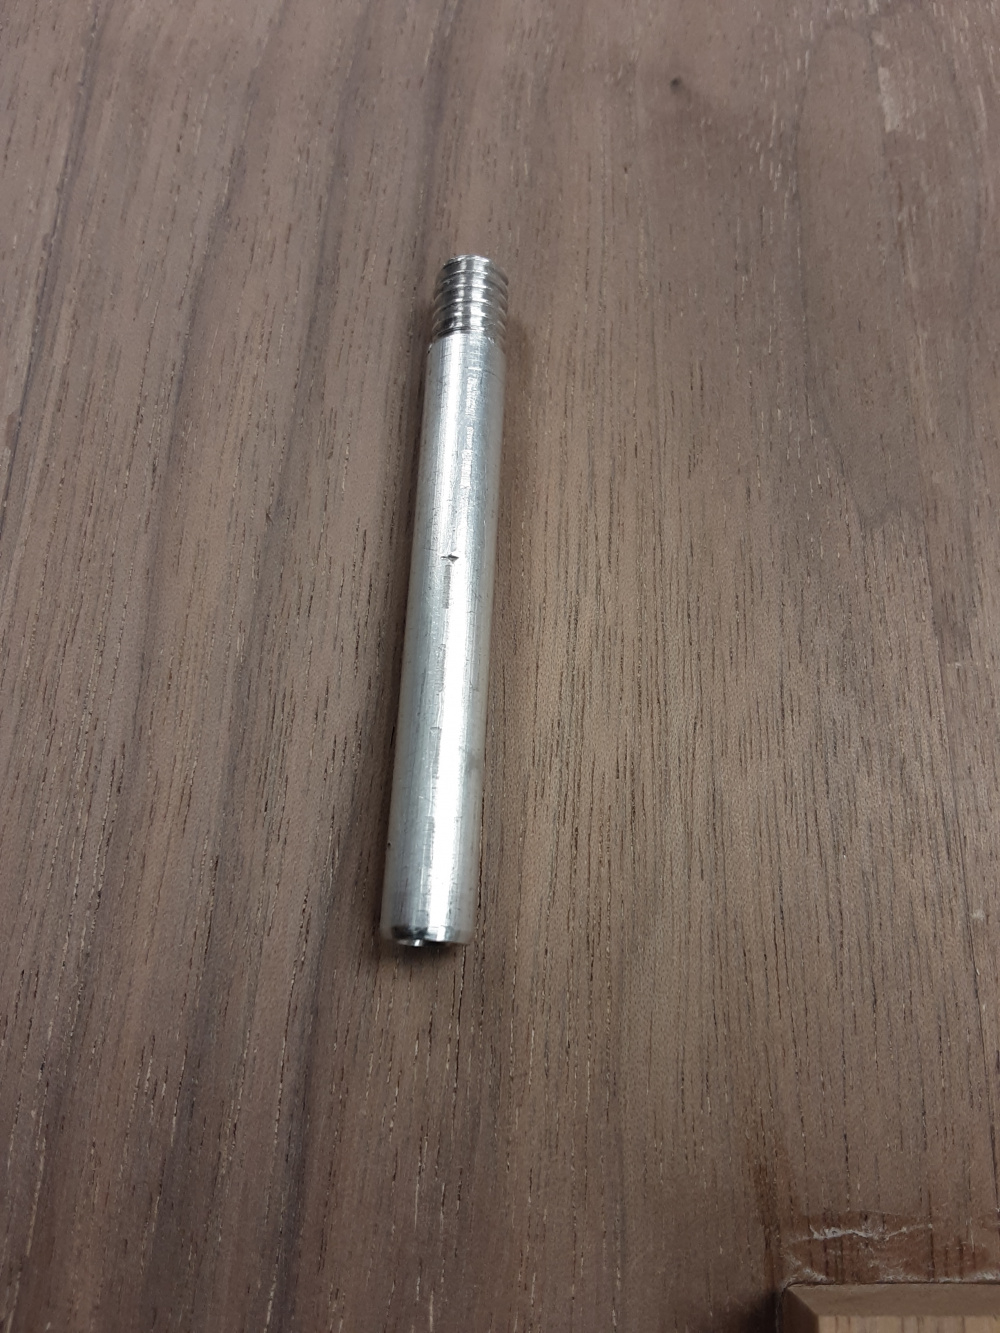
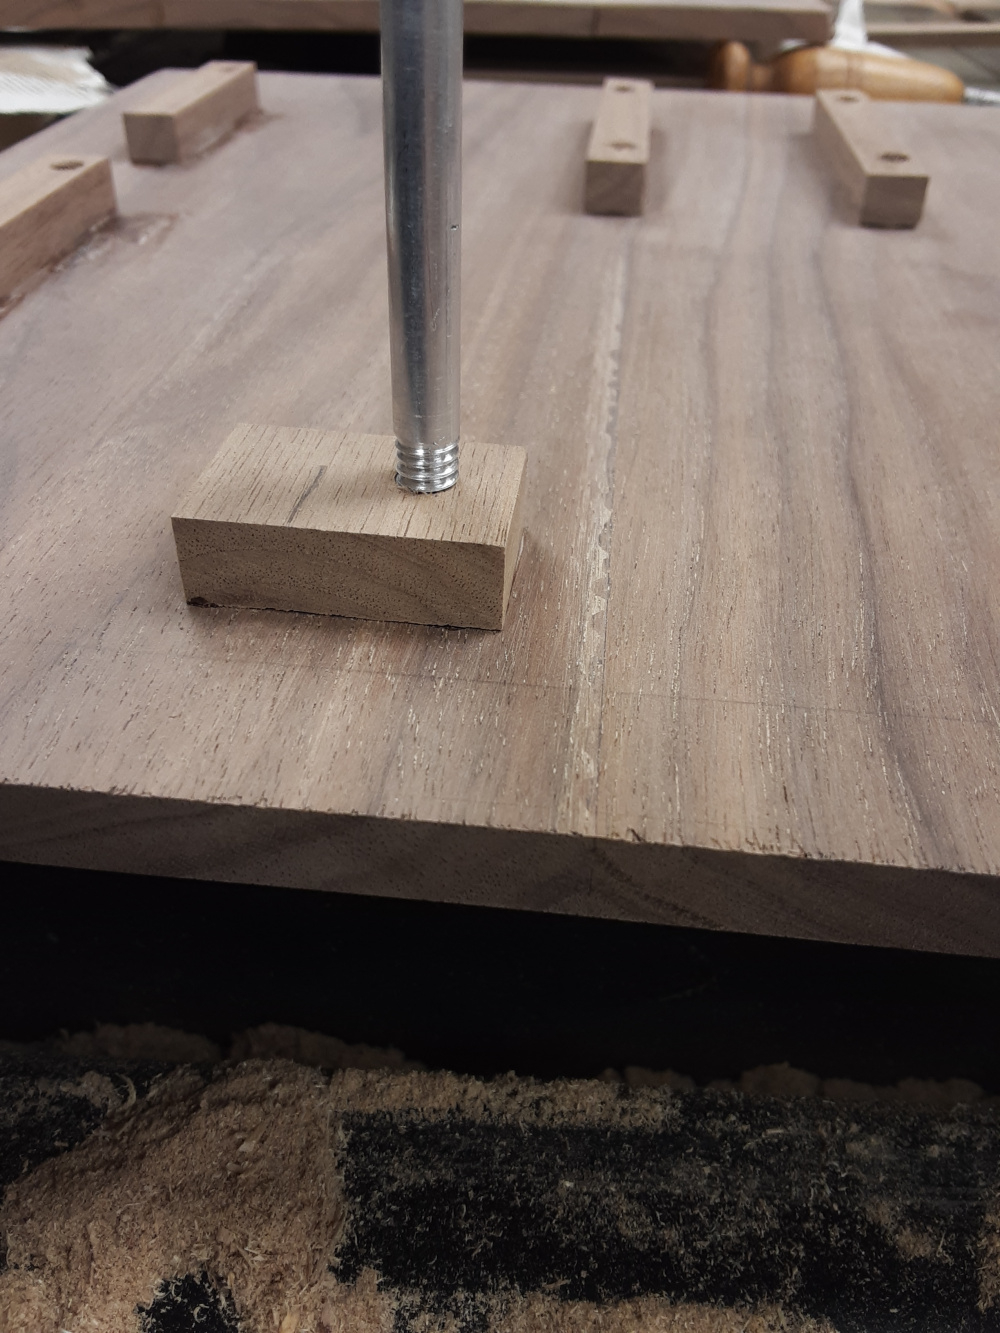
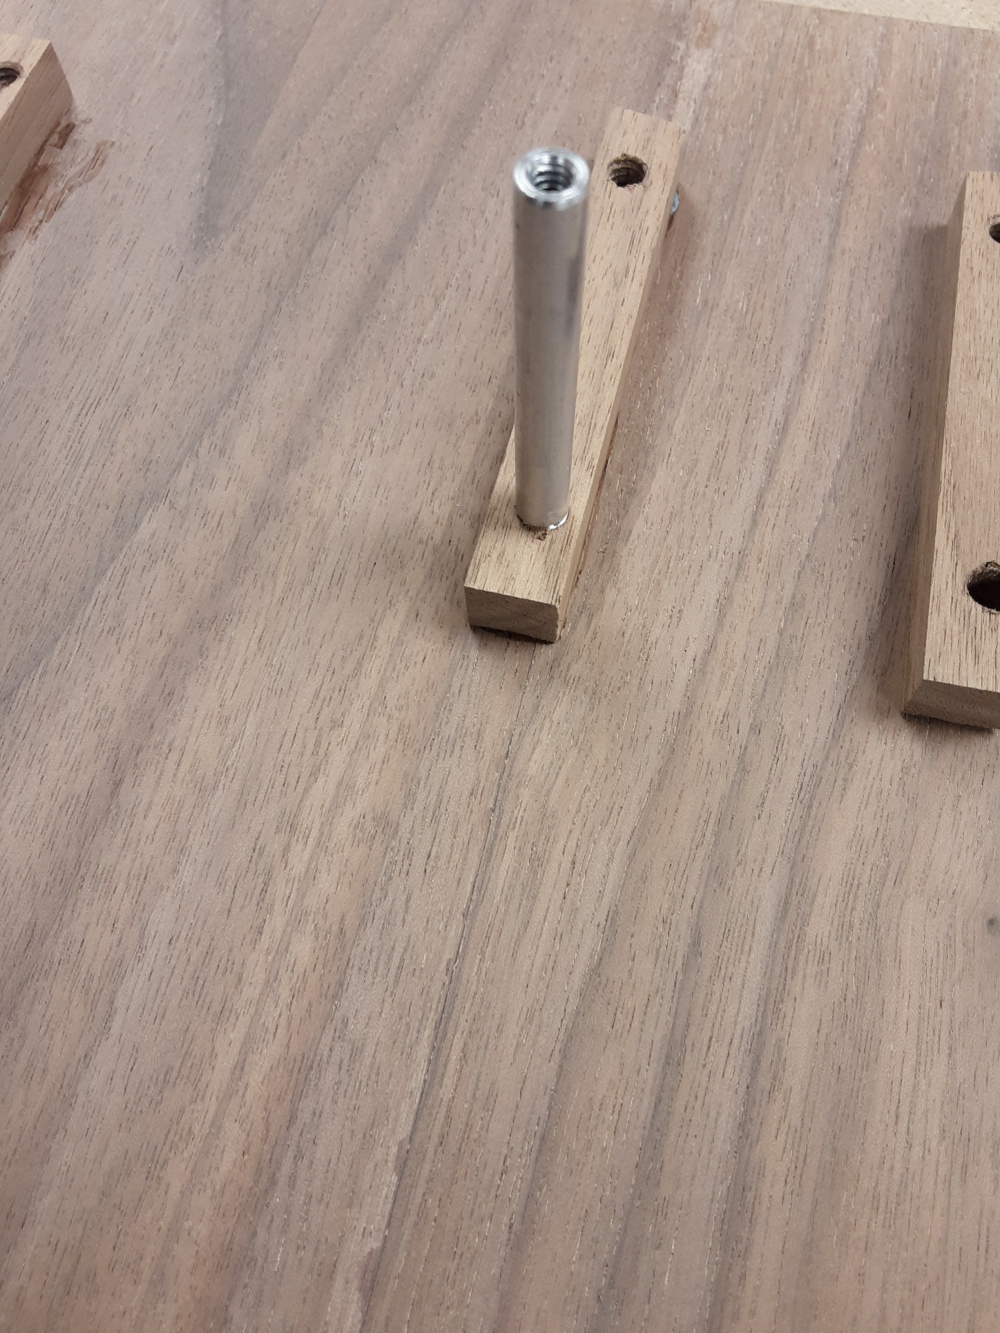
8 - 32 machine screw. I then drilled and tapped the cleats to accept the 1/4 - 20 threads of the posts and then screwed the posts in with a dab of epoxy.
Great solution to that problem!
Great solution, but how did you get your posts and holes on the bottom panel to line up? Cuz, you know, I've had that problem in a similar panel design.
It was actually super easy to do. I just marked out where I wanted the holes on the bottom and drilled them first with an 1/8" bit. I then assembled the top, center and bottom and inserted a 1/8" brad point through the holes that I had already drilled and used the point to make a mark on the top where the posts would go. Because of the cleats everything stays aligned in the process.
That is kool!
I should mention that I used a bottoming tap on the wooden cleat, so that it was threaded all the way down.
This is the little amp and Bluetooth board.
I also dig the divided port feature. With that long of a port, no audible resonance?
I haven't taken any measurements yet, but I haven't noticed anything standing out sound wise. I also haven't spent much time with it yet, so at this point I can't give a good answer.
You should buy a bag of wire ties")
I literally buy the 1000pc bags.
I used that little amp on my Goosebump/MM 2.1 desktop build. It's pretty solid.
InDIYana Event Website
I ran out of the, how did JR put it "cryo, virgin, mouse fart piss" treated variety, and just couldn't bring myself to use ordinary wire ties and sacrifice the overall sound quality.")
I'm telling ya- the Wombat urine from Australia works wonders. Just ask Thanh...")
InDIYana Event Website
I just knew there had to be a legit reason why a "detail" guy like yourself, especially an electrician, would leave the wiring looking all up and crazy like that
Honestly it's hard complain about a $15 board, but I have said it before, I wish that they would give me a better product and just charge more. The amp is fine, but the screw terminals are crap, they have a slot opening for the wire instead of a square so even using 16ga wire was a tight squeeze, and I know it's a 15watt amp, and yes I could have used smaller wire, but how many of us have smaller 2 conductor on the shelf. It also needs a power switch or at least a spot on the board to add a switch or better yet a switched pot like I used. Finally an adjustable crossover point would be nice, even if it meant just having pads on the board for soldering resistors, but then a gain the traces on this board are super thin, so care who have to be taken with the soldering iron.
In the end, yes it's super cheap, but PE now has a 4x30w board with dsp for $70 that would most likely be my choice for an application such as this.
I always have a legit excuse....errr, um, REASON.
The reason I went bandpass is that I got the lower acoustical rolloff F3. The 150Hz was too high.
FWIW, there are 2 versions of this amp, and I'm not certain mine had slots vs squares. One was a buyout, one is regular stock.
InDIYana Event Website
I have two and they are the same, but like I said it's so cheap that it's almost free. I just believe that the new dsp boards have a ton more to offer.
This is the port near field, no resonance issues even with the long ports.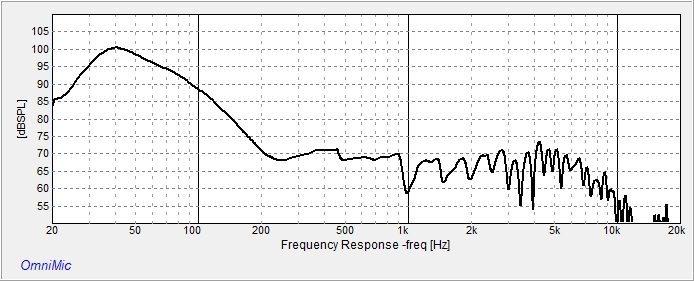
That came out nice! It's exciting to see people using actual real wood instead of the cardboard that I usually use. I know what you mean about the amp... but it was kind of cutting edge for the price when it came out all those years ago! It's probably perfect for something like the Cinema Tablet since all the drivers are so close together.
Just for some retro fun in case anyone is interested, here are a few threads on Tech Talk on one of the first uses of this board:
https://techtalk.parts-express.com/forum/tech-talk-forum/65944-micro-sized-subwoofer-plate-amp-idea?246507-Micro-Sized-Subwoofer-Plate-Amp-Idea=
https://techtalk.parts-express.com/forum/tech-talk-forum/69294-micro-b-2-1-plate-amp-writeup-finally
I used it in a 2.1 mini-plate amp that I called the Micro-B.
TomZ
**ZARBO AUDIO ** https://www.youtube.com/channel/UCEZUyvobRaFQSTl6NdOwgxQ