@rjj45 said:
I have used this method several times for non-circular drivers. Of course, sometimes more successfully than others...
Now I think I see how it can be simplified...
Thanks for sharing. Looks like this method has one less step and less waste than the Javad technique.
@tajanes said:
a small chisel, a sharp scoring knife and a dremel for the 'screw wings' section of the driver (after round routing) is moving up the chain of options...
Sorry for hijacking your thread with all the calculation confusion. Going back to your felt idea, perhaps you could simply cover the entire baffle surface with 1/4" felt and then surface mount the drivers onto the felt. The felt would also serve as the driver gasket. When you tighen the driver screws, the felt would be compressed under the flange and this would automatically flush mount the drivers to the plane of the felt.
EDIT: Cut simple driver holes, then glue felt onto baffle, then mount drivers on top of the felt.
Have a study of Dave Ralph's website regarding the effective and ineffective use of felt for diffraction. I am currently building some 3 ways (hope to have ready to demo at InDIYana) that will have no baffle round overs, surface mounted drivers, and snap on grills. I will be deploying some 1/2" thick F13 felt blocks to hopefully "minimize" diffraction issues.
Have a study of Dave Ralph's website regarding the effective and ineffective use of felt for diffraction. I am currently building some 3 ways (hope to have ready to demo at InDIYana) that will have no baffle round overs, surface mounted drivers, and snap on grills. I will be deploying some 1/2" thick F13 felt blocks to hopefully "minimize" diffraction issues.
I remember reading this on Dave's site a few years ago. Will go back and read it again. Also, in the 7th edition of the LDC, Vance D. conducted a fairly in depth study on the sonic effects of applying felt to baffles and had many positive things to say about it as well. Look forward to hearing these in Indy.
Fortunately, since the odd shape I’m dealing with is basically wings with tangent lines to the circle one way is to use a chisel for these wings- especially with baltic birch as its easier to cut down to a certain layer (i.e. ¼ in ~ 4 layers, etc). I practiced on some scrap- fairly clean.
Then it came to me that I only really need to do a pattern for a single wing. No need for multiple pattern boards and calculations… just run the router for the circular depression and then, once a wing pattern is made just line it up and clamp it to the baffle, match the depth and with a router flush bit and bingo. I’ll follow up with my progress as I can make time.
I’m beyond that point apparently (age) when measuring twice and cutting once doesn’t always do it.
I spent so much time setting up for the odd shaped coax that when I went to flush mount the woofer I ended up ¼ too large. Fortunately the depth was ¼ inch, and I had planned to paint the baffles black (aka ATC speakers, or cover in black felt) so I just cut a couple of circles out of ¼ ply, glued them in overnight and re-routed. I had pre-tested the cuts for the coax’s, but when I got to the woofer I was apparently thinking oh these are easy…
I've pretty much given up on measure 2 4 times and cut once, as I still mess it up. I just build in the extra expense for the extra wood I have to buy to fix my mistakes.
RSS210! Isn't that quite a large sensitivity difference?
When I did the route for my B&C in the Tandems, I made a template set on 4 points that I could rotate the template and do the next 'side' of the pincushion. Only one of the trials really fit the curve, so I just used it 4 times. Not the easiest thing to route for...
the beyma coax has its own passive Xover (I made with lots of great input here), and I use a miniDSP as (active) Xover btw it and the woofer (8in version) - biamped, so can adjust for sensitivity diffs
You did a really nice job of transitioning from the circular to winged recess areas. Almost CNC quality, to my eyes. Also, nice save on the 1/4" woofer boo-boo.
4thtry
I’ve been following your Retro Speako, impressive woodworking.
If I may ask about finishing suggestions- I’m going to be using a Minwax oil based stain ‘Aged Barrel’ (which apparently can’t be sold in CO per the paint person at ACE... but it can be delivered from out of state- funny I can buy Federally illegal substances in CO but not this stain? anyway) over a pre-stain on baltic birch. I’d like to end up with a flat finish coat / treatment. Suggestions for what to apply over an oil stain? Thx
Pick a matte clear that you feel comfortable applying. I would use a 2k urethane product, but that's just me. I would recommend something with a catalyst / hardener.
These pieces are currently just set approximately in place to see how things are fitting. The top, bottom and baffle are ¾ in. baltic birch ply. In the first pic the front baffle has ½ in. painted black the last ¼ bare as it will be glued into the box (i.e. the baffle will sit out ½ inch and I’ll be making a grill that snugs around the baffle that will be ¾ inch depth to provide room for the woofer’s excursion, when it is on). The sides will be ½ in ply (¾ in front corner piece for setting the baffle), but braced side-to-side by the coax enclosure as well as an additional cross piece. The back will be screwed in place for access. And, bottom mounted passive...
ugly_woofer
Pick a matte clear that you feel comfortable applying. I would use a 2k urethane product, but that's just me. I would recommend something with a catalyst / hardener.
Your finished pieces I've seen at the shows are flawless. But I don't have a spray gun, so does this product brush on easily, or should I be looking for maybe a water based flat poly or ?
On my Retro's, I tested three oil based products: 1) Craig's 1:1:1 boiled linseed oil, poly, mineral spirits mix, 2) General Finishes oil based semi-gloss Arm-R-Seal, and 3) Watco Danish oil - natural finish. After lots of testing, I decided to go with Arm-R-Seal because it dried faster and seemed more consistent on my test samples. The BLO mix darkened the wood more, and it some cases, on my test samples, the extra darkness became a little blotchy looking. The Arm-R-Seal and Watco Danish oil were more consistent from sample to sample (Mahogany and Curly Maple), but the Watco oil took forever to dry. Even after 3 to 4 weeks, the Watco still felt a little oily to the touch. The Arm-R-Seal was dry after 24 hours and could be re-applied to obtain a darker looking finish.
So, I applied 4 coats of semi-gloss, oil based Arm-R-Seal to both cabinets and stands, waiting 24 hours and lightly sanding between coats. Came out really nice. Each additional coat hardened the surface just a little bit more. No blochy areas. It seems to me that the first coat of Arm-R-Seal acted somewhat like a sanding sealer. Each additional coat darkened the wood just a little bit more.
So, getting to your question of what to apply over oil, my plan is to wait until it gets warmer (60F or so with low humidity), set the cabinets on saw horses outside, lightly sand them down with 320 grit (foam pad), and then HVLP spray them with several coats of semi-gloss clear lacquer. I'll do 3 coats on the first day of spraying, sand them down again, and then do another 5 or 6 coats on the 2nd day. All done outside with a good cross breeze and wearing a respirator. I've done this before on other speakers and it works well, as long as you allow the oil enough time to dry before hitting the wood with lacquer. I will be at about 2 months of dry time, so I should be OK. Otherwise, if you do not wait long enough, the lacquer will mix with the wet oil and will not harden (becomes kind of gumy).
Sorry for the long winded response. Hope this helps.
These pieces are currently just set approximately in place to see how things are fitting. The top, bottom and baffle are ¾ in. baltic birch ply. In the first pic the front baffle has ½ in. painted black the last ¼ bare as it will be glued into the box (i.e. the baffle will sit out ½ inch and I’ll be making a grill that snugs around the baffle that will be ¾ inch depth to provide room for the woofer’s excursion, when it is on). The sides will be ½ in ply (¾ in front corner piece for setting the baffle), but braced side-to-side by the coax enclosure as well as an additional cross piece. The back will be screwed in place for access. And, bottom mounted passive...
I spy a new Bronco in the background 😉 What model did you get?
Black Diamond, twin turbo 2.7ltr. I ordered it fairly early on ~mid Jan '21, got it delivered first week of Dec.
BDs had the largest set of tires w/o going full Sasquatch and a bit more undercarriage protection. I passed on the stabilizer bar disconnect: off road probably, MOAB nope.
Eastwood sells a urethane 2k matte clear in an aerosol, and while it's not cheap, it will be far more durable than the alternatives for non hvlp spraying.
After all the discussion here, I gave in and went with the "wasteful" template method. The scrap material used here is chipboard from some low cost desk, with lumber prices as they are, old furniture at yard sales may be a good deal just for the lumber
Biggest problem here is using a 3/4" bushing with a 1/4" router bit, which leaves absolutely zero clearance. It wasn't mentioned in the reddit thread, but you should really give the template a good sanding or use a rasp lightly to open it up just enough to create some clearance for the driver. It did work but man is it ever a tight fit, I'll be doing some delicate sanding / scraping to the cutout to try and get a better fit, otherwise it'll never be able to get removed once its in a cabinet.
I always make another separate finished template from a scrap of wood. That way I can check the clearance of the driver by passing it through the hole in the template and not worry about cutting a bad rebate on the finished cabinet. If the driver is tight in the template a little hand sanding will make it right. I make the cutout for the driver in the baffle and fasten the driver to it. I then place the finished template over the driver and hold it in place with double stick tape or clamps. I remove the driver and then cut the rebate using a top bearing router bit. This is especially handy when you have multiples of a driver to recess.
I was about to suggest using a layer or two of masking tape, because I'm pretty sure Javad did that in his Pretty Persuasions thread. But figured I'd check the first page given 6thplanet's post above. @6thplanet - that was very prescient of you!
Having cut rectangles before, I would say it's way less work provided you have a router bit equal size of the corner radius. You can either just cut straight lines using just a straight edge to guide the router, or run a board through the table saw and glue together a frame to use with a bushing for the template, which is more easily done then carefully routing around the part you've bolted down, then cutting again with a bushing to create a template. Alternatively, you could make the waveguide print the same width as your baffle and skip a few steps that way using the edge of the print as the baffle edge on 3 sides.
Here's the super complex template I made for an AMT3-4, very simple.
Comments
Thanks for sharing. Looks like this method has one less step and less waste than the Javad technique.
Have a study of Dave Ralph's website regarding the effective and ineffective use of felt for diffraction. I am currently building some 3 ways (hope to have ready to demo at InDIYana) that will have no baffle round overs, surface mounted drivers, and snap on grills. I will be deploying some 1/2" thick F13 felt blocks to hopefully "minimize" diffraction issues.
I remember reading this on Dave's site a few years ago. Will go back and read it again. Also, in the 7th edition of the LDC, Vance D. conducted a fairly in depth study on the sonic effects of applying felt to baffles and had many positive things to say about it as well. Look forward to hearing these in Indy.
Might still be cheaper than the lumber:
https://www.amazon.ca/gp/product/B082VRR5ZL/ref=ox_sc_act_title_1?smid=ASV3IVVEECBWP&psc=1
There are multiple ways to do this.
Fortunately, since the odd shape I’m dealing with is basically wings with tangent lines to the circle one way is to use a chisel for these wings- especially with baltic birch as its easier to cut down to a certain layer (i.e. ¼ in ~ 4 layers, etc). I practiced on some scrap- fairly clean.
Then it came to me that I only really need to do a pattern for a single wing. No need for multiple pattern boards and calculations… just run the router for the circular depression and then, once a wing pattern is made just line it up and clamp it to the baffle, match the depth and with a router flush bit and bingo. I’ll follow up with my progress as I can make time.
Again, thanks for all the input.
Really nice, tight fit! Looks just as good as a template alignment!")
I’m beyond that point apparently (age) when measuring twice and cutting once doesn’t always do it.
I spent so much time setting up for the odd shaped coax that when I went to flush mount the woofer I ended up ¼ too large. Fortunately the depth was ¼ inch, and I had planned to paint the baffles black (aka ATC speakers, or cover in black felt) so I just cut a couple of circles out of ¼ ply, glued them in overnight and re-routed. I had pre-tested the cuts for the coax’s, but when I got to the woofer I was apparently thinking oh these are easy…
I've pretty much given up on measure 2 4 times and cut once, as I still mess it up. I just build in the extra expense for the extra wood I have to buy to fix my mistakes.
RSS210! Isn't that quite a large sensitivity difference?
When I did the route for my B&C in the Tandems, I made a template set on 4 points that I could rotate the template and do the next 'side' of the pincushion. Only one of the trials really fit the curve, so I just used it 4 times. Not the easiest thing to route for...
InDIYana Event Website
the beyma coax has its own passive Xover (I made with lots of great input here), and I use a miniDSP as (active) Xover btw it and the woofer (8in version) - biamped, so can adjust for sensitivity diffs
You did a really nice job of transitioning from the circular to winged recess areas. Almost CNC quality, to my eyes. Also, nice save on the 1/4" woofer boo-boo.
4thtry
I’ve been following your Retro Speako, impressive woodworking.
If I may ask about finishing suggestions- I’m going to be using a Minwax oil based stain ‘Aged Barrel’ (which apparently can’t be sold in CO per the paint person at ACE... but it can be delivered from out of state- funny I can buy Federally illegal substances in CO but not this stain? anyway) over a pre-stain on baltic birch. I’d like to end up with a flat finish coat / treatment. Suggestions for what to apply over an oil stain? Thx
Pick a matte clear that you feel comfortable applying. I would use a 2k urethane product, but that's just me. I would recommend something with a catalyst / hardener.
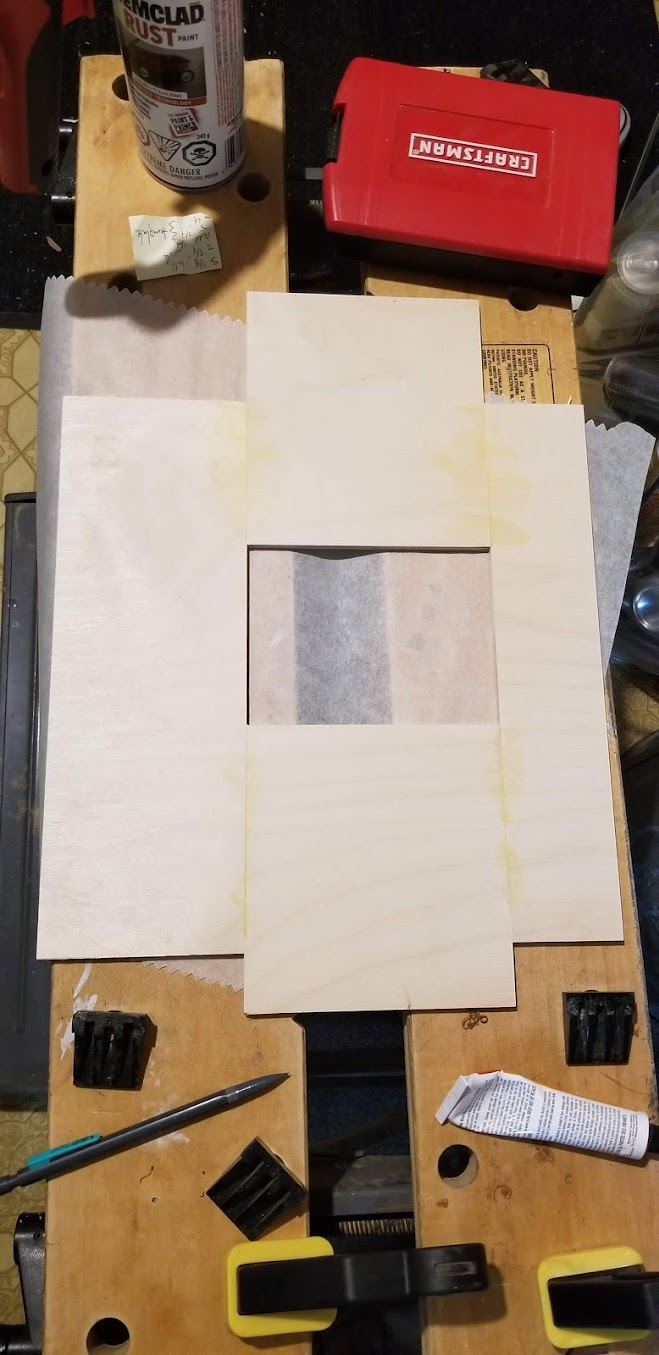
A bit of progress on the build.
These pieces are currently just set approximately in place to see how things are fitting. The top, bottom and baffle are ¾ in. baltic birch ply. In the first pic the front baffle has ½ in. painted black the last ¼ bare as it will be glued into the box (i.e. the baffle will sit out ½ inch and I’ll be making a grill that snugs around the baffle that will be ¾ inch depth to provide room for the woofer’s excursion, when it is on). The sides will be ½ in ply (¾ in front corner piece for setting the baffle), but braced side-to-side by the coax enclosure as well as an additional cross piece. The back will be screwed in place for access. And, bottom mounted passive...
ugly_woofer
Pick a matte clear that you feel comfortable applying. I would use a 2k urethane product, but that's just me. I would recommend something with a catalyst / hardener.
Your finished pieces I've seen at the shows are flawless. But I don't have a spray gun, so does this product brush on easily, or should I be looking for maybe a water based flat poly or ?
On my Retro's, I tested three oil based products: 1) Craig's 1:1:1 boiled linseed oil, poly, mineral spirits mix, 2) General Finishes oil based semi-gloss Arm-R-Seal, and 3) Watco Danish oil - natural finish. After lots of testing, I decided to go with Arm-R-Seal because it dried faster and seemed more consistent on my test samples. The BLO mix darkened the wood more, and it some cases, on my test samples, the extra darkness became a little blotchy looking. The Arm-R-Seal and Watco Danish oil were more consistent from sample to sample (Mahogany and Curly Maple), but the Watco oil took forever to dry. Even after 3 to 4 weeks, the Watco still felt a little oily to the touch. The Arm-R-Seal was dry after 24 hours and could be re-applied to obtain a darker looking finish.
So, I applied 4 coats of semi-gloss, oil based Arm-R-Seal to both cabinets and stands, waiting 24 hours and lightly sanding between coats. Came out really nice. Each additional coat hardened the surface just a little bit more. No blochy areas. It seems to me that the first coat of Arm-R-Seal acted somewhat like a sanding sealer. Each additional coat darkened the wood just a little bit more.
So, getting to your question of what to apply over oil, my plan is to wait until it gets warmer (60F or so with low humidity), set the cabinets on saw horses outside, lightly sand them down with 320 grit (foam pad), and then HVLP spray them with several coats of semi-gloss clear lacquer. I'll do 3 coats on the first day of spraying, sand them down again, and then do another 5 or 6 coats on the 2nd day. All done outside with a good cross breeze and wearing a respirator. I've done this before on other speakers and it works well, as long as you allow the oil enough time to dry before hitting the wood with lacquer. I will be at about 2 months of dry time, so I should be OK. Otherwise, if you do not wait long enough, the lacquer will mix with the wet oil and will not harden (becomes kind of gumy).
Sorry for the long winded response. Hope this helps.
I spy a new Bronco in the background 😉 What model did you get?
Black Diamond, twin turbo 2.7ltr. I ordered it fairly early on ~mid Jan '21, got it delivered first week of Dec.
BDs had the largest set of tires w/o going full Sasquatch and a bit more undercarriage protection. I passed on the stabilizer bar disconnect: off road probably, MOAB nope.
Eastwood sells a urethane 2k matte clear in an aerosol, and while it's not cheap, it will be far more durable than the alternatives for non hvlp spraying.
never enough clamps -
After all the discussion here, I gave in and went with the "wasteful" template method. The scrap material used here is chipboard from some low cost desk, with lumber prices as they are, old furniture at yard sales may be a good deal just for the lumber")
The process followed is the same that was previously posted in this thread:
https://www.reddit.com/r/diyaudio/comments/4ysmms/tutorial_how_to_flushmount_irregular_shaped/
Biggest problem here is using a 3/4" bushing with a 1/4" router bit, which leaves absolutely zero clearance. It wasn't mentioned in the reddit thread, but you should really give the template a good sanding or use a rasp lightly to open it up just enough to create some clearance for the driver. It did work but man is it ever a tight fit, I'll be doing some delicate sanding / scraping to the cutout to try and get a better fit, otherwise it'll never be able to get removed once its in a cabinet.
I always make another separate finished template from a scrap of wood. That way I can check the clearance of the driver by passing it through the hole in the template and not worry about cutting a bad rebate on the finished cabinet. If the driver is tight in the template a little hand sanding will make it right. I make the cutout for the driver in the baffle and fasten the driver to it. I then place the finished template over the driver and hold it in place with double stick tape or clamps. I remove the driver and then cut the rebate using a top bearing router bit. This is especially handy when you have multiples of a driver to recess.
Ron
dcibel, see my post on the first page.
Hindsight...") Not to worry, I'll make it work.
Not to worry, I'll make it work.
I was about to suggest using a layer or two of masking tape, because I'm pretty sure Javad did that in his Pretty Persuasions thread. But figured I'd check the first page given 6thplanet's post above. @6thplanet - that was very prescient of you!
prescient, had to look that one up.🤔
Also the layers vary with the thickness of tape ya have on hand.
I cheated. I had a friend change the STEP to make the waveguide rectangular so I don't have to do hard things on the front panel.
IDK, seems the same amount of work to me
Having cut rectangles before, I would say it's way less work provided you have a router bit equal size of the corner radius. You can either just cut straight lines using just a straight edge to guide the router, or run a board through the table saw and glue together a frame to use with a bushing for the template, which is more easily done then carefully routing around the part you've bolted down, then cutting again with a bushing to create a template. Alternatively, you could make the waveguide print the same width as your baffle and skip a few steps that way using the edge of the print as the baffle edge on 3 sides.
Here's the super complex template I made for an AMT3-4, very simple.