Site Links
Howdy, Stranger!
It looks like you're new here. If you want to get involved, click one of these buttons!
Quick Links
Categories
In this Discussion
Who's Online (0)
Precise driver rebates

I'm not the best woodworker and maybe the information below is obvious, but there have been a few comments on routing driver rebates recently so I thought I'd post my process.
Note, a very accurate recess will leave a gap between the driver frame and recess of less than 1/64" so even very tiny errors are going to make a difference. If I end up completely off-center I would have a 1/32" gap on one side and no gap on the other. While 1/32" is small for most woodworking on the cabinet, it will be obvious when it comes to an off-centered or too large gap.
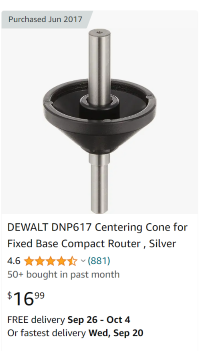
1) My Jasper Jig has a centering disc to ensure the router bit is centered. If I was using a DIY jig I would align using a router alignment cone.
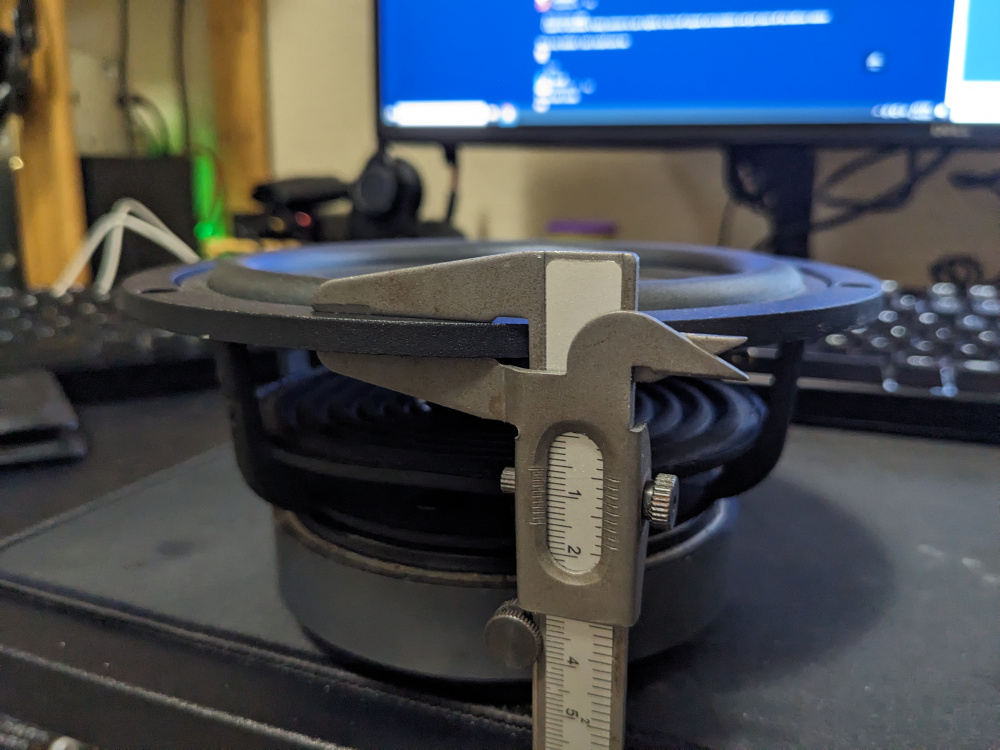
2) Measure driver diameter with digital calipers. Manufacturer specs are almost always accurate, which means I will only get almost always accurate driver rebates.
3) I have a Jasper Jig with 1/16" diameter increments using a 1/4" router bit. Adding a 9/32" straight bit to my tool box allows me to route circles in 1/32" diameter increments. I will route the driver outside diameter to the nearest 1/32" greater than my caliper measurements in (2). Given my accurate diameter from Step 2, this means I have 1/64" gap at the most.
4) Drill the hole for the center pin with a drill press. If I didn't have a drill press, I'd get one of those "portable" drill presses. I suck at drilling a straight hole 90 degrees from the plane of the baffle, and routing a circle with a center pin inserted at an angle will distort my circle ellipse.
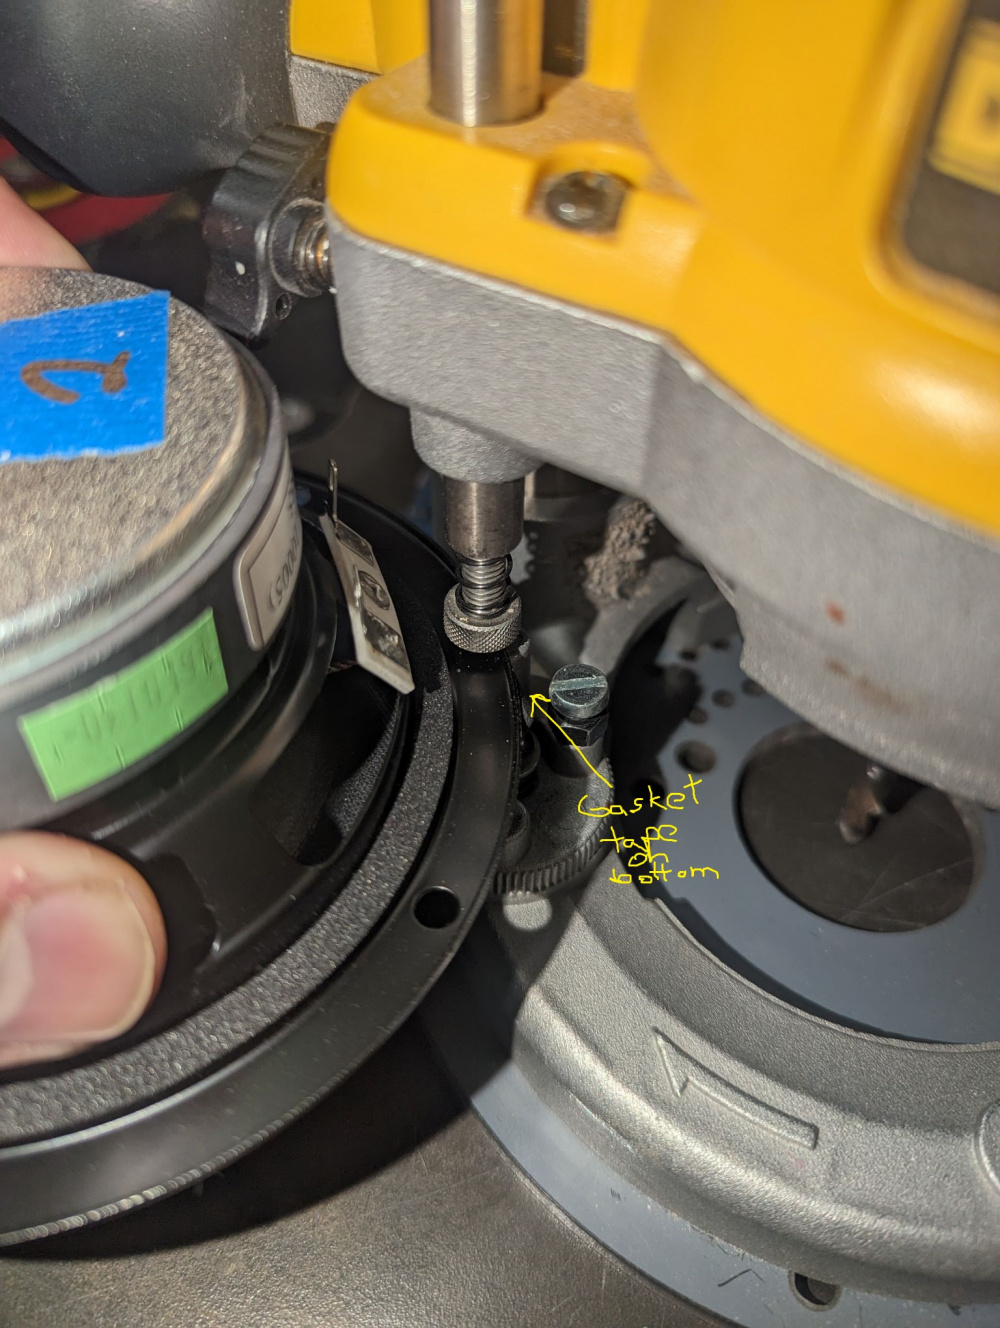
5) PRECISE DEPTH: I use my actual driver with the actual gasket tape that I will use to set my router's depth stop. (I use thicker gasket tape on woofer than tweeter and the gasket tape I've got off Amazon is thicker than what I got from PE.) I stick the gasket tape on the FRONT of the driver. When I set my depth stop I press down hard to compress the gasket tape as much as possible, since it will be screwed down and compressed when actually installed. (If I put the gasket tape on the back of the drive I will get the correct dept also, but pushing down hard on the dept stop on the face of the driver WILL mar the driver. Sadly I discovered this unfortunate fact on a not-so-cheap tweeter.)
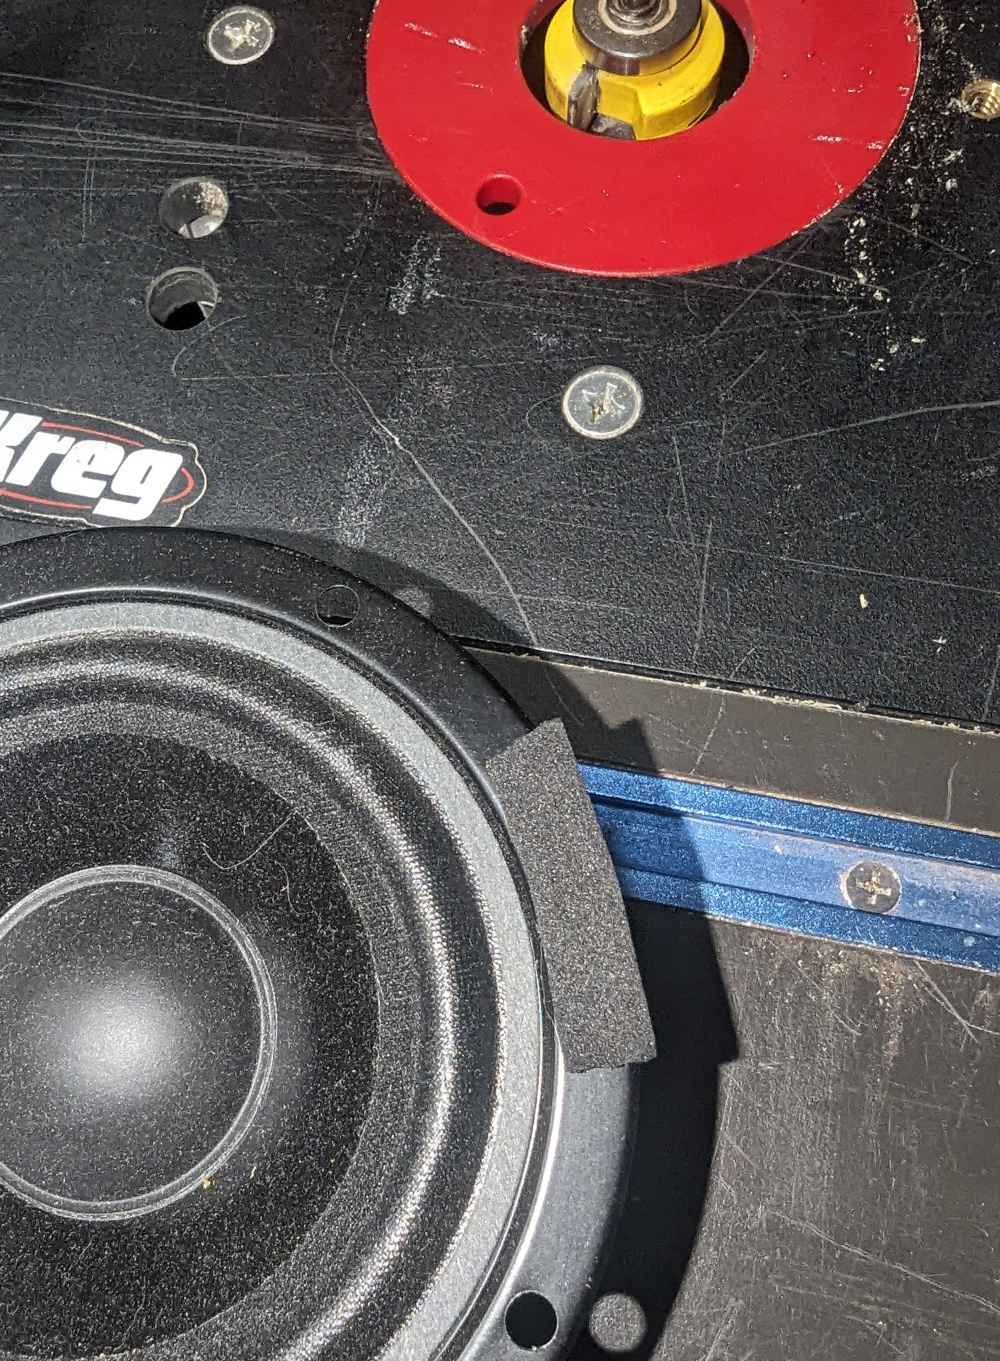
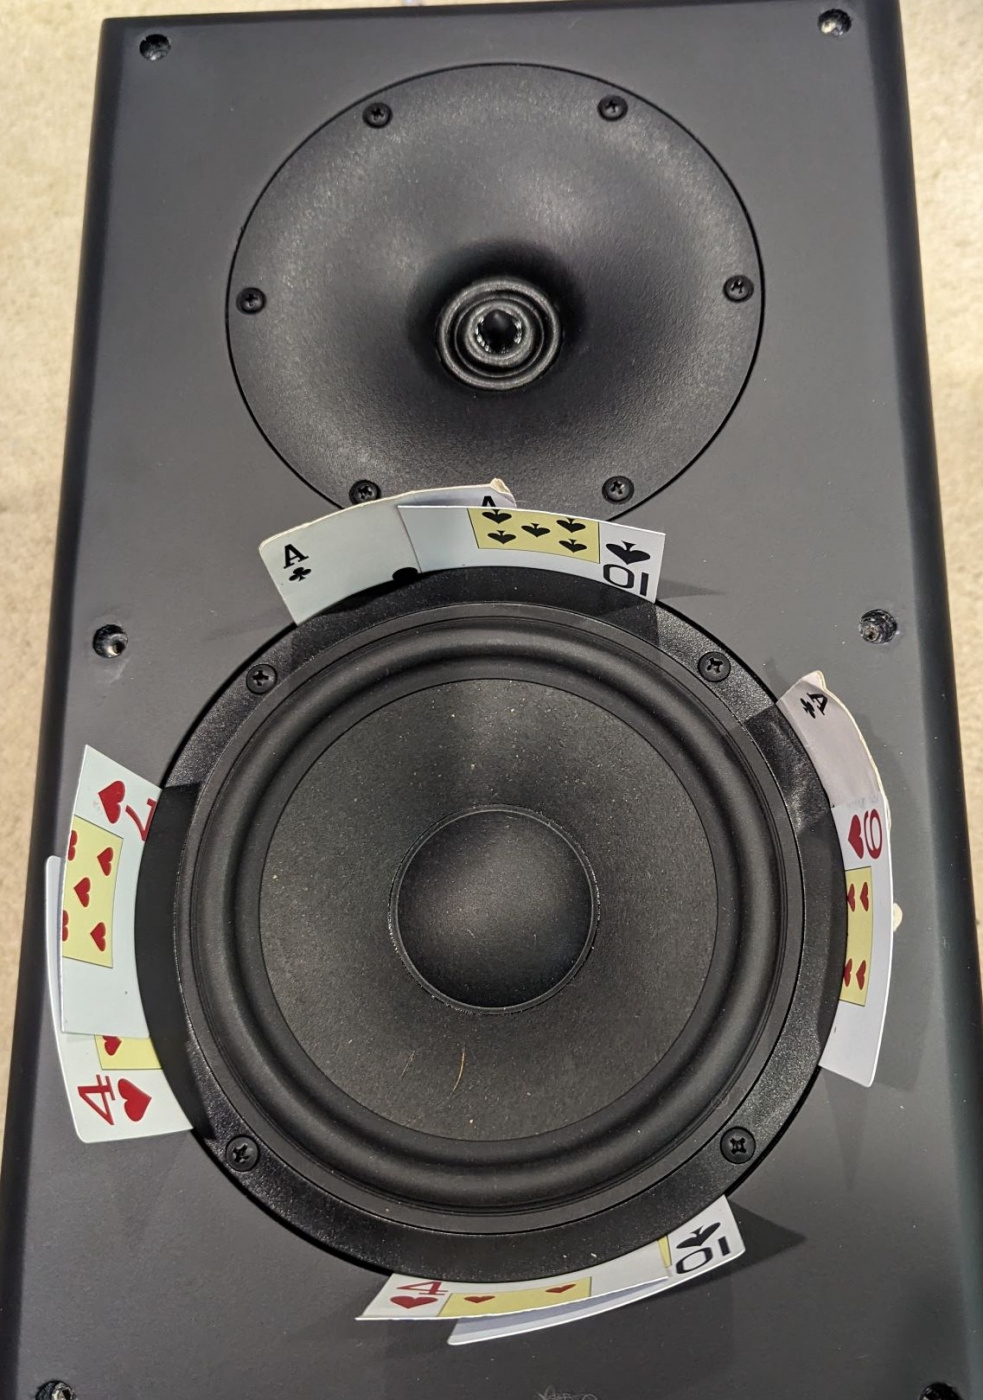
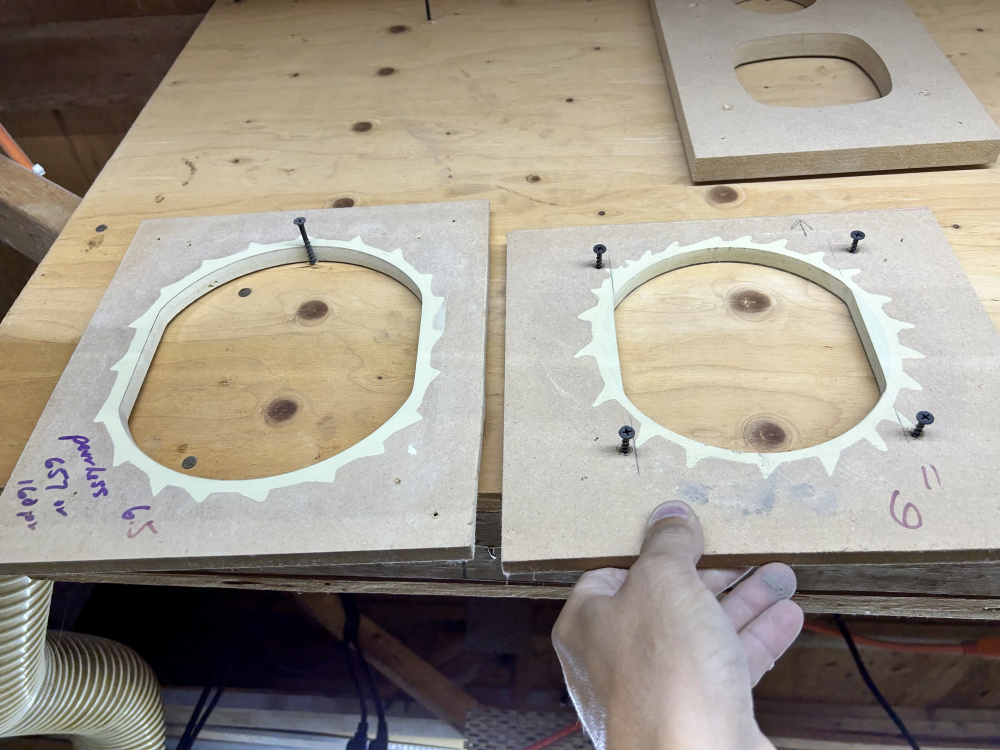
6) Center driver in the cutout when complete using some sort of even spacers. I learned the playing-cards trick from Keith Etheredge back when people actually posted build threads at PETT. Drill driver holes in baffle using a drill press (or portable drill press) to ensure speaker doesn't end up off-center due to slanted screws. (The woofer recess below probably could have been 1/32" diameter smaller, I could fit two playing cards in the gap on both sides of the driver, but the depth is spot-on. The waveguide cutout couldn't be more accurate with my tools, as I couldn't fit a single playing card in the gap on both sides. The cards are 0.011" thick.)


Comments
good use of the cards for spacing-thx
LOL, the cards are cut in half.")
Interestingly, I got into woodworking by making poker tables. I have really awesome custom chips, enough to run a 30 person tournament, and sadly haven't used them in 7 years. Playing poker is probably the only thing I like better than building speakers
I saw that afterwords- either way- I'll sit back and watch the game...
Thanks for the shop tips!
Dang... that looks an awful lot like work.
My useless 2 cents, I use calipers to set the depth
Once you have the depth, lock it and use the ID side to set the router stop.
Less opportunities to dent the cone.
Am I the only one that makes a test rebate on a piece of scrap?
I have a cnc and still sometimes do test panel first.
https://www.jfcomponents.com/
Good tip!!
What happened between your test hole and your real hole, JR?
OD was nuts on, depth was off because reasons. Most methods still require some skill at woodworking as evidenced by this thread and the derailment on my thread.
Sorry, man! Sharing our trials and errors helps everyone as evidenced by the content of the derailment.
Carry on, we are interested in your progress on this build
I have a 60 piece numbered drill bit set similar to this picture. Numbered drill sets use drill diameters in thousandths instead of fractions of inches.
I measure the thickness of the driver flange with a digital calipers and pick a drill bit to set the plunge stop with.
Ron
Look for "Brad Point Drill Bits" when doing woodworking, guys - those tapered drill bits are for metal working and will walk all over the place and ruin your groove. This is concerning drilling holes on marked out places - use a punch as well to mark and create a divot for the drill bit to center upon.
Ron's use of drill bits (above ^) is right on the money concerning setting the depth stop of a router plunge depth.
If you have or make a hole, spot, or divot, then normal bits are okay. There are times when the brad point bits are not what I need, but they do have their place. You can't enlarge a hole with brad points for example.
InDIYana Event Website
My high tech workbench consists of a sacrificial 3/4" particle board handy panel sitting on top of two saw horses. I use it to test rebate depth and diameter for almost all my driver holes. I also use other scrap, if available. When the handy panel gets beat up to the point where I can no longer see what I am doing, I flip it over and destroy the other side.")
^ Exactly - I also see people using foam insulation board as a backer/bench protector and I like that Idea as I have some available but it isn't cheap . . .
NO argument offered, Ben but I will submit the following concerning the differences in the two bit types:
Tapered bits are fine as you suggest in materials that are absent grain as long as there is a pilot hole or divot deep enough to allow them to do their job [and the bits are sharp, 'equally' on each tapered cutting surface]. Like drilling into MDF or in sheet metals - flat, smooth materials.
Even if you divot, pilot or punch some material like grainy oak, a tapered drill bit will grab adjacent-to-the-hole material that is softer than where the hole is supposed to go and cut towards the path of least resistance.
The best [most accurate] way to use tapered bits in wood is to step from a center punched mark through at least 2 incrementally larger bits so that the larger bit introduced is guided by the existing hole. Go slow as you press the drill in this case so it can cut straight with minimal force/load - otherwise it will walk in grainy wood.
Brad points need a divot the size of the brad point and cut cleanly because they are self piloting.
Concerning making a hole larger with a Brad Point bit? Just use one that fits the hole and wallow it with your hand drill motor then follow-up with the correct sized bit of your choice.
A dull drill bit is your worst enemy no matter what you are trying to drill accurately.
I have seen this too, but the problem with rigid foam insulation board is that you need to use at least 2" thick material. It costs much more and moves around too easily compared to particle board. It is very difficult to clamp it in place without damaging it. A 2'x4' x 3/4" particle board handy panel tends to stay put and can be clamped to the saw horses as necessary.
How I use to make rebates before the CNC. The old bondo mold.
https://www.jfcomponents.com/
Do you bag the driver and pour around it?
InDIYana Event Website
No router a cut out of the object.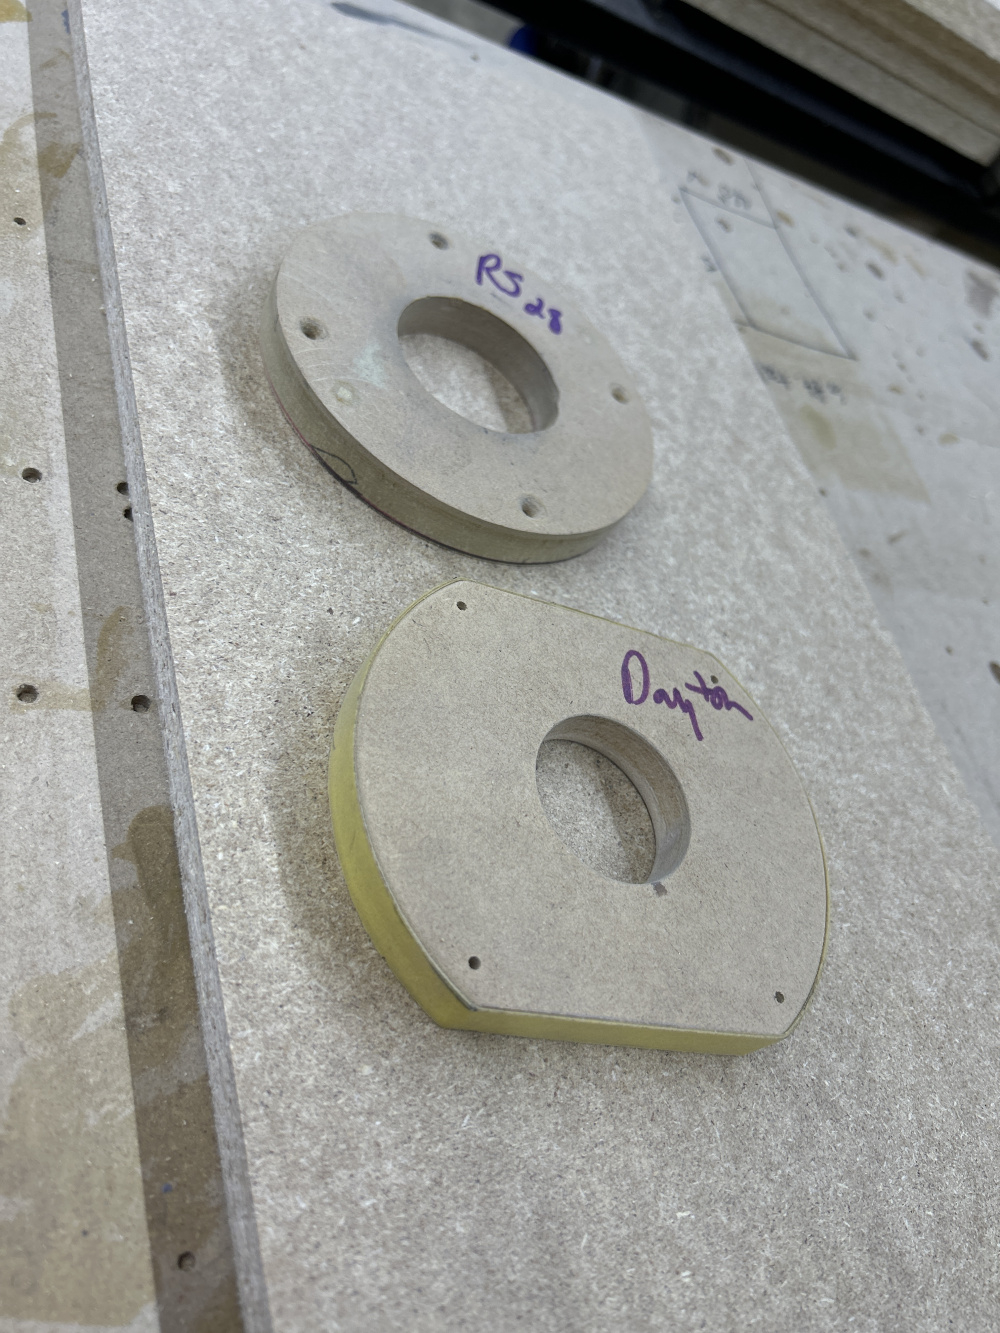
https://www.jfcomponents.com/
Could you offer router templates for popular rounded-square framed drivers like the SB10PGC21, SB12PFC25, SB13PFC25, SB16PFC25, SB20PFC30, Dynavox LY401F-M01, FaitalPro 5FE120, Peerless TC9FD18, etc. for say $10 ~ $15 a piece plus shipping at some point [during the winter] when other business is slower??
I see you have a rounded-square frame template in the background [2 images upthread] which is what sparked this query, Hifiside . . .
It’s possible but finding a file to copy without buying each driver is the difficult part.
https://www.jfcomponents.com/
A lot of those driver are just a square and a circle with correct measurements
https://www.jfcomponents.com/
How about a tracing on paper?
can you scan/import that ^ into your CNC/CAD program somehow?
I can just copy the drawings off the Internet and download them into my v-carve pro program, but the tracing option on the program is not very good
https://www.jfcomponents.com/
OK, thanks for entertaining me.