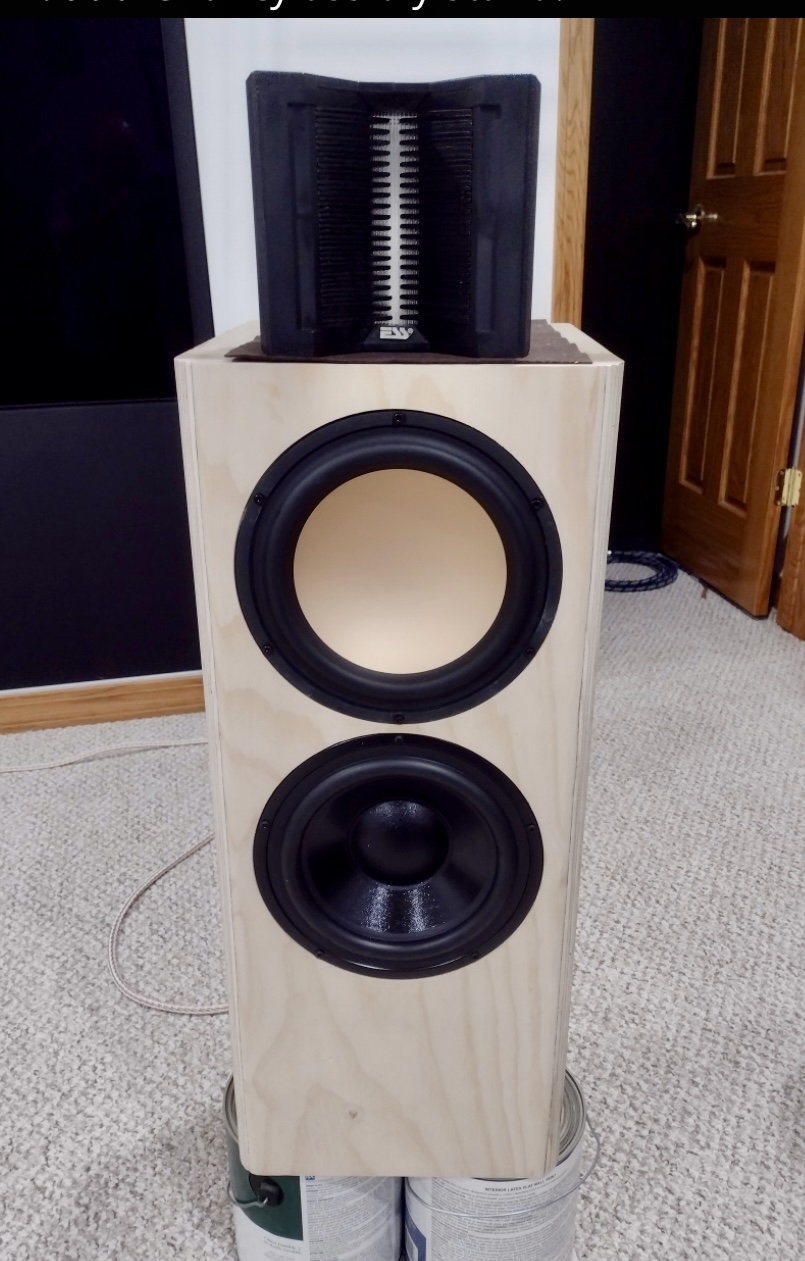
I was just about ready to start cutting wood for a couple of MTW boxes, and I see Nick's naked ESS sitting on top of his latest > which is just way too cool.
So I'm heading back towards a MW box with the beyma slot tweeter / waveguide on top (with a removable grill that will cover the three drivers- from the front anyway, as a waf compromise when not playing).
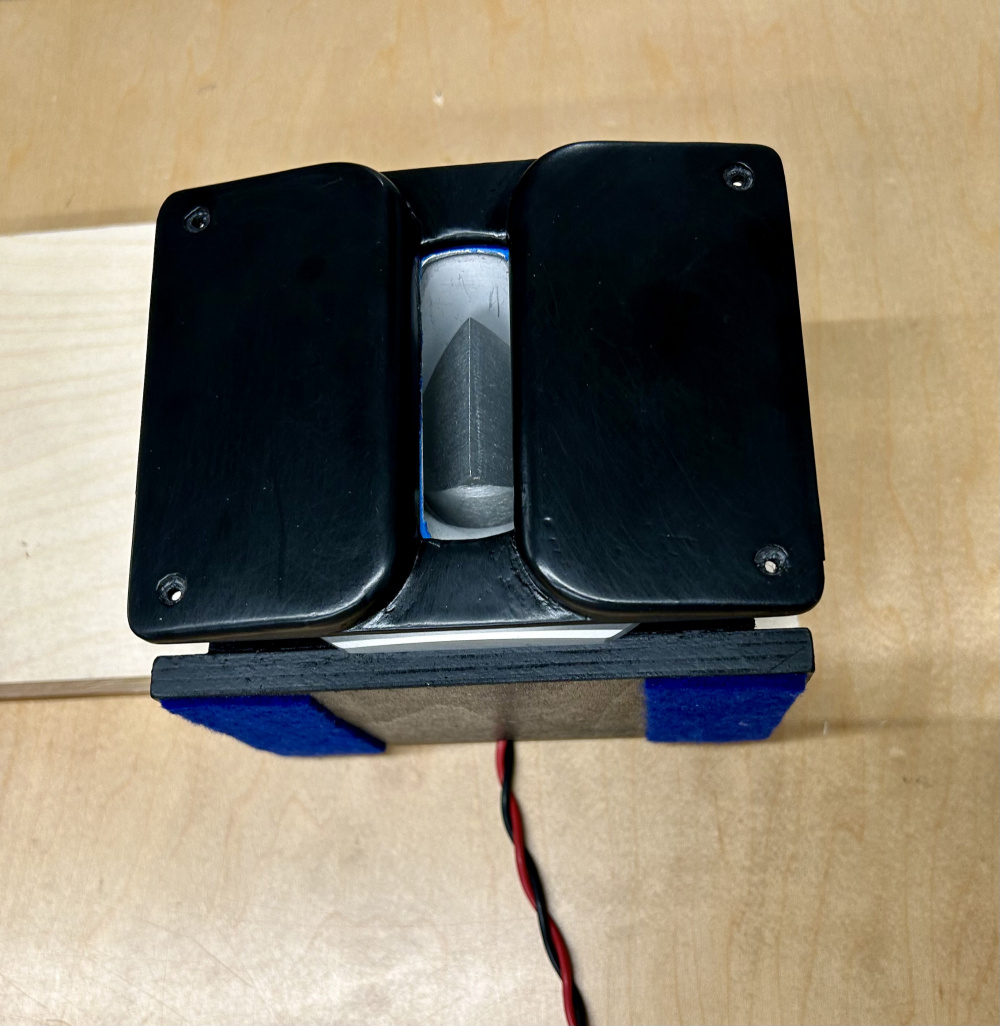
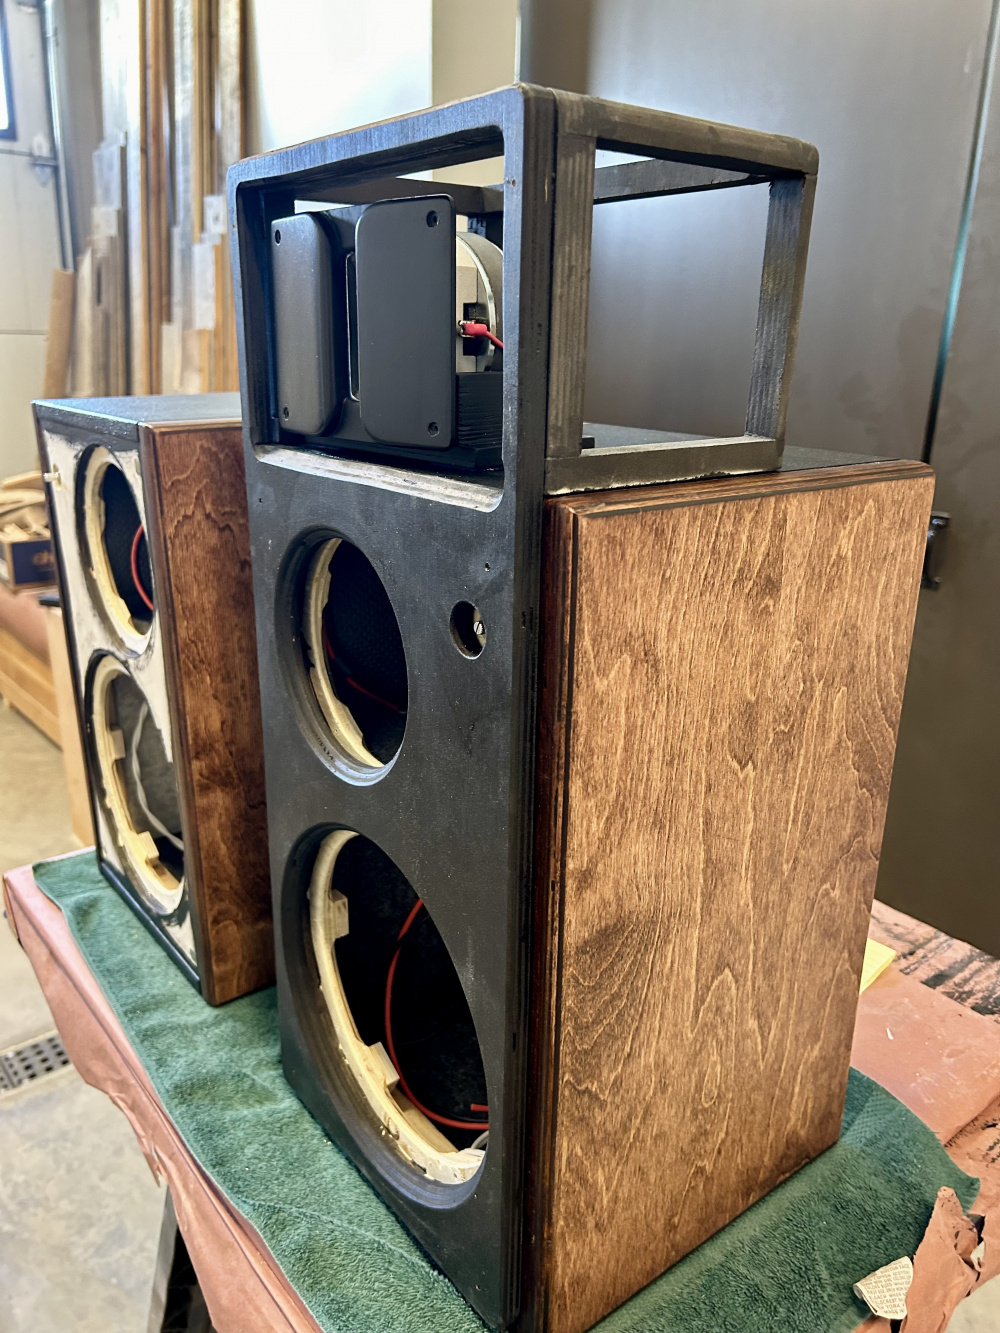
I built a simple knock-off base I saw used for a fostex super-tweeter (easy enough), and I'll attach the driver to the base (bottom two screw holes) and then the waveguide.
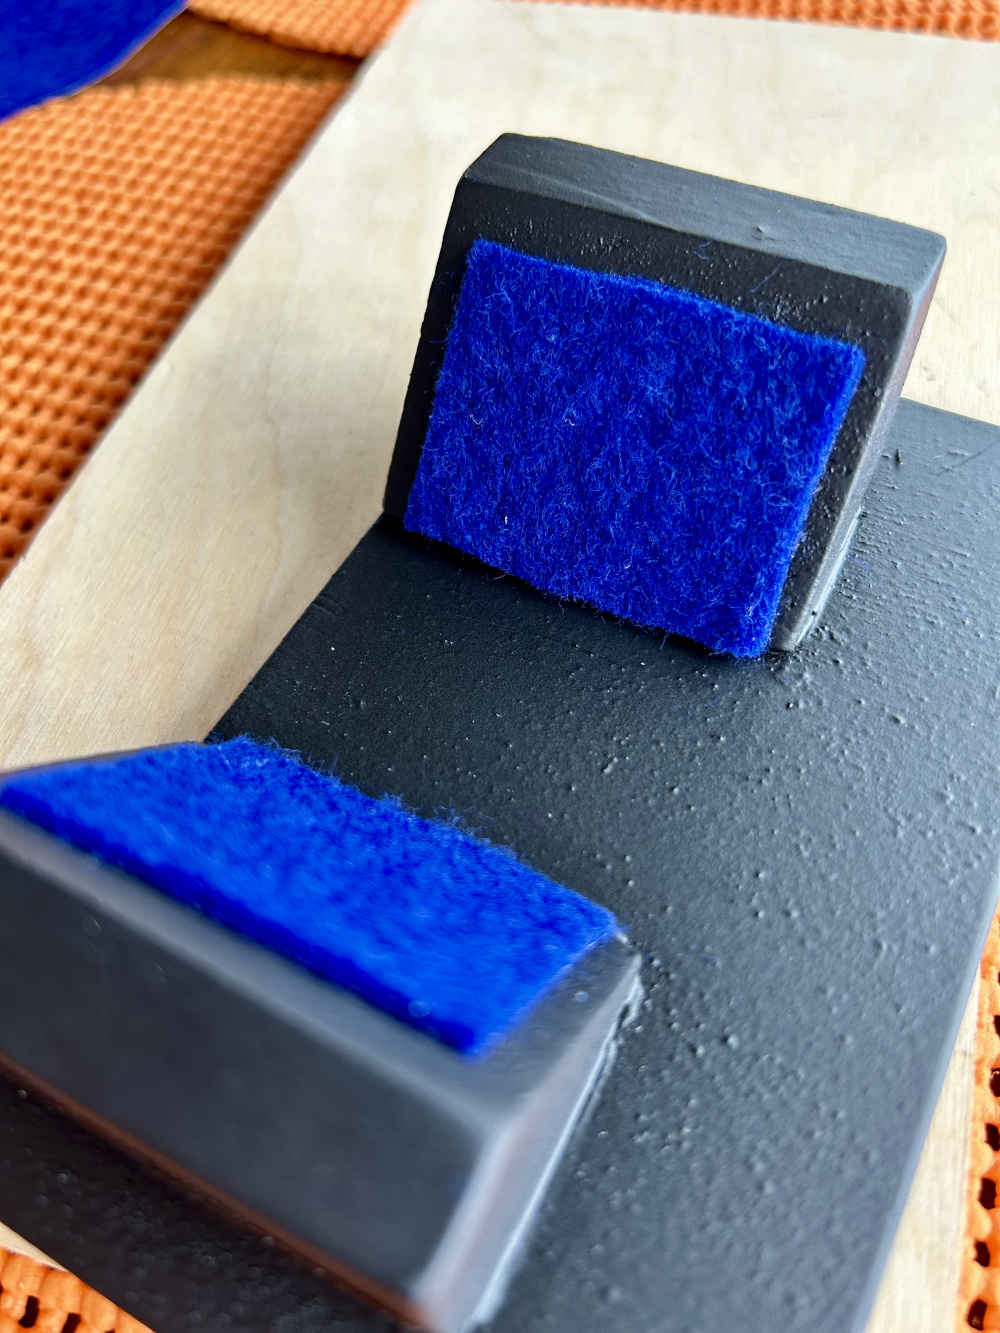
Screwed the drivers to the base (on top of some felt to minimize any vibrations)
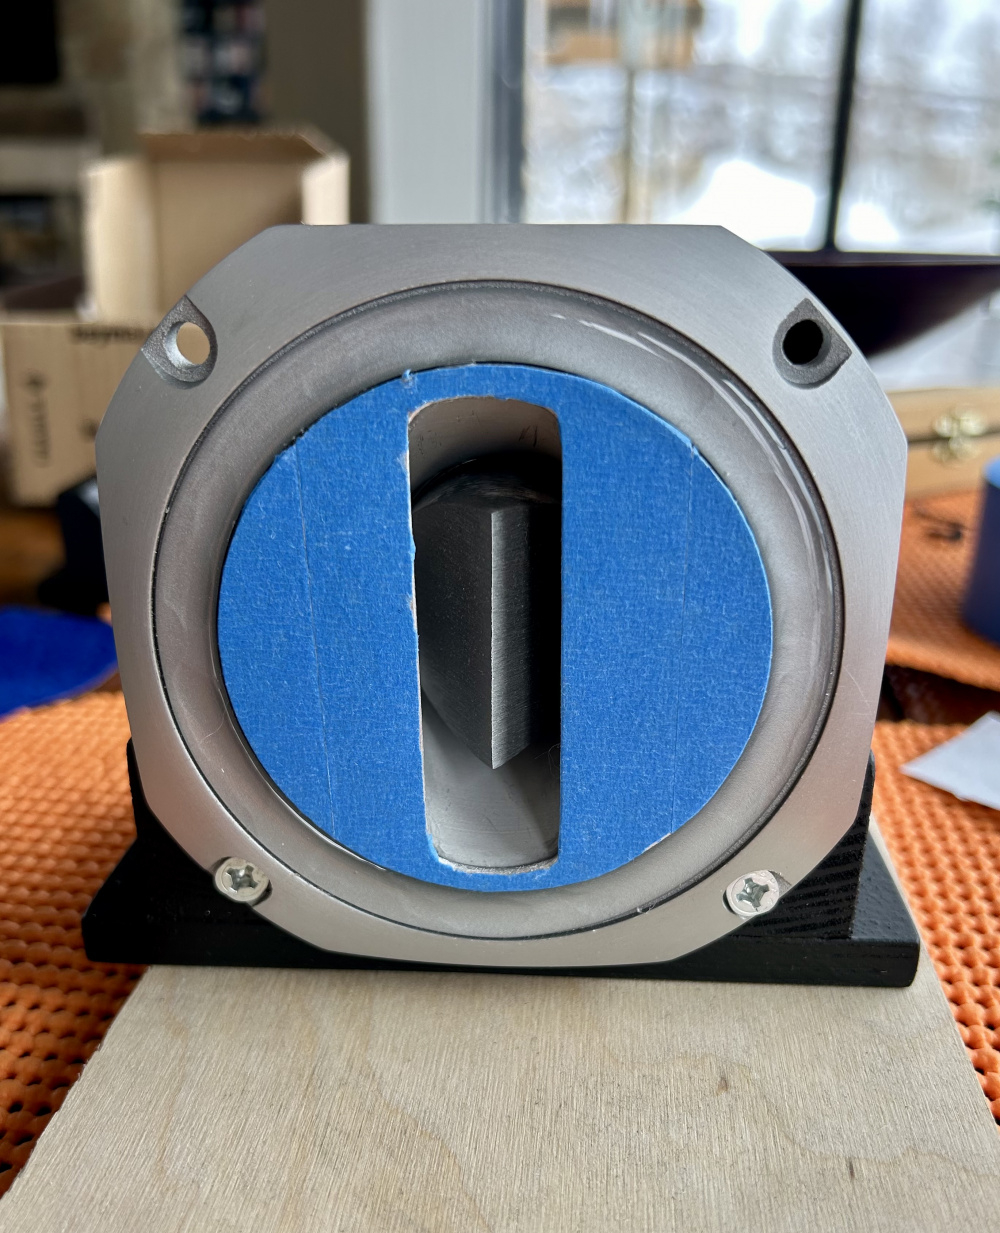
Attached the waveguide to the driver with a clear caulk as an adhesive, and ~ per my HS shop turning class placed a single layer of painter's tape on the driver. This may be a temporary solution but I wanted to protect the driver face as a first go. I used this caulk awhile back to adhere an aperiodic vent and it really worked (hard to remove), so I'll see how this goes. As a side bar... I learned that the paper for turning wood projects should have been only one layer, vs the folded double layer that I used- as my candle holder flew off and went through the ceiling tiles in the classroom. The teacher had me instead make a cutting board > safer for the whole class-ha.
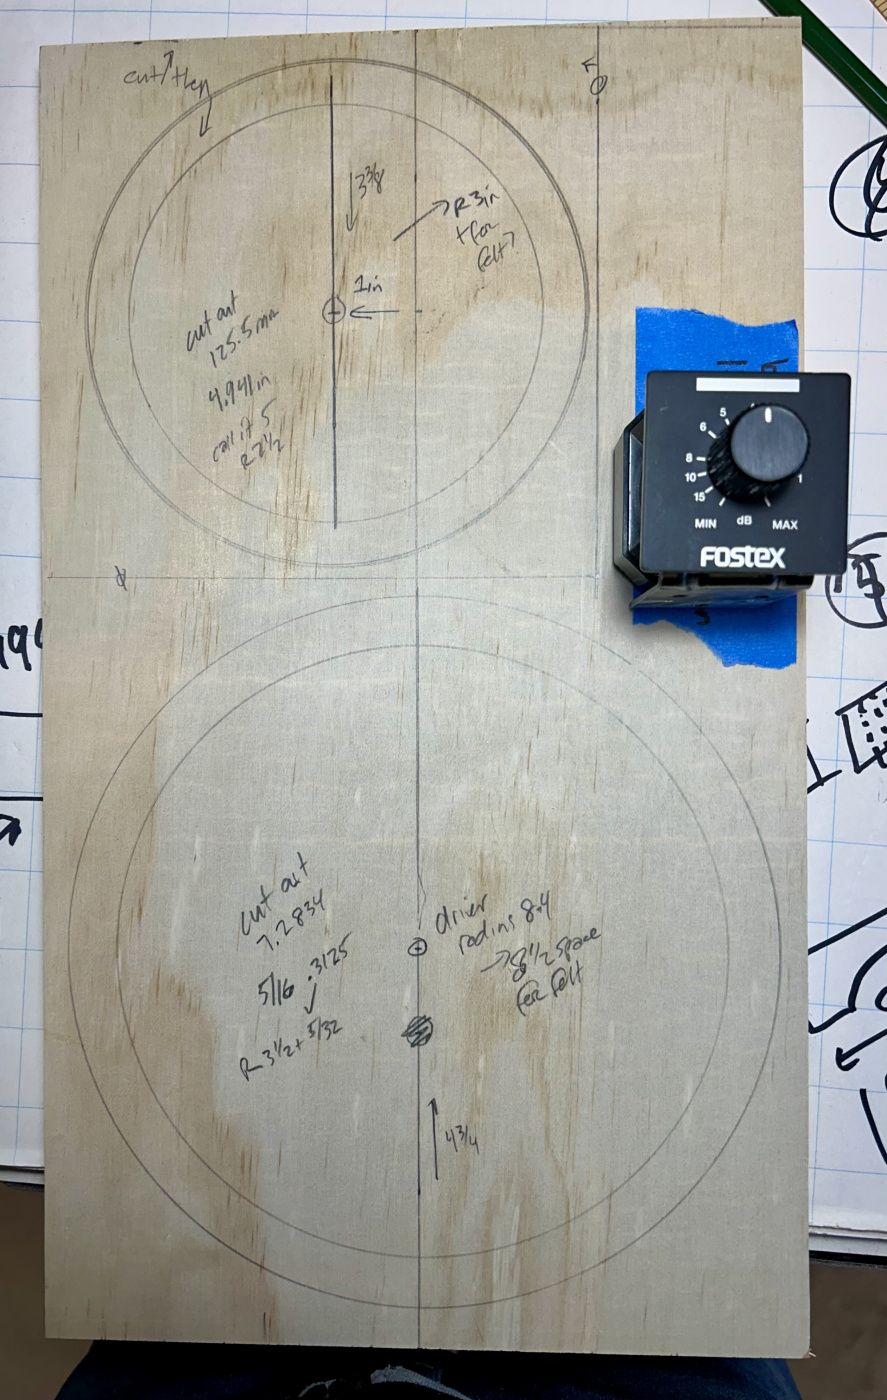
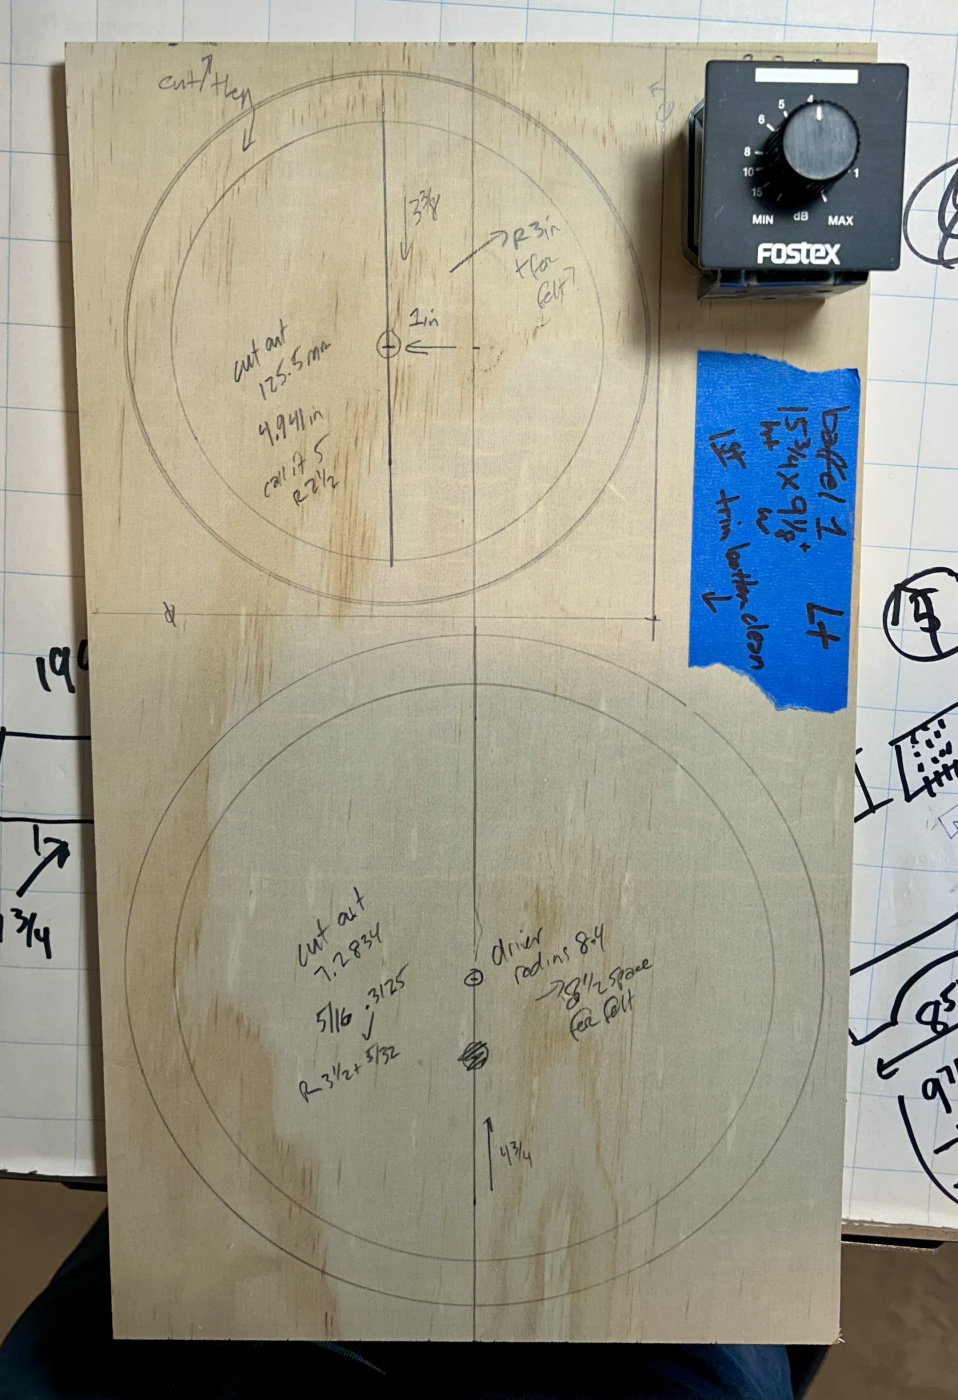
Spent the day laying out the build and then got most all the pieces cut. I’ll be trying some kerfing / bending for the first time for venting the mid / MarkAudio out the back.
I haven’t yet figured out where to place the attenuator for the top sitting SuperTw. While I will be using a ¼ in. plug connector on the top side of the MW box, I don’t know if I want the attenuator knob up there as well - vs a bit more discrete behind the grill or possibly on the back next to the SpeakON…. thoughts?
Can you make the baffle like you are adding another super-duper tweeter above the super-tweeter and install it there?
it'll be symmetric looking and only mess with the vertical axis dispersion causing diffusion towards the ceiling and be right there and handy when it needs attention to attenuation . . .
@ugly_woofer said:
Instead of kerfing and bending, I find it easier to make it whatever shape I need and then veneer it.
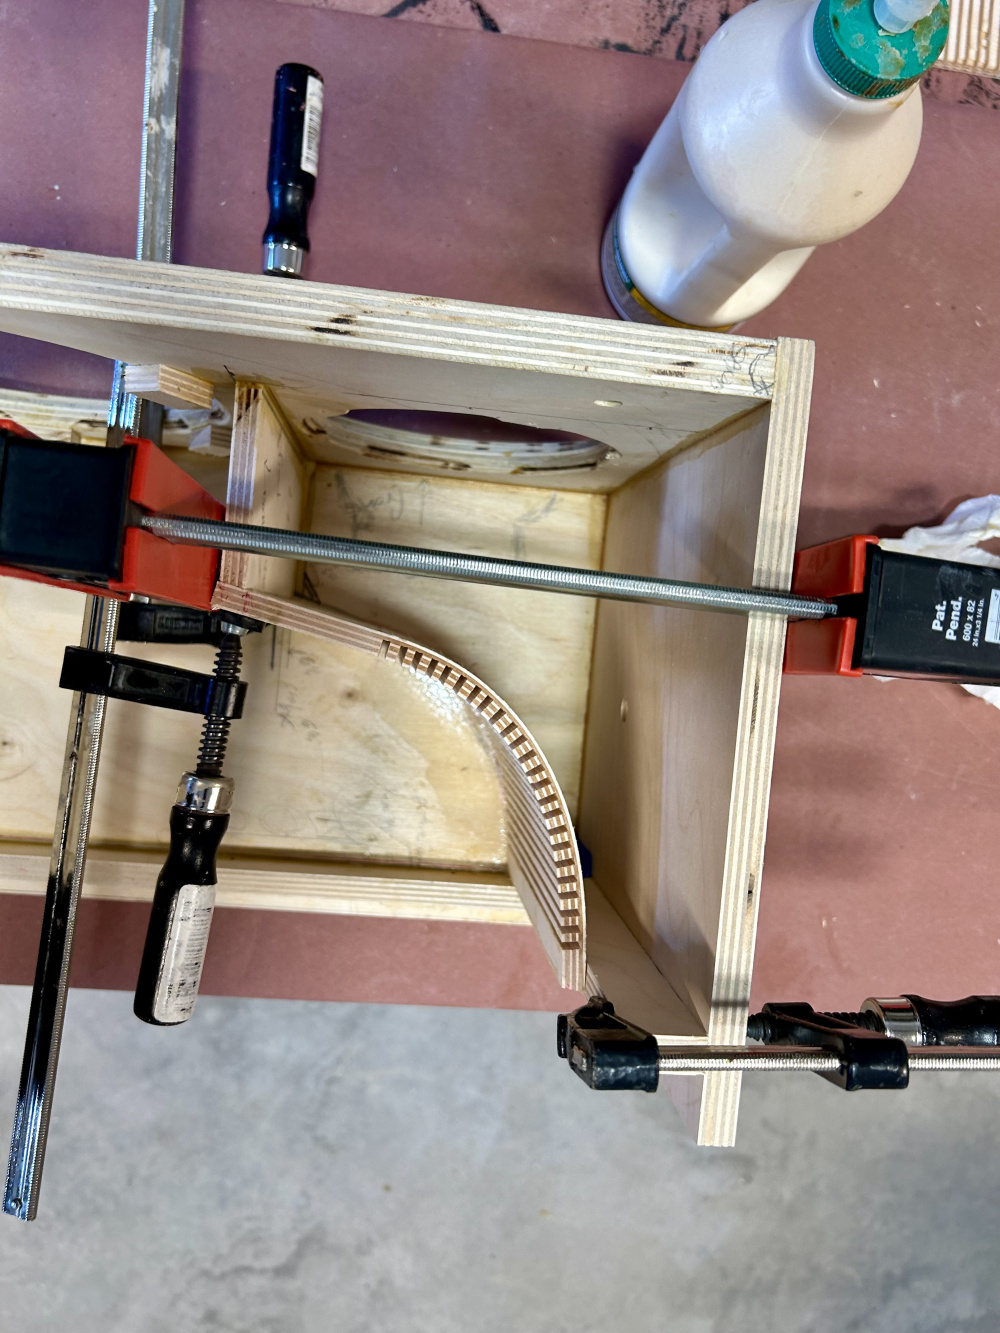
This board will be internal - per the drawing (above) its the curved section with the hatch marks. Was just going to do it with a few angled boards butted together- but thought I'd play around with kerfing - but I could veneer to smooth out / added support to the kerfed side (on top of a lot-a glue) and felt lined.
@Steve_Lee said:
Can you make the baffle like you are adding another super-duper tweeter above the super-tweeter and install it there?
it'll be symmetric looking and only mess with the vertical axis dispersion causing diffusion towards the ceiling and be right there and handy when it needs attention to attenuation . . .
Point taken re the diffusion issue per the knob.
I'll be making the grill section like a picture frame above the speaker box for the super tweeter with waveguide. While I'll place it vertically above the mid/MarkAudio, I can play around with slightly aiming inward towards the listening area. In the past, where setting a tweeter off-center on a speaker, I've placed the tweeters on the inside positions on the speakers. With this one I'll be setting up with the mid/MarkAudio towards the outsides to provide a more open path for the tweeter when angled (through the grill) towards the listening area (if that makes any sense?).
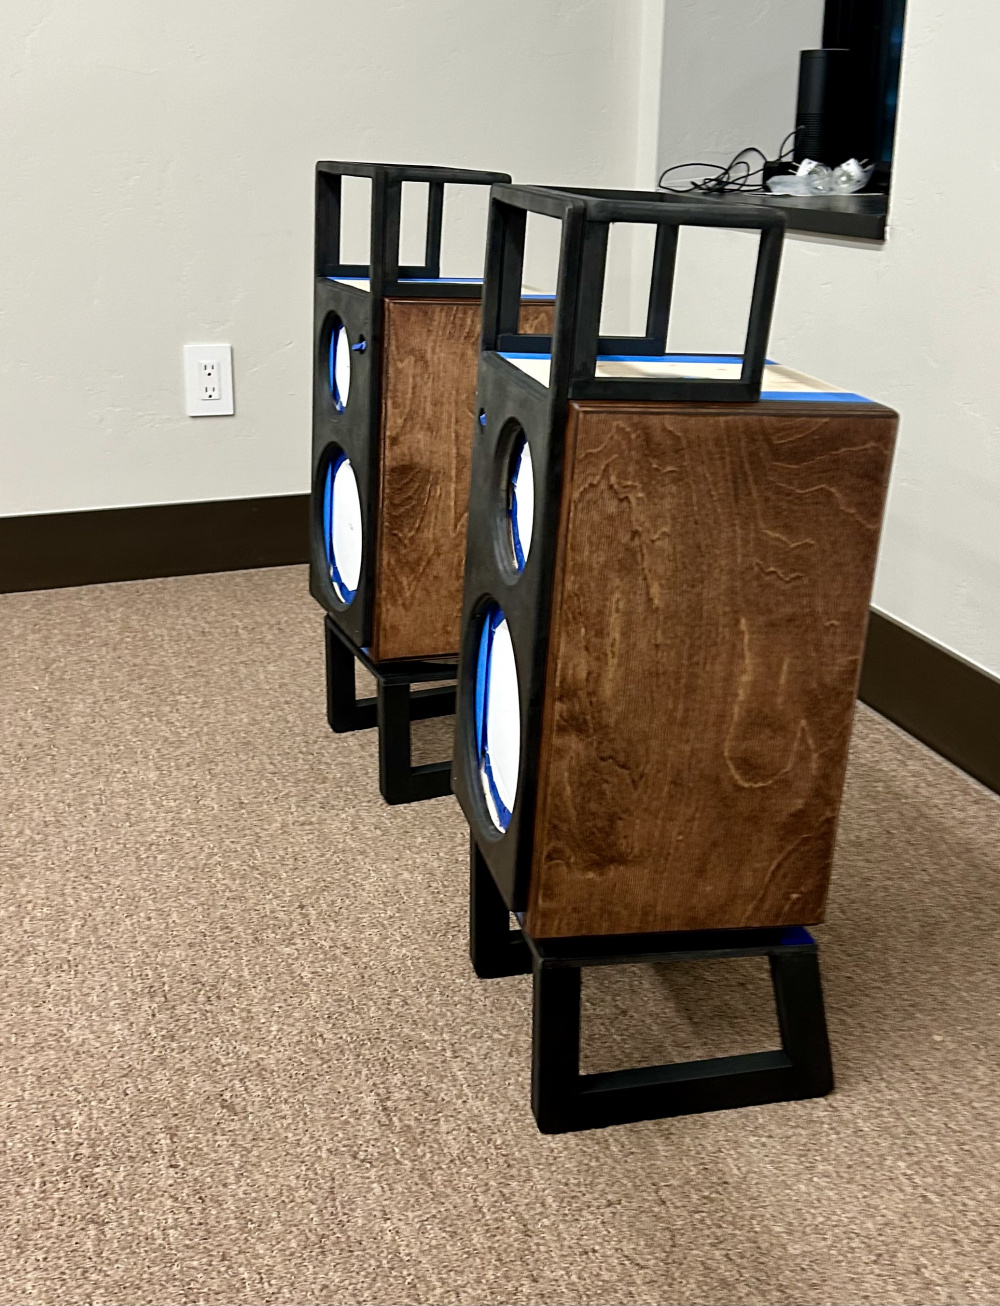
After playing around with possible locations- seeing that I can mount the attenuator with or w/o the faceplate (which is not really needed - I can just put painted dots at min, at neutral, and max) - so visible just a ¾ in knob ⅞ high. I could also set it down a bit so only ⅜ in protrudes - enough to still easily turn. As such leaning towards top mounted. A few pics to show what I’m talking about. (The attenuater knob and SuperTw/waveguide units are just placed on top of my current speaker build as reference - similar dimensions and build).
That's nice looking attenuator, btw. I might be inclined to flush mount it into the cabinet for a professional finished look but close-to the back-edge of the cabinet [or just surface mount to the back] so as not to interfere with any future tweeter positioning experiments/options on top.
Finally made a few decisions (getting old sucks) and drilled holes for; the ¼ in connector in the top of the box board for the Super Tw, the rear SpeakON for the low and mid/high channels, and the attenuator - will set the knob down a bit - w/o the faceplate and will go with just a small marker for a neutral setting, and it will be located…. next up routing the baffles for the M/broad range and the W/sub driver. Then the fun part: building the box and a Mid vented compartment.
A bit of build progress. I got the top, bottom, and baffle glued to one side, and now working on the vented section for the broad ranger / extended mid. Hopefully a combination of glue and pins (freeman micro pinner is a great tool, imo) will hold this together as I fill in the kerfing cuts, first round glue only, following with a watered down mixture of glue and sawdust.
I completed the MarkAudio / mid 'enclosure'. It's fully vented out the back and walls are lined with felt/foam. Used foam for the exit to keep stuff from getting in. I wanted to minimize any back waves to extent possible in a 'box' set-up. Also, not sure who here I 'borrowed' the use of auto sound dampening, but it should definitely keeps the mid box free of back waves from the woofer (now vibrations through the baffle may be another thing). Also got most of the woofer's walls lined with felt (and the Lpad ended up on the baffle).
@Steve_Lee
I suspect the attenuator knob will be oriented to the off-sides of the cabinets?
Actually towards the inside (I know…) as I will be orienting the super tweeter above the broad ranger which is offset 1 in. from centerline, but with flexibility to angle it a bit inwards - but w/o faceplate and set-back. The baffle will be covered in a thin layer of (blue - color nod to JBL) felt. The knob is set back and will extend a bit less than ½ in.
I got the boxes together- first two rounds of sanding, and round-overs. Thought I’d show the back side before finishing (sides stained, bal of spkr black) as the vented area for the MarkAudio at the top of backside will be difficult to see. Too cold and snowy to take it outside for sanding and routing- so had about all the sawdust I could take (even with mask and air filter system- its frickin everywhere). Now a few beers and watching Nadel vs Alcaraz - Netflix Las Vegas
While Steamboat has Builders First Source, Alpine Lumber, and ACE (my go-to hardware store), for baltic birch I need to order (not inexpensive but I'm not a big fan of MDF)
Building the grills so I can just have the front baffle plate, and an additional ‘topper’ to cover the top sitting tweeter (…if I have too). The tweeter cover has a couple of magnets that lock it to the front baffle plate.
However, I’ve got enough extra ½ ply to give Nick’s grill / waveguide grill style a go. Probably much better than the frame-style grills when it comes to diffraction - if the (4 per baffle) magnets will hold it. I need min ½ in depth for the woofer, and may need to route out a bit of extra material on the backside of the grill / waveguide to reduce weight. I’ve got a few days while the stain cures before topcoat anyway (the slight baffle set-back you see is biz the baffle will be covered in felt- for when sans grill)…
Looks like the magnets may hold w/o need to hollow out some areas from the back of the grills.
‘Course, I initially tapped and glued the magnets in backwards. Thankfully I pre-drill a small hole through the material under the magnet to provide an air source for the glue to harden (visible in pic), and just tapped through a small pin (football inflator was just the ticket) and the glue hadn’t yet completely dried. Sometimes I surprise myself and get them in properly the 1st time…!
Checked the fit this am, and the magnets are holding the grill no problem (and thinking a thin-ish layer of felt on the baffle shouldn't be an issue).
Just about finished with the building. Need to cover the grills and get the felt glued to the baffles. Then on to building the passive Xover btwn the MarkAudio and the super tweeter.
I completed the grills, and pre-checked that the spkr cut outs lined up fairly well before applying the grill cloth. I went with the Nick design ~ solid waveguide vs. the original frame style.
I’m fairly happy with how the tweeter top grills came out - a little tougher than I initially expected - and I did have to resort to placing a few staples to tug in some of the corners (nothing that a little black paint can’t address).
Glued (so I thought) blue felt on the baffles (for sans grills listing) and it looked good- until I went to trim a couple places only to realize the adhesive wasn’t holding well enough. It did make a nice little mess - so I cleaned it up and called it a day. I’m trying a couple of different glues, and looking like wood glue might work. If so it’s a lot less messy and allows a bit refitting the felt.
I'm ready to start driving our dog nuts > running measurement sweeps this weekend for building the passive Xover btwn the MarkAudio and the beyma tweeter.
For what it's worth, attaching thicker felt to the inside with spray adhesive works just fine. But for the thinner felt I put on the baffle, wood glue is the way to go. I've tried the thinner stuff that had the self adhesive backing but it deforms when you pull off the protection layer. The wood glue is a bit forgiving as you work with positioning the felt.
Pics; with and w/o the grill, and with front grill only.
Comments
Do you plan on comparing the stock print to the smoothed?
Bitchin😎
I’m was looking at comparing the STweeter with and without the finished print. I could try the stock just to see.
Comparing the modified beyma slot tweeter, mounted with and w/o waveguide, initial measurements.
I was just about ready to start cutting wood for a couple of MTW boxes, and I see Nick's naked ESS sitting on top of his latest > which is just way too cool.
So I'm heading back towards a MW box with the beyma slot tweeter / waveguide on top (with a removable grill that will cover the three drivers- from the front anyway, as a waf compromise when not playing).
I built a simple knock-off base I saw used for a fostex super-tweeter (easy enough), and I'll attach the driver to the base (bottom two screw holes) and then the waveguide.
Screwed the drivers to the base (on top of some felt to minimize any vibrations)
Attached the waveguide to the driver with a clear caulk as an adhesive, and ~ per my HS shop turning class placed a single layer of painter's tape on the driver. This may be a temporary solution but I wanted to protect the driver face as a first go. I used this caulk awhile back to adhere an aperiodic vent and it really worked (hard to remove), so I'll see how this goes. As a side bar... I learned that the paper for turning wood projects should have been only one layer, vs the folded double layer that I used- as my candle holder flew off and went through the ceiling tiles in the classroom. The teacher had me instead make a cutting board > safer for the whole class-ha.

Spent the day laying out the build and then got most all the pieces cut. I’ll be trying some kerfing / bending for the first time for venting the mid / MarkAudio out the back.
I haven’t yet figured out where to place the attenuator for the top sitting SuperTw. While I will be using a ¼ in. plug connector on the top side of the MW box, I don’t know if I want the attenuator knob up there as well - vs a bit more discrete behind the grill or possibly on the back next to the SpeakON…. thoughts?

Can you make the baffle like you are adding another super-duper tweeter above the super-tweeter and install it there?
it'll be symmetric looking and only mess with the vertical axis dispersion causing diffusion towards the ceiling and be right there and handy when it needs attention to attenuation . . .
Instead of kerfing and bending, I find it easier to make it whatever shape I need and then veneer it.
This board will be internal - per the drawing (above) its the curved section with the hatch marks. Was just going to do it with a few angled boards butted together- but thought I'd play around with kerfing - but I could veneer to smooth out / added support to the kerfed side (on top of a lot-a glue) and felt lined.
thx
Point taken re the diffusion issue per the knob.
I'll be making the grill section like a picture frame above the speaker box for the super tweeter with waveguide. While I'll place it vertically above the mid/MarkAudio, I can play around with slightly aiming inward towards the listening area. In the past, where setting a tweeter off-center on a speaker, I've placed the tweeters on the inside positions on the speakers. With this one I'll be setting up with the mid/MarkAudio towards the outsides to provide a more open path for the tweeter when angled (through the grill) towards the listening area (if that makes any sense?).
After playing around with possible locations- seeing that I can mount the attenuator with or w/o the faceplate (which is not really needed - I can just put painted dots at min, at neutral, and max) - so visible just a ¾ in knob ⅞ high. I could also set it down a bit so only ⅜ in protrudes - enough to still easily turn. As such leaning towards top mounted. A few pics to show what I’m talking about. (The attenuater knob and SuperTw/waveguide units are just placed on top of my current speaker build as reference - similar dimensions and build).
That's nice looking attenuator, btw. I might be inclined to flush mount it into the cabinet for a professional finished look but close-to the back-edge of the cabinet [or just surface mount to the back] so as not to interfere with any future tweeter positioning experiments/options on top.
Just my opinion, but I would consider mounting it behind the tweeter. Ma.ybe modify the tweeter base. Just a thought, carry on
Finally made a few decisions (getting old sucks) and drilled holes for; the ¼ in connector in the top of the box board for the Super Tw, the rear SpeakON for the low and mid/high channels, and the attenuator - will set the knob down a bit - w/o the faceplate and will go with just a small marker for a neutral setting, and it will be located…. next up routing the baffles for the M/broad range and the W/sub driver. Then the fun part: building the box and a Mid vented compartment.
A bit of build progress. I got the top, bottom, and baffle glued to one side, and now working on the vented section for the broad ranger / extended mid. Hopefully a combination of glue and pins (freeman micro pinner is a great tool, imo) will hold this together as I fill in the kerfing cuts, first round glue only, following with a watered down mixture of glue and sawdust.
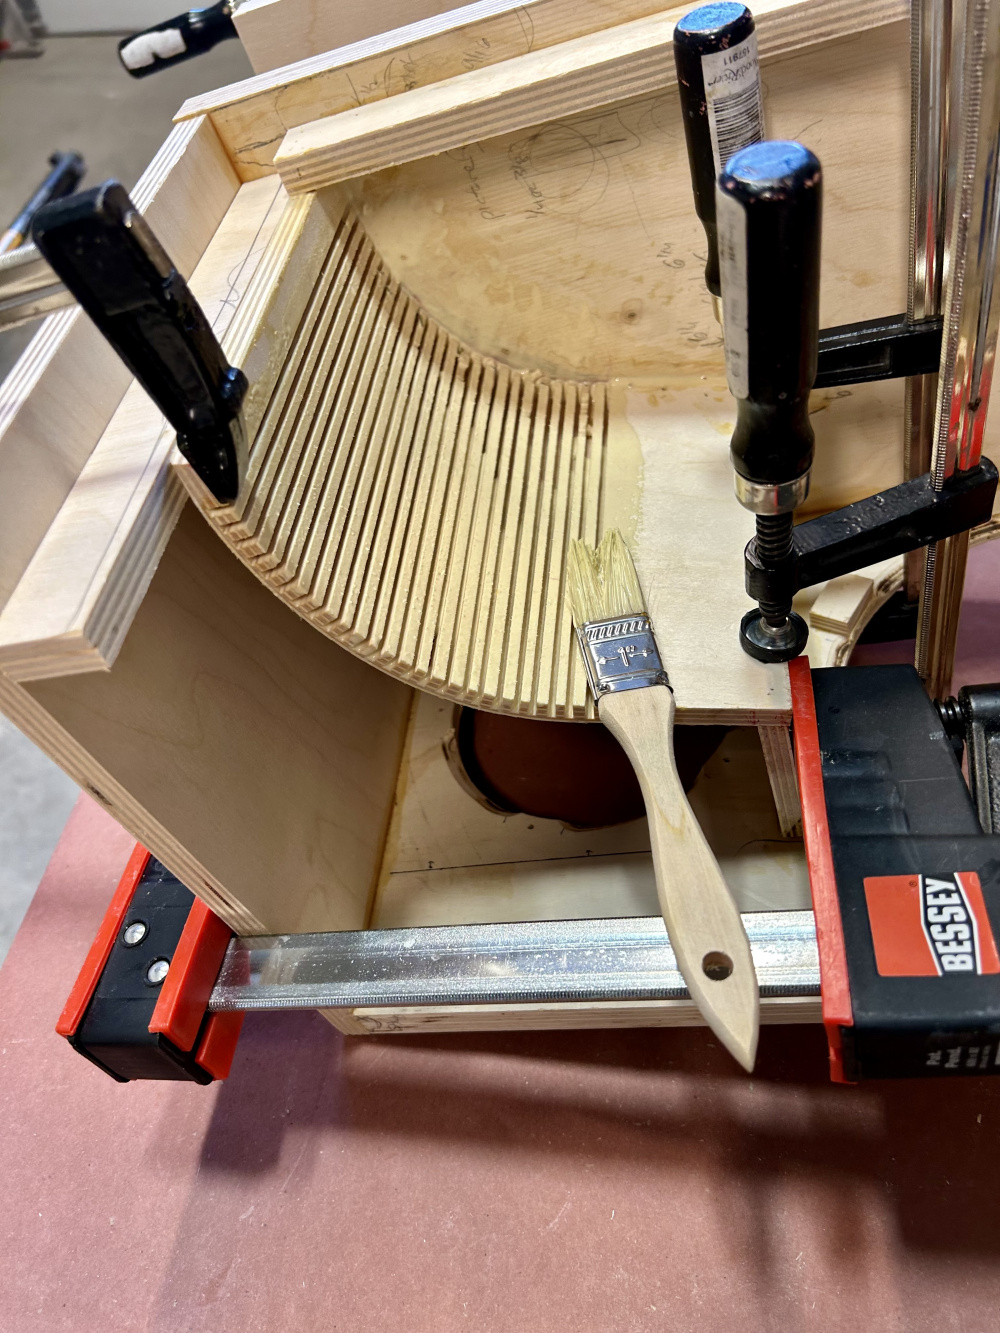
I completed the MarkAudio / mid 'enclosure'. It's fully vented out the back and walls are lined with felt/foam. Used foam for the exit to keep stuff from getting in. I wanted to minimize any back waves to extent possible in a 'box' set-up. Also, not sure who here I 'borrowed' the use of auto sound dampening, but it should definitely keeps the mid box free of back waves from the woofer (now vibrations through the baffle may be another thing). Also got most of the woofer's walls lined with felt (and the Lpad ended up on the baffle).
Looking good and nice detail work, Sir!
I suspect the attenuator knob will be oriented to the off-sides of the cabinets?
Actually towards the inside (I know…) as I will be orienting the super tweeter above the broad ranger which is offset 1 in. from centerline, but with flexibility to angle it a bit inwards - but w/o faceplate and set-back. The baffle will be covered in a thin layer of (blue - color nod to JBL) felt. The knob is set back and will extend a bit less than ½ in.
I got the boxes together- first two rounds of sanding, and round-overs. Thought I’d show the back side before finishing (sides stained, bal of spkr black) as the vented area for the MarkAudio at the top of backside will be difficult to see. Too cold and snowy to take it outside for sanding and routing- so had about all the sawdust I could take (even with mask and air filter system- its frickin everywhere). Now a few beers and watching Nadel vs Alcaraz - Netflix Las Vegas

Sawdust could be considered a allergen, bad, or it could also be considered as non dietary fiber, good!
Nice material
While Steamboat has Builders First Source, Alpine Lumber, and ACE (my go-to hardware store), for baltic birch I need to order (not inexpensive but I'm not a big fan of MDF)
https://www.woodworkerssource.com/plywood/34-baltic-birch-plywood-pack-choose-your-size.html
Building the grills so I can just have the front baffle plate, and an additional ‘topper’ to cover the top sitting tweeter (…if I have too). The tweeter cover has a couple of magnets that lock it to the front baffle plate.
However, I’ve got enough extra ½ ply to give Nick’s grill / waveguide grill style a go. Probably much better than the frame-style grills when it comes to diffraction - if the (4 per baffle) magnets will hold it. I need min ½ in depth for the woofer, and may need to route out a bit of extra material on the backside of the grill / waveguide to reduce weight. I’ve got a few days while the stain cures before topcoat anyway (the slight baffle set-back you see is biz the baffle will be covered in felt- for when sans grill)…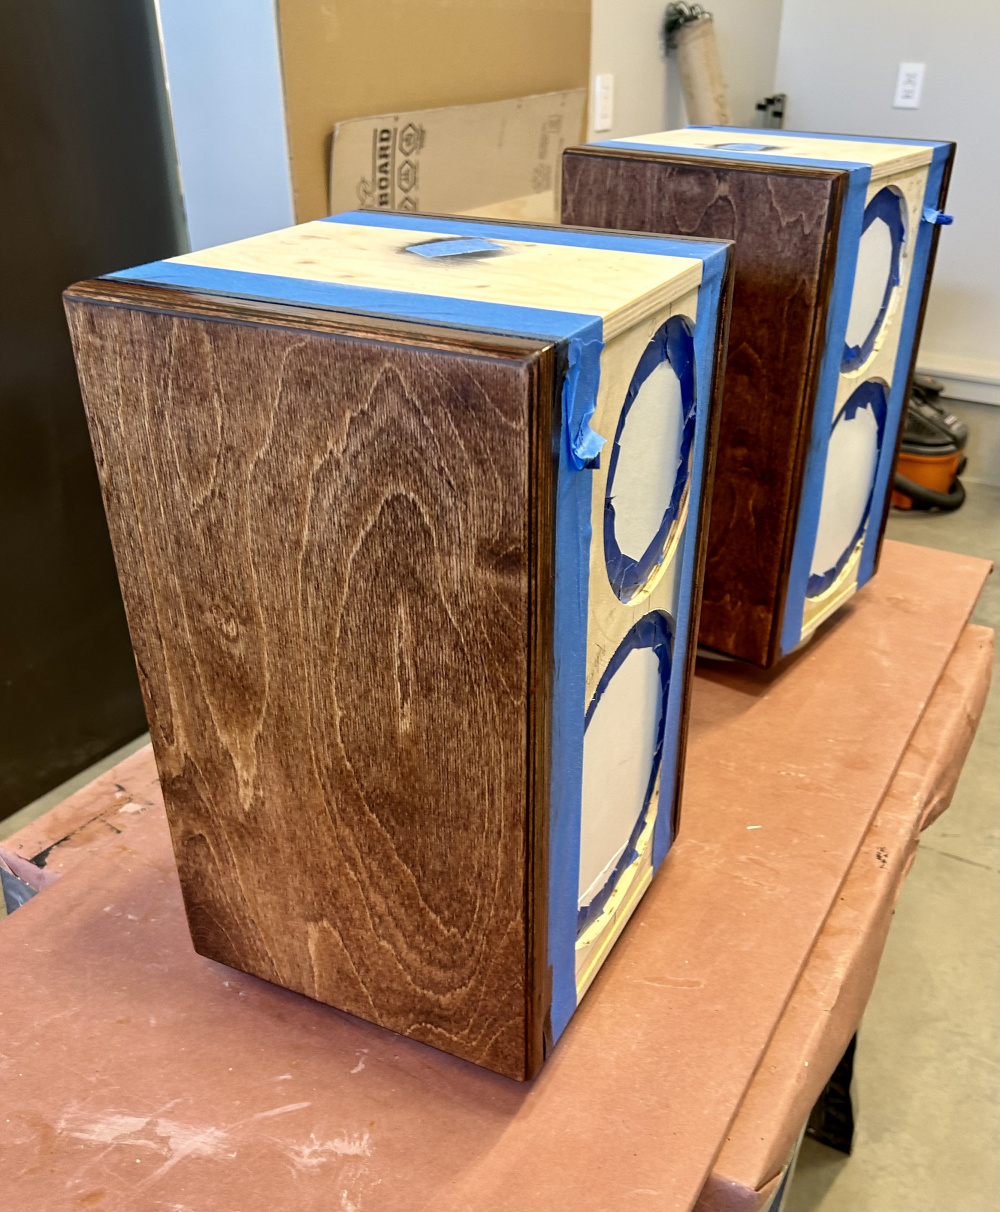


Looks like the magnets may hold w/o need to hollow out some areas from the back of the grills.
‘Course, I initially tapped and glued the magnets in backwards. Thankfully I pre-drill a small hole through the material under the magnet to provide an air source for the glue to harden (visible in pic), and just tapped through a small pin (football inflator was just the ticket) and the glue hadn’t yet completely dried. Sometimes I surprise myself and get them in properly the 1st time…!
Checked the fit this am, and the magnets are holding the grill no problem (and thinking a thin-ish layer of felt on the baffle shouldn't be an issue).
Just about finished with the building. Need to cover the grills and get the felt glued to the baffles. Then on to building the passive Xover btwn the MarkAudio and the super tweeter.
I completed the grills, and pre-checked that the spkr cut outs lined up fairly well before applying the grill cloth. I went with the Nick design ~ solid waveguide vs. the original frame style.
I’m fairly happy with how the tweeter top grills came out - a little tougher than I initially expected - and I did have to resort to placing a few staples to tug in some of the corners (nothing that a little black paint can’t address).
Glued (so I thought) blue felt on the baffles (for sans grills listing) and it looked good- until I went to trim a couple places only to realize the adhesive wasn’t holding well enough. It did make a nice little mess - so I cleaned it up and called it a day. I’m trying a couple of different glues, and looking like wood glue might work. If so it’s a lot less messy and allows a bit refitting the felt.
Looks great. That would be a good way to cover a Heil AMT too.
Looks pretty cool, dude😎
I'm ready to start driving our dog nuts > running measurement sweeps this weekend for building the passive Xover btwn the MarkAudio and the beyma tweeter.
For what it's worth, attaching thicker felt to the inside with spray adhesive works just fine. But for the thinner felt I put on the baffle, wood glue is the way to go. I've tried the thinner stuff that had the self adhesive backing but it deforms when you pull off the protection layer. The wood glue is a bit forgiving as you work with positioning the felt.
Pics; with and w/o the grill, and with front grill only.