Site Links
Howdy, Stranger!
It looks like you're new here. If you want to get involved, click one of these buttons!
Quick Links
Categories
In this Discussion
Who's Online (0)
making a cube-ish box by edge gluing six mitered panels together?
Hello my woodworker and speaker-building friends,
I am terrible at woodworking yet I need to make a few medium size subwoofer boxes of about 45L internal volume. I have been mulling over how I could do this here at home in Germany. The tools I have at hand are a decent contractor grade Bosch table saw and a router and not much else. At first I thought about cutting a bunch of panels from some inexpensive wood product like OSB (its available here), and using furring strips or the like to better support butt type joints along all the edges. This seems simple at first but then when you think about doing that for all the internal edges in a cube, it's not as cute a solution as it seems.
Enter what I think might be the solution to my problem, and why I am writing this thread and asking for input:
Today I found a web site that will custom cut birch plywood, including thru holes. I am not sure what technology is used for this (saw, CNC, etc.) but the price is not too bad. So let's say I buy from them six identical cut square panels, with one or two having the thru-holes for the driver(s) already cut for me. These would come with square edges. But I could use my table saw, with the blade set at 45deg, and run the panels through, cutting all four sides at this angle, at an identical width. I would only need to lose a small amount of width (the width of the final panel on the outside of the box) to do this. I do this will all six panels (per box) that I wish to assemble. This gives me six panels, each with all four sides mitered at 45 degrees.
In step two I take four of the panels and lay them next to each other with the small side facing up (eg mitered edges showing). After aligning everything carefully I put something like painters tape along the seams between adjacent panels (three internal seams). Then I apply some glue with a brush along the mitered joints, and to the left and right outer mitered edges. Next I fold up the panels into a square tube and tape the final seam. Now I take another panel and after applying glue to the mitered edges I place that on top of one of the open ends of the square tube I just made, and then tape those edges to secure. I repeat with the last panel to close up the tube into a box, taping the remaining seams together. After checking the tape on all seams I walk away and let er dry for a couple of days. Then I will do some final cleanup of edges, glue, etc.
Would this work? Reliably? Seems like a way to assemble a box without too much work, and in a way that will self-stabilize while the glue is drying.
The panels will each be about 16"x16" out of 7/8 inch plywood.
Please comment before I dump a bunch of money into this scheme in an effort to make some subwoofer cabs.
Thanks!

Comments
Not sure if the tape trick will work with such large heavy panels. I typically use band clamps. Don't expect perfectly tight miter joints. Even if you set the bevel for 45.5 you cannot always cut all the way out to the point. Some places will undercut and some might overcut depending on the flatness of your panels. Maybe you could undercut slightly and plan to radius the corners 1/4 inch or so. 6mm in German speak.
OK I managed to find a couple of YT vids on the subject. I could buy a couple of band clamps. Two is enough? Or maybe three: one in the middle and one at each end of the joints?
I thought that doing all six panels at once would prevent skew (if I first did just the four sides and let that glue dry before moving on to the other two panels) but maybe that is too many balls in the air at once.
Also, look up "Corner clamps". There are big expensive ones (e.g., Bessey) and cheap ones (e.g., Menards or Harbor Freight).
Butt joints are plenty strong, and IMO the edge of plywood with thin plys looks pretty sharp.
But if you gotta do miter.. I don't have personal experience yet. But from seeing others do it, it seems getting all panels glued up at once is the only likely way to have the edges aligned.
I have my table saw dialed into darn near perfection and can make some really nice and tight and square enclosures using all butt joints. But when I do 45° miters it's tough to get perfect joints. IME it's because the sheet goods I'm using are never perfectly flat. And it seems like the saw blade wants to ever so slightly deflect when cutting at an angle other than 90° or the blade is pulling the stock away from the fence.
I have had good success doing 4 sided mitered enclosures (side-top-side-bottom) then rabbit in the back panel flush and have a removable baffle.
Glue blocks and simple butt joints work really well. Leaving the boards oversized and cleaning the edges up afterwards helps with any ruff edges. Add bracing as you see fit. Leave the front and back oversized when you glue them on and clean them up with a flush trim bit.
Another thing you can do to help get a clean cut with the flush trim bit is to put painters tape where the bearing rides for the first pass then take the tape off before the final pass. Take time on the layout of the glue blocks, superglue can work nicely if you are screwing the glueblocks afterwards.
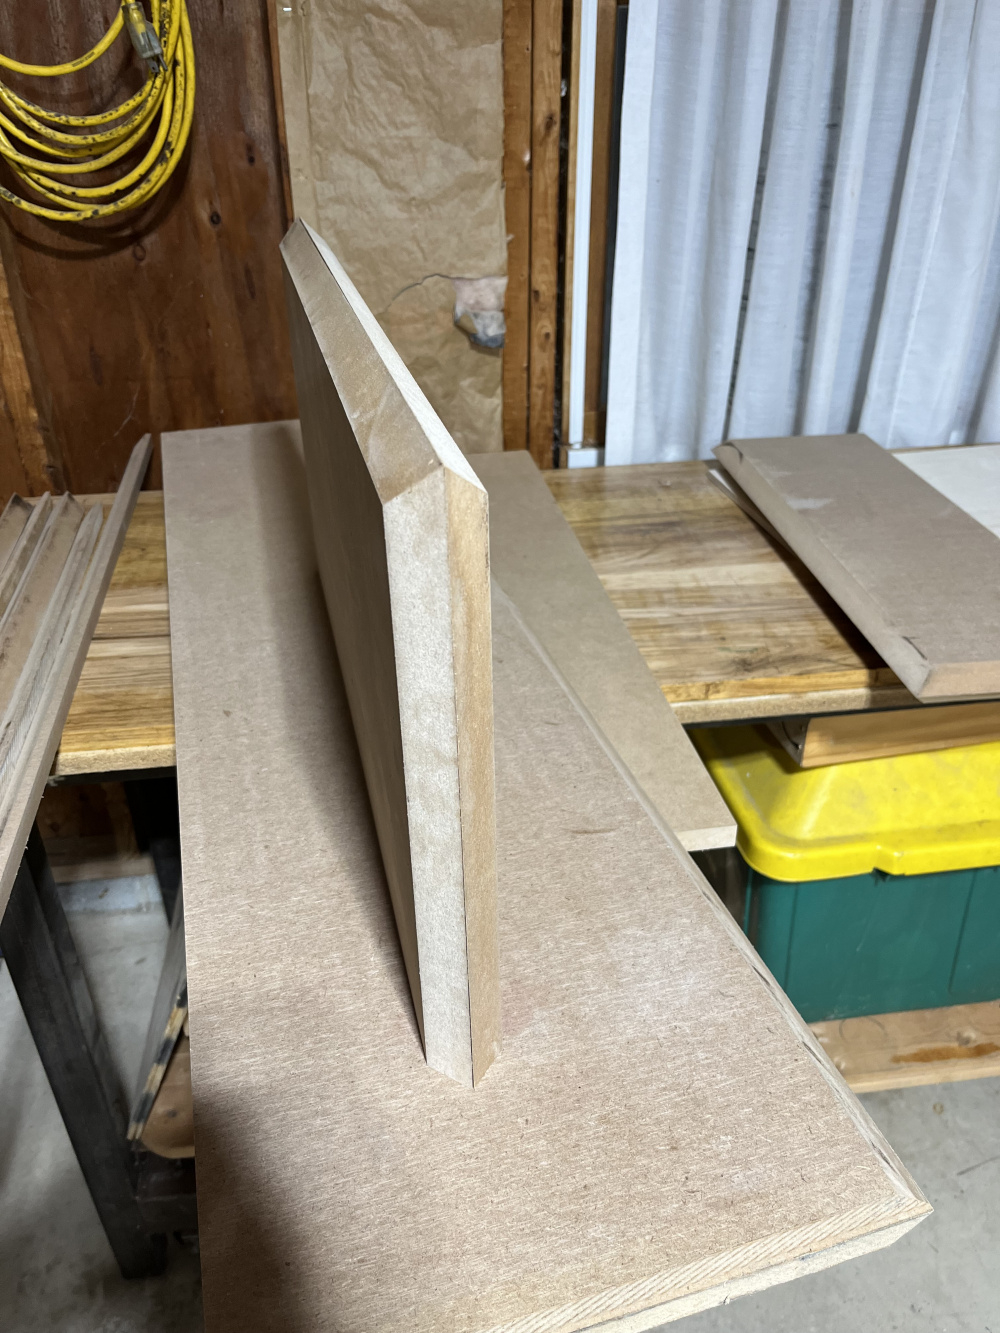
Miter joints can be difficult on a table saw unless you have a panels jig and make a final pass around a saw blade thickness. Thin kerf blades will deflect adding to the imperfections.
I assume the cuts are not perfect and align all my 4 panels against a straight edge and use fiber reinforce packing tape across the panels. I use a square on the other panels and tape. I don't use a lot of clamps as it pushes everything out of square.
Leaving boards oversized and cleaning up with the flush bit: Yep that is how I do all mine.
@kenrhodes Yes, this (butt joints and a furring strip inside ) was my original idea. I have tried it before but found it difficult to align multiple panels properly. I think you cannot use eg. band clamps in this case, and I am not a fan of corner clamps.
It seems like many are suggesting to do an "approximate" job using butt joints and leave overhang, which is trimmed off later with a flush-cut bit.
I'm not really looking for perfect, seamless/gapless joints. Rather a way to assemble the box only using edge-glued joints. Will table saw miter cuts really be that wonky?
Also, I have seen the tip to use fiber reinforced tape instead of painters tape to prevent the tape from coming loose when you flex the corners together. I can get 2-axis (cross) reinforced tape here that is 50mm or 75mm wide.
Would it be better in this application to use a gap-filling, non-foaming adhesive like 5min epoxy instead of PVA glue? Epoxy is thin enough to flow when you close up the joint but will cure quickly and bonds wood well. I would use the dual tube syringe type packaging to make it easy to mix and apply.
This would maybe get around the problem of insufficient clamping pressure, pressure necessary for a good PVA glue joint...
With the glue blocks you won't need clamps although they can be helpful.
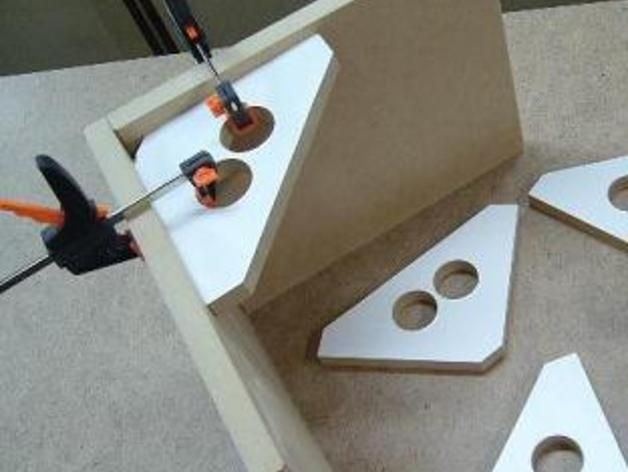
Clamping jigs can be nice for projects like this:
PVA wood glue is all you will need, epoxy and construction adhesives have their strengths but I rarely need them in the wood shop.
A fully mitered box without jigs is almost impossible as the angle and dimensions need to be spot on. A mitered joint also doesn't provide any alignment for assembly adding to the complexity.
A box with mitered joints will have 41 percent greater glue area. Band clamps apply pressure equally . Both help to self-square the entire assembly. A slight flat on the points of the beveled edges also will prevent cutting into the bands.
Please make yourself a nice flush outfeed table. Tablesaws are dangerous enough without having to reach across the blade. I always cringe when I see a video of someone without an outfeed table.
The problem with the jig pictured is that it is not (necessarily) putting any clamping force on the joint. You could assemble and 100% tighten the clamps that setup with a 1/4 gap between the end grain of the upper piece with the side of the lower one. Even if you first tighten the clamp on the upper piece and then pull the joint closed with the other clamp, you are relying on friction between the edge of your jig and the face of the upper piece to keep everything from moving. There could be creep/slip happening without you noticing it, since the joint will still look closed but the clamping pressure will have fallen off.
In a sense using the miter joint plus a band clamp with four 90 edge blocks to join four panels together into a square tube seems better since the band tension will keep pressure on the miter faces at the blocks. But of course this depends on having very good miters along the edge of the panels...
In any case, I hear you about the lack of alignment options for the mitered joints. This is why I was thinking of assembling at least 5 if not all 6 panels since the two end panels should help to square up the four sides. They would be lined up along a straight edge (table saw fence?) first. Before gluing you can fold up the four taped side panels and check the alignment. The epoxy idea is to reduce the need for clamping pressure down to the minimum necessary to keep the assembly together.
I am currently reading up on how to align my table saw blade and fence, and would buy a digital angle measurement tool for blade angle checking.
I have a lot of scrap wood around here or I can buy some cheap sheet goods nearby. If I can find some flat pieces I might be able to do a test run to check the quality of the miter cuts and fitting four of them together before investing in the real stuff.
I recently watched a video of a guy using a table saw without a blade guard/kickback preventer and using his hand to push the piece thru, each time bringing his fingers to within 1" of the blade. I kept checking for scars on his fingers... or missing fingers.
Good advice on the outfeed table.
Edit: this one -
Check out around the 6 min mark...
Charlie,
I'm not sure what the concern is butt joints. Yes they are very boring and not exquisite or fancy or interesting for master craftsman, but they are ROCK SOLID.
In fact, one of my later cabinets using nails + PVA glue for the butt joints, but after all that trouble, I decided to do a test- gluing two 3/4" panels together using butt joints, and then try to break the joint, first with bare hands, then mallet/hammer. Well eventually it did break, but not along the joint- the MDF was weaker! So my later builds I abandoned the nails. I have built at least 4 pairs of floor standing cabinets and 2 subwoofers in my early days of loudspeaker building (20 years ago) using nothing but butt joints and they are still going strong.
In manufacturing they are not ideal but in DIYing you have plenty of time... which is why butt joints are ideal.
The main downside is that you need to give them time for the glue to cure. And \ensure is that the butts joints are exactly square.
Put one panel on flat a level surface.
Run PVA glue on the edges of 2 other panels and stand them at 90 degrees.
You'll have time to adjust them slightly so they are completely flush without any overhang (no need for flush trim bit) The weight of these panels standing at 90 degrees is enough pressure for the the glue to bond (no need for clamps) *Them leave them to dry- overnight to 24 hours is ideal**
Then turn upside down and repeat. Put some books or storage boxes or whatever you have laying around to apply pressure to the joint.
*Them leave them to dry- overnight to 24 hours is ideal**
Now turn the workpiece and put down the top/bottom panels and again lay down the weights.
*Them leave them to dry- overnight to 24 hours is ideal**
I did this in my 20's; I didn't even know what a table saw was. If I can do it...
Agreed, for speakers there would be functionally no strength difference between butt and miter as neither are brought to failure. Not sure what all this concern is with fillet blocks because they are not necessary with butt joints. Bracing is still needed with either method to prevent pannel flexing. Panels can be cut intentionally large and glued up exactly where you want, to be trimmed later. Doesn't have to be "approximate". But it seems that dead horse has sailed... or something like that.
I have cut and assembled some MDF cabs before using butt joints and was very disappointed. But there was probably not a good square cut on anything in any direction due to the tools I had at the time. I was hoping to make something a little nicer looking without having to pay someone to do it for me. As an example I found an ad for someone who would make custom loudspeaker cabs with a CNC on the local Craigslist type site. Ended up that he wanted 500 Euros per cabinet for something that was about 80L and he would only make it from 40mm (about 1.6") thick plywood. I got wet feet when he seemed more interested in getting me to pay him than in the actual details of the size, cutouts, etc. that he would need to make the thing.
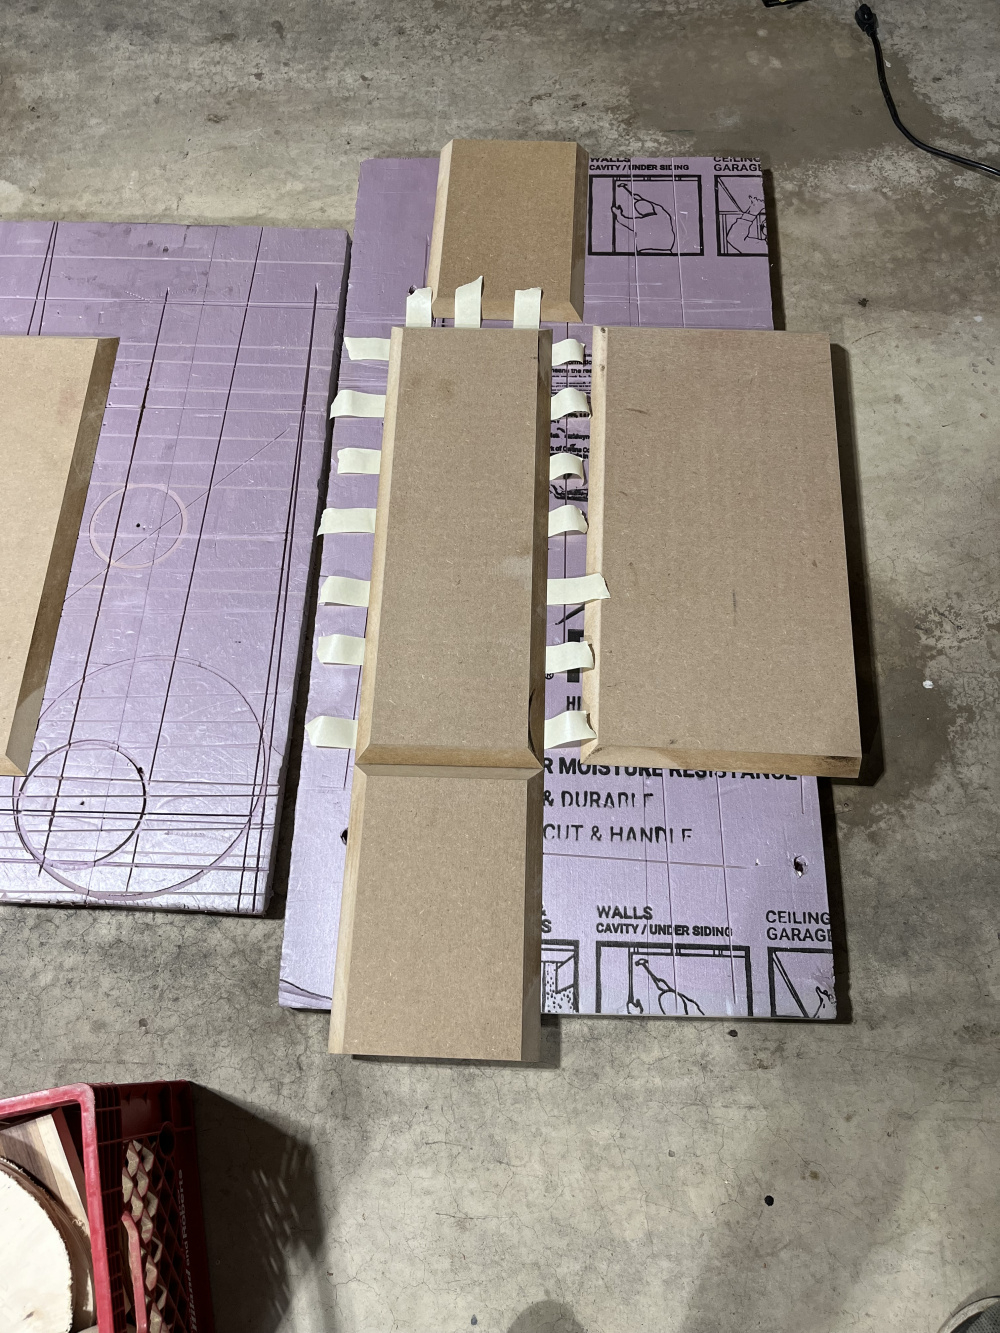
I've had great success with the mitered edges and tape approach with MDF on up to ~35L volume cabinets. I've not done anything larger with that approach. Plywood is a bit more finicky, more likely to warp during transport/storage. I have done at least 7 enclosures that way using a track saw. I love my track saw for larger panels like you are planning.
For the larger/heavier panels 2"/50mm wide painters tape helps minimize racking during assembly. Even with some warped plywood quick sanding and roundover with router cleaned up the edges beautifully.


Did you use yellow carpenters glue PVA or something with a longer working time?
I have been using Titebond III, primarily because I once bought a gallon for general purpose woodworking and it’s never given me a reason to look elsewhere so I keep buying more. Plenty of working time unless you try to glue-up several enclosures in one go, only tried that once…
*edit, spelling
Good stuff. There is no substitute for experience.
Who is the guy that said, A man with experience is not at the mercy of a man with an opinion?
Thanks for your post, Dan. It's great to see someone reporting success with this method. I think a track saw has a real advantage over a table saw for making long mitered edges because you can put vertical down pressure on the piece of wood while cutting (or at least from what I understand). When using a table saw, if the wood is not flat the bow causes the blade to cut at a different height along the workpiece (OK, I just read about this yesterday but is makes total sense) and it is difficult or impossible to press down hard while also sliding the piece across the table and past the blade.
I think I will give this a try. I found another source where I can get custom cut birch ply up at 25, 30 or even 40mm thickness and I hope that I will be able to source nice flat pieces that I will then miter on my saw, after aligning it.
I'm still mulling over using epoxy instead of wood glue. I do have some stuff that is like Tightbond II (not III). It would definitely much nicer to work with glue!
Seems like a made up name, but I guess he's an LDS church guru.
Charlie, defientely try out the miter approach - it does work, but has its own quirks - I only tried it once and have stuck to butt joins since - mostly due to using cnc cuts (very difficult to miters) and i don't very much like the table saw. If you are concerned about the ugly joint (name/appearnce / telegraphing properties) flush trimming and putting a layer of laminate / formica / veneer takes care of the appreance. @hifiside has some nice videos of preppeing butt joints.
Do try out on smaller peices first before going on to the larger cabinet. Track saw may make it easier, but I don't have access to one. Mitered edges certainly makes assembly and finishing easier, but you might run into issues getting to that point whereas butt joints takes multiple passes / methods to get there. Either way both gets you there.
Also, troels uses black mdf - if that's something easily available to you you - using mitered edges might be a one step finished box. Colored mdfs are also available here, but not locally and shipping is so expensive, multple finihsing steps seems more economical! Valchromat or Florescolor
Also, if you are exploring cnc for butt joints, you can specify a little over sized rabbets on the larger panel - that will help align the panels during glue up and then you again flush trim the overhangs. again multiple steps, but gets me closer to getting a good cabinet - unless you have mad cabinet cutting and glueing skill like some of the guys here. No wonder I make less than one pair of cabinets a year!
I'd love to be able to get black Valchromat here at about the same cost as regular MDF.
InDIYana Event Website
Just FYI, Jim Salk used to make his cabinets with 6-sided miters and held them in place exclusively with tape while the glue dried. In fact, clamping 6-sided miters tends to push things around too much - tape holds everything right where it needs to be. As others have said though, the material needs to be perfectly flat and the miters perfect for this to save more trouble than it causes and Jim had a $40k sliding table saw to do the short-edge miters with. For the long-edge miters, a Grizzly cabinet saw with a well aligned fence was sufficient. Since you're only using 16" squares, every edge is probably long enough to get good results with a fence.
You could also potentially dial in a table/fence/jig for your router to get perfect 45s on all edges. It can sometimes be easier to hold the material flat doing this, but would take much longer than on a table saw.
I wouldn't pre-order a big stack of squares, but I think it's worth a shot. It will save a ton of time, trouble and clamps if you can get it to work.
Another tip from Jim if you're going to install bracing - make oversized dadoes (about 1/16"-1/8" in both width and depth) and then fill with liquid nails or other gap-filling glue. Roll the brace up like a burrito when gluing the first 4 sides together, letting the liquid nails take up the slop in the dado. This stops the brace from being a positioning factor during glue-up.
I have started undersizing my braces a bit and using expanding glue such as gorilla glue to hold everything in place - through i am not sure if it helps or not. Else I find my braces to trhow everything out of whack.
Did not understand the "Roll the brace up like a burrito" part @DanP