Please review the site Rules, Terms of Service, and Privacy Policy at your convenience. Rules, TOS, Privacy
Get familiar with the reaction system: Introducing the Reaction System

New Speaker Cabinets

Hey guys, 

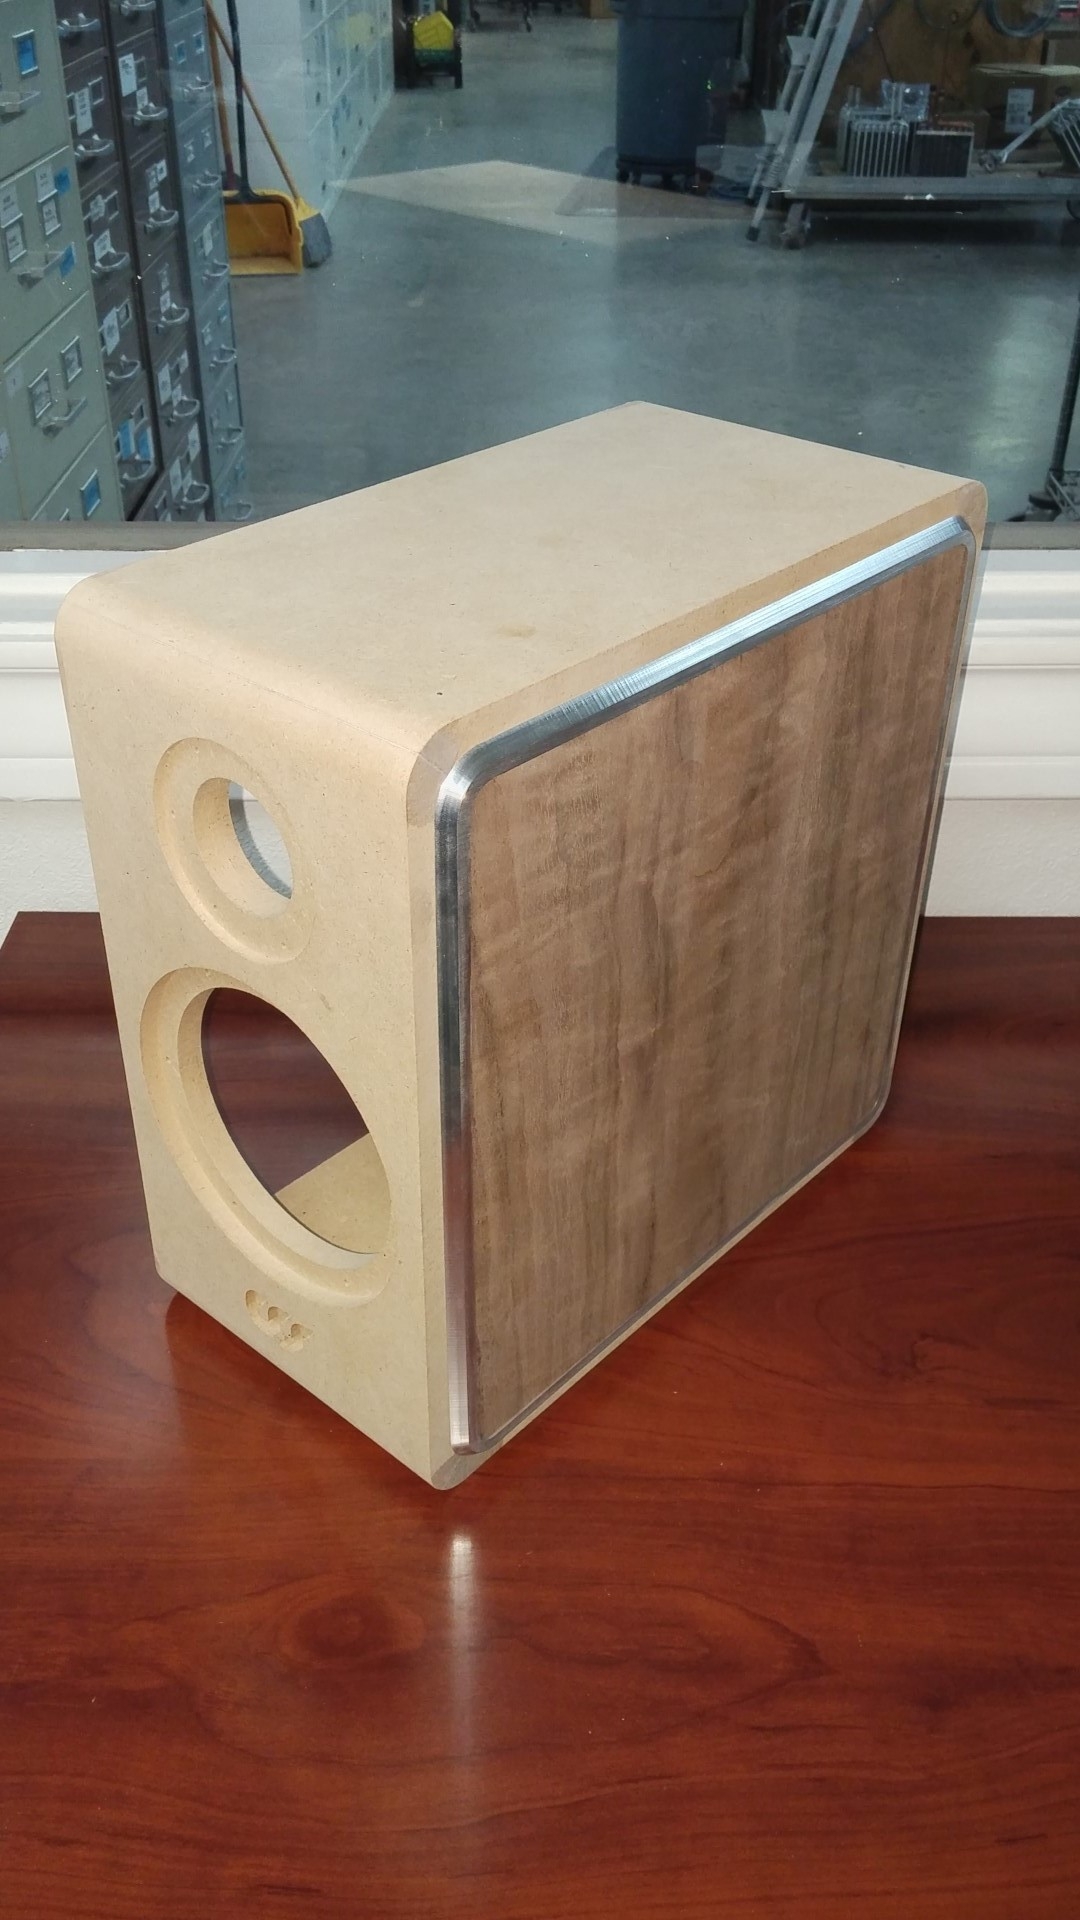
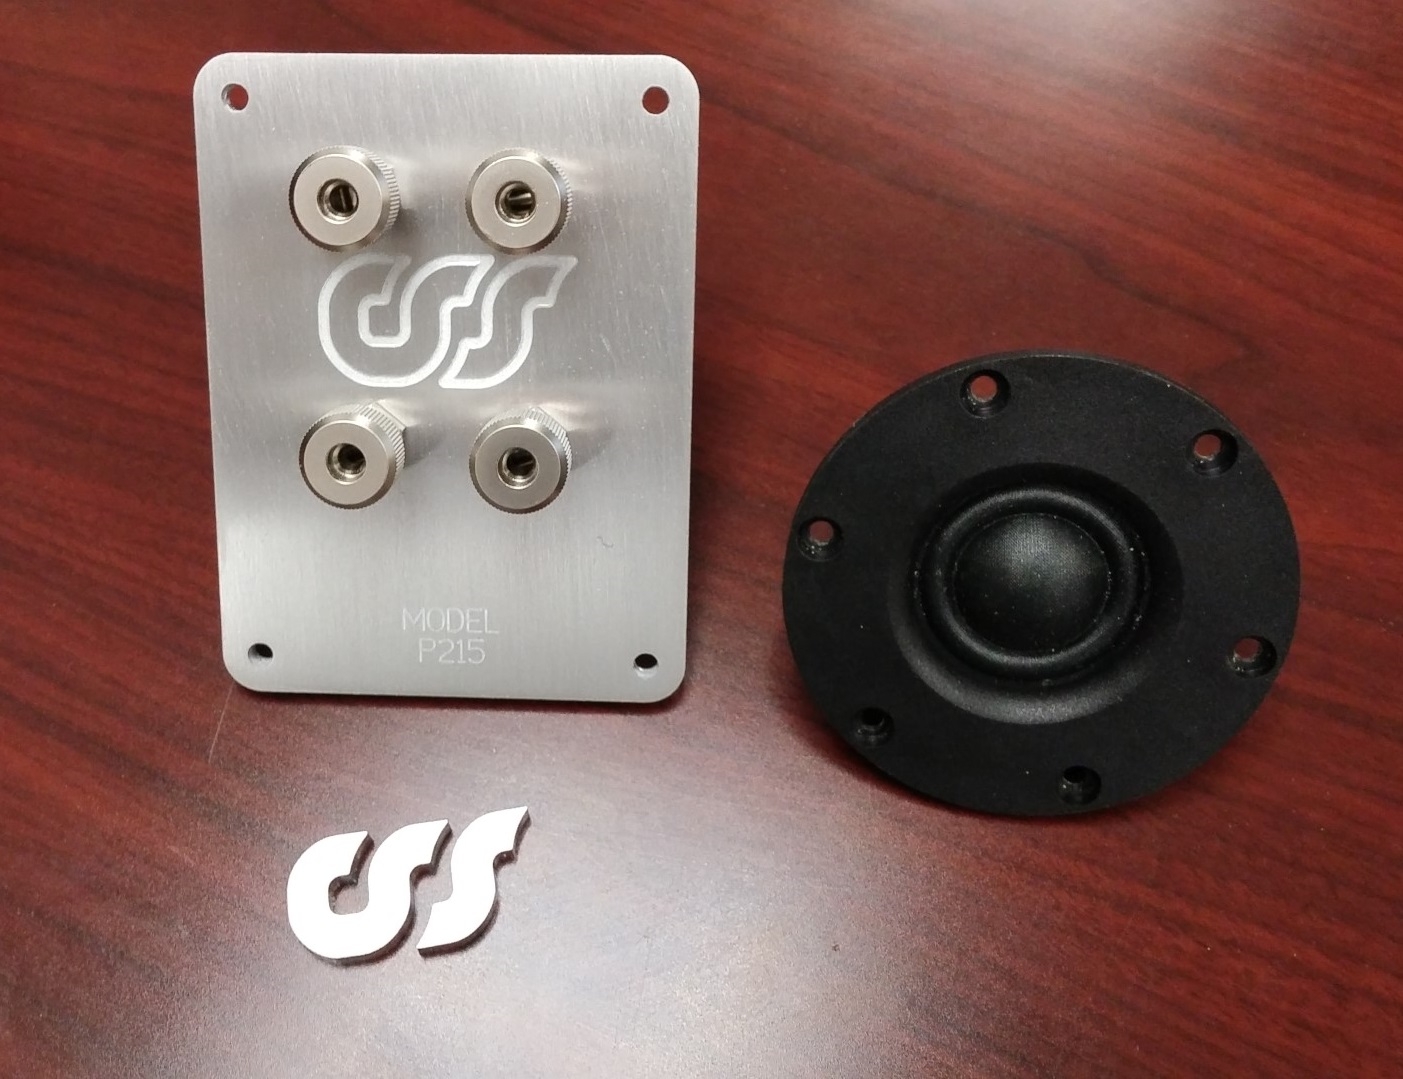
We wanted to share some early pictures of our cabinets we are having made for the Model P215. We are looking at making some nice, reasonably priced production cabs for these kits and offering in two standard finishes. I'm not sure yet on final price, but they should look awesome once complete. These will be finished in satin white automotive and natural satin walnut. Probably not something that many people here will be interested in buying but figured you'd appreciate the construction ;)


Nicholas_23jhollanderdcibelBryan@MACTurn2JavadSJasonPS7910

Comments

  • Ooooh la la ! 
  • That is an awesome design.  I wish someone made a bare 45 degree jointed MDF box
    Bryan@MAC
     John H, btw forum has decided I don't get emails
  • Wolf said:
    That the Satori 5" design?
    Yup this one: 
    My signature goes here
  • Yeah, we had the cab made for those first since we were still tweaking the Criton. We are going to have something similar for the Criton made as well. Looking at offering two finishes, this one and black/rosewood combos, plus the option to customize if you want.

    - Kerry
  • Nice cabinet - do the CSS letters go in the matching recess in the front of the box?
  • Nice cabinet - do the CSS letters go in the matching recess in the front of the box?
    Yes they do, sir.  Good eye. 

    Dan
    squamishdroc
  • Almost ready. Just a little clear coat left and these will be done.

    jhollanderBryan@MACTurn2
  • very nice. How did you get that aluminium trim and what is the wood insert. Looks really slick.
  • The aluminum was cut on a CNC machine that can handle aluminum feed rates and bit speeds. The inset is an aluminum CSS logo.
  • Looks sharp! Aluminum makes a damn mess in the shop.
  • That's a pretty snazzy looking cabinet! Though the screws on the rear plate are sticking out like a sore thumb for me. They should be a flat head so they can be flush with the plate, unfortunately it may mean changing the bit in your CNC router. Otherwise it is excellent, I hope you are going to offer it is a few different colours and wood types. I'm a fan of white and caramel bamboo myself ;)
    I'm not deaf, I'm just not listening.
  • D1PP1N said:
    Looks sharp! Aluminum makes a damn mess in the shop.
    Second only to PVC
    Bryan@MACD1PP1N
     John H, btw forum has decided I don't get emails
  • Yeh pvc, sign foam and insulation makes a furry looking coat on everything. 
  • So does Corian
  • That is an awesome design.  I wish someone made a bare 45 degree jointed MDF box
    I wonder if i could use a drawer lock style bit to do this. The sides and tops arent bad but recessing the front and rear of the speaker at 45 deg as well become a little tricky. Is the general concensus that the front and rear dont need to be recessed but the top/bottom/sides should be mitered? I this a well placed brace could make glue ups nicer as well. 
  • I've done complete 45 degree, tape, and fold up boxes for the smaller speakers.  My preference is to keep the front baffle separate.  That allows the use of some fancy hardwood or rear mounted drivers.

    Tape has been very easy.  I only got into trouble trying to add clamps plus tape.  Once I pushed one panel out of place everything went to hell.  Now it's just tape and checking square

    JavadS
     John H, btw forum has decided I don't get emails
  • Tape how? does it have enough to hold it together while gluing?
  • ani_101 said:
    Tape how? does it have enough to hold it together while gluing?
    Plenty of strength. I use wide painters tape. Put it on the outside, across the joints. Add glue and fold it up. No clamps and an hr or so later, you are ready for the next stage.
  • There use to be a good video but I can't find it.  Basically cut your 5 sided or six sided box with 45 degree miter joints lay out the panels on your work bench align them with a long straight edge an then tape the seams along the length of each joint.  Carefully turn the taped panels over.  Spread glue on all the joints.  I usually work quickly or have to reapply more glue.  Then fold the box up.  I add tape across the joints (joints with no tape) to hold the panels together.

    I'll keep looking for the video
     John H, btw forum has decided I don't get emails
  • Here are a few... can't find the speaker one


     John H, btw forum has decided I don't get emails
  • Thanks, interesting - will cut down a lot of assemble, glue clamp up time... now if only i can get a good 45deg cut, on my list to try
  • it's called, miterfolding.


  • D1PP1N said:
    Looks sharp! Aluminum makes a damn mess in the shop.
    Second only to PVC

    The bad thing about PVC is it seems gets statically charged when cut so the particles stick to everything.
  • It's not too tricky with small cabinets.  Never tried with anything large.


    My signature goes here
  • I suppose the tape will come off with bigger cabinet while trying to turn/fold. Will try this summer with some small cabinets
  • I did some 50 liter short tower cabinets.  The issue was finding a big enough table for taping the parts and then turning it over.  I kind of folded and rolled it over
     John H, btw forum has decided I don't get emails
  • I've got a pair of 2.5 cu ft 45" tall towers via Meniscus. They are rabbeted but I still used tape and folded them using band clamps to hold them while the glue set. I put the rear panel on (also rabbeted) just to hold sq. Still have no idea what drivers I'm putting in them lol
    ani_101
Sign In or Register to comment.