Site Links
Howdy, Stranger!
It looks like you're new here. If you want to get involved, click one of these buttons!
Quick Links
Categories
Who's Online (0)
My Shop Kit

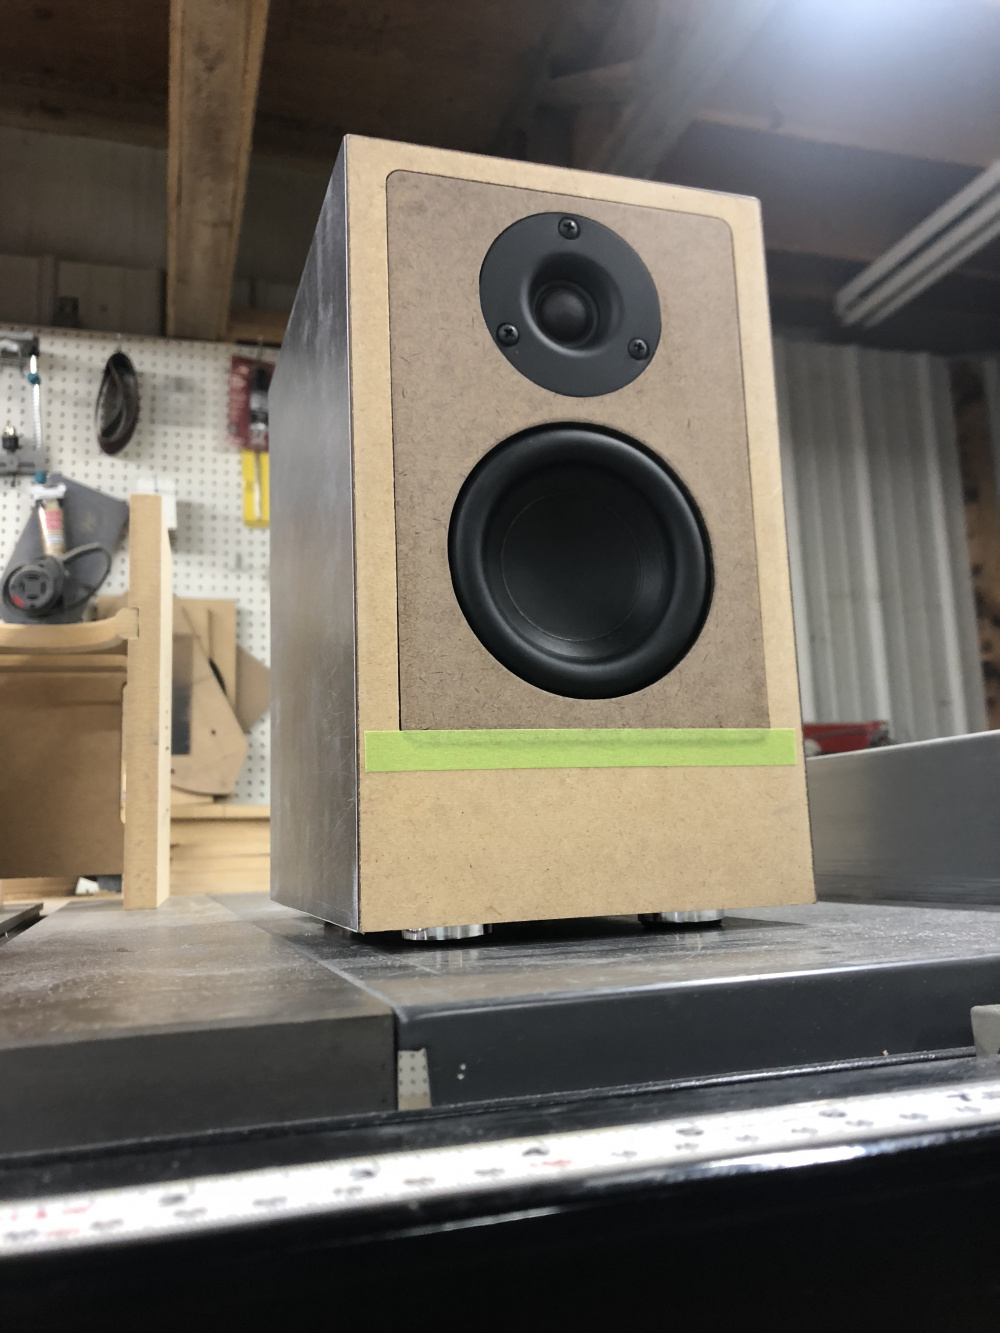
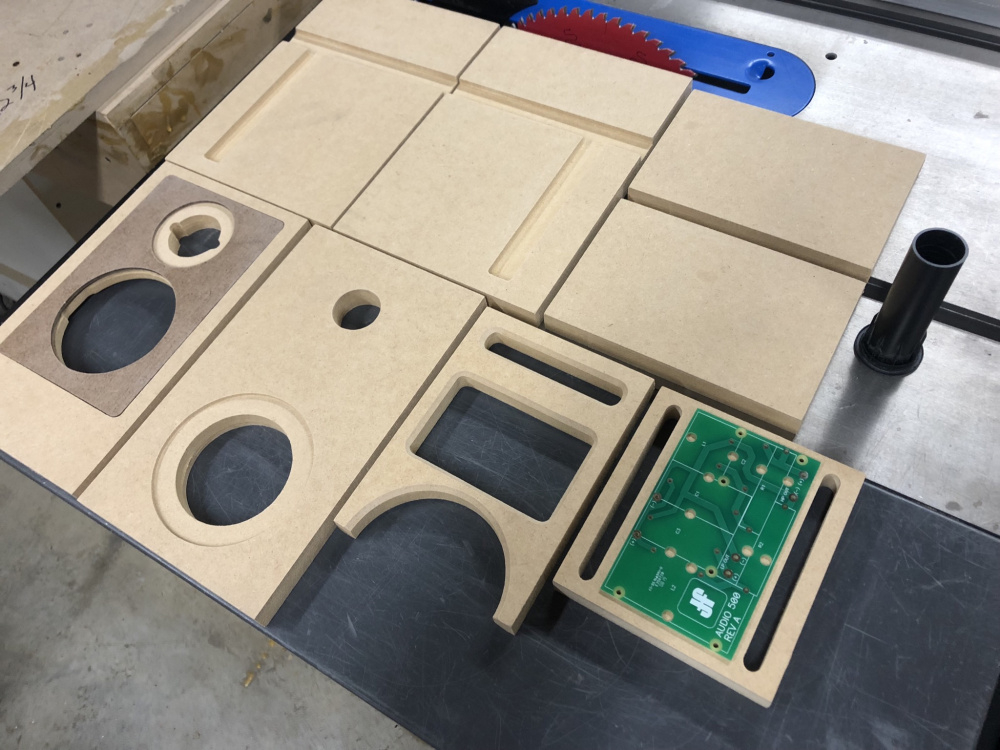
Since I get asked to build a set of bookshelves or towers for people throughout the year. I decide to build a few kits so I don’t have to spend countless hours searching for drivers and tuning crossovers that nobody would want to pay for. I used a Peerless 830855 Woofer and a peerless DX20 tweeter which I have plenty of. The crossovers aren’t finalized yet do to the rain we had the last couple days makes for a noisy shop but we are close. I can get 4 cabinets per 1/2 sheet of mdf which makes them around $4 a cabinet. Glue up is very simple and the laminate pieces I use the finish the edges (for no wood shrinkage marks) are scrapes from the years of previous projects. Terminal cup and will probably get changed on the final one but here’s what I came up with.
Tuned@53hz
.15 cuft
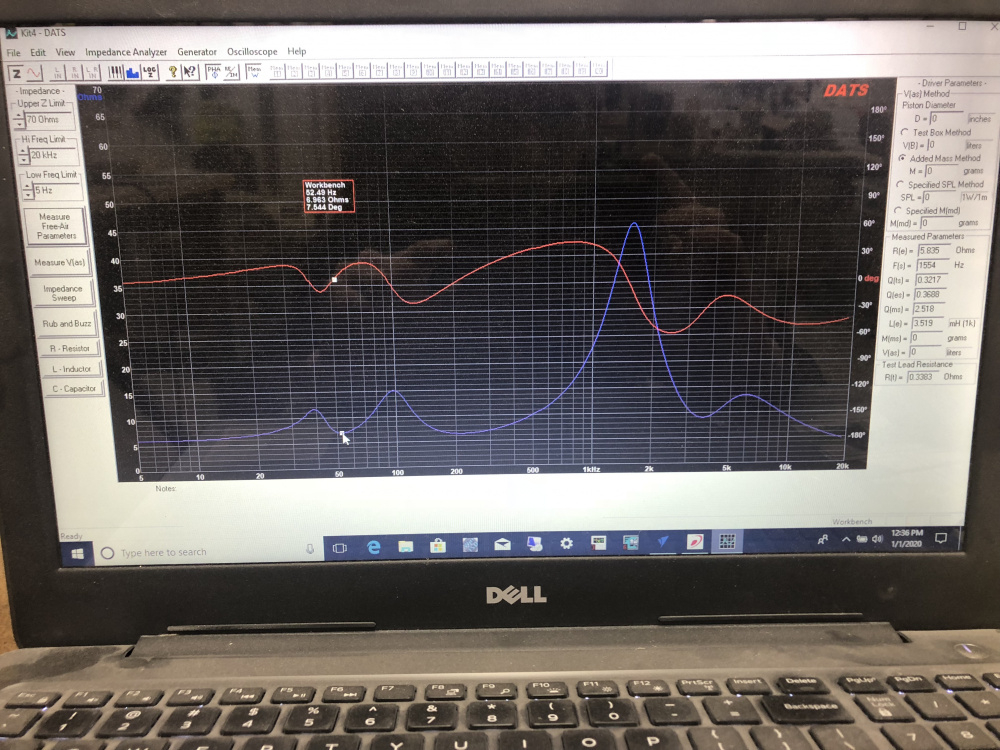
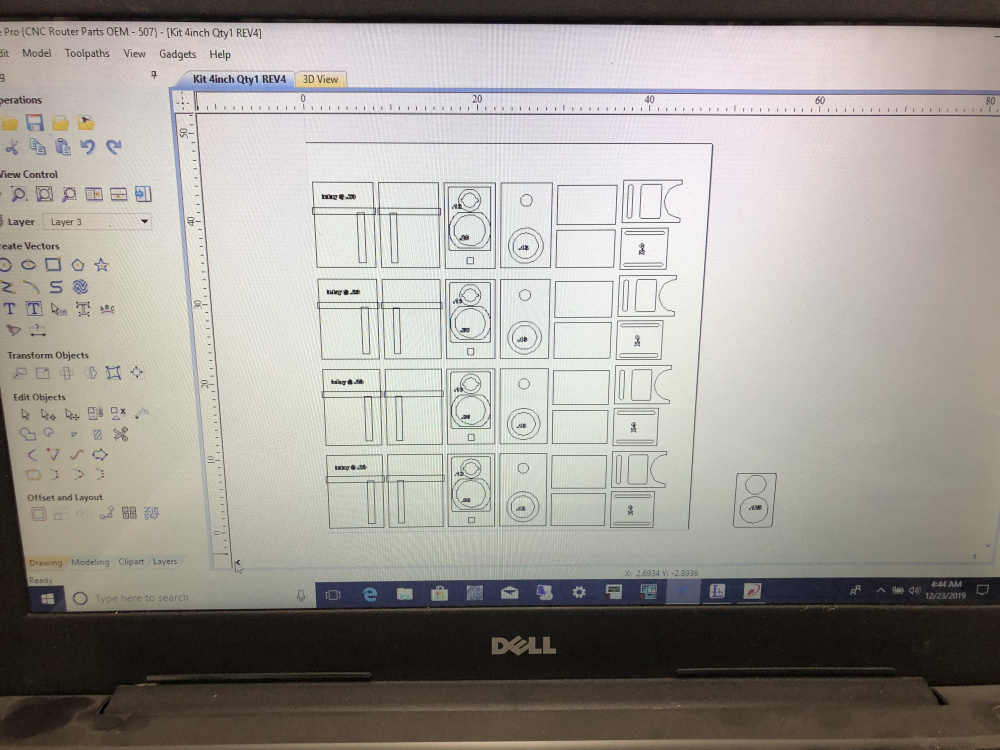
Tuned@53hz
.15 cuft


Comments
InDIYana Event Website
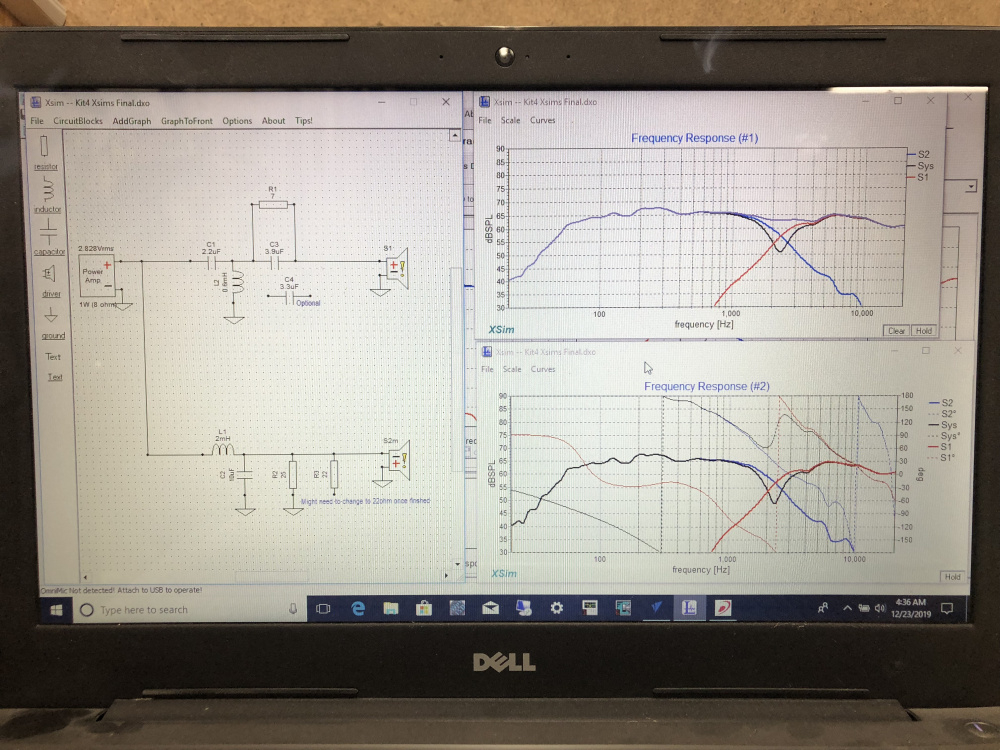
Look at it like this- you have a coil (lowpass) and a resistor (shunt) directly across the amplifier outputs, so the resistor will get warm being the flat load across the outputs. I always use 25W+ resistors if I have to place them across a woofer for this reason.
InDIYana Event Website
https://www.jfcomponents.com/
https://www.jfcomponents.com/
https://www.jfcomponents.com/
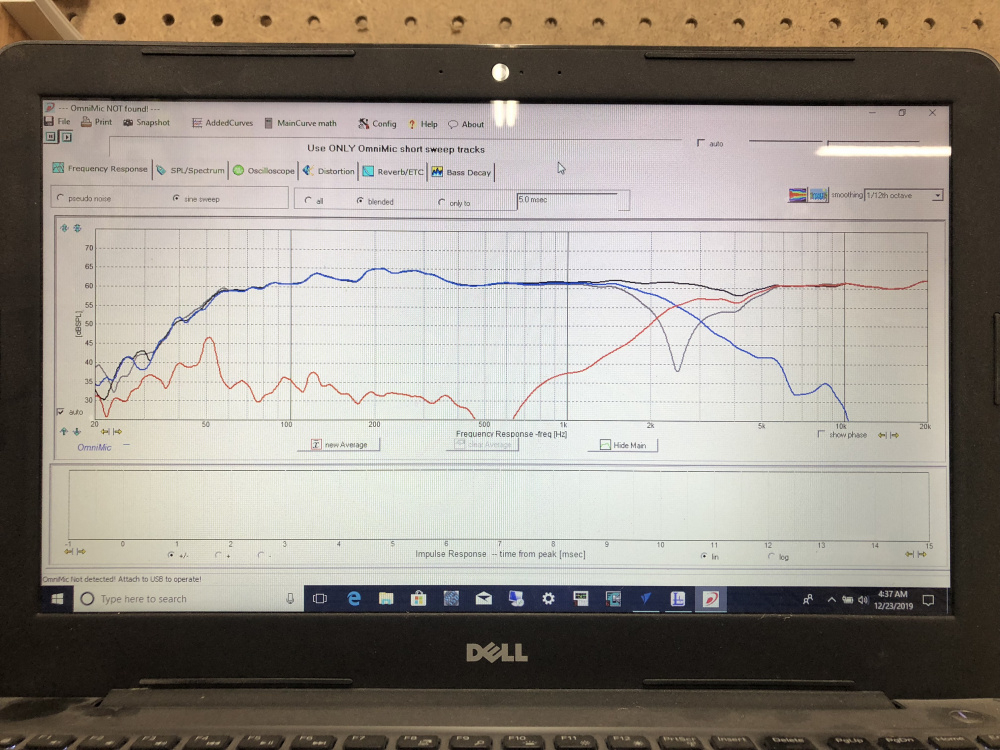
Love seeing your projects and thank you for sharing this one here. This is just a question, not a criticism. Are your measurements taken at that low of a SPL? How far is your mic away? I ask because I usually send my wife and kids away somewhere, turn off the furnace and all house fans, dishwasher, etc. and still my noise floor is around 50-55 dB. So when I measure I measure with the mic as close as I can but still capture the entire baffle effect (at least 3 times the baffle width), and I crank the volume as high as I can without damaging the poor tweeter. 90 dB at about 30" is usually about where I'm at.
.
https://www.jfcomponents.com/
https://www.jfcomponents.com/
https://www.jfcomponents.com/
https://www.jfcomponents.com/
Also what is the engine enable for? Is that the darker shade on the baffle?
And what do you mean by "cut it"?
Thanks for this series...
I’ll know more when that actually happens
https://www.jfcomponents.com/
https://www.jfcomponents.com/
1 block sand all sides of enclosure with 80 grit and a hard sanding block (piece of mdf)
2. roll on glue (titebond blue). Enclosure sides 2 coats. Laminate 1 coat. Then press on with a iron.
3. After cool down router each side flush as you put it on.
5. Router round over
6. 180 grit DA (Dual action sander) all laminate to give it a good tooth.
7. 220 grit all round overs and other surfaces left.
8. Blow it off well. (Air hose, air in a can, etc..)
9. Mix primer 4:1 and roll on. 15 mins in between coats. Make sure the roller is completely wet with each coat or it will pull up the existing coat.
10. After 4 hour @ 70degs. 320 grit block sand enclosure. Re-Primer spots if needed.
11. I used the 2k primer surfacer (rattle can) as a sealer surfacer which after a 1 hour dried very good and sanded quick with 500 grit nicely.
12. blow it off good. And wipe gently with a quality Tack cloth.
13. shake color can. Fusion nickel silver paint. 1.00 per can at Ace bargain bin. 20 min flash time between coats and at least 4 coats. Let dry around 45 mins. Do Not tack cloth before clearing..
14. Rattle can Clear coat. Follow directions on can. Spray first coat med/wet, second and third Wet I used a 10 min flash time between all coats. These air dried @75 degrees for around 16 hrs before wet sanding and buffing.
https://www.jfcomponents.com/
https://www.jfcomponents.com/