Site Links
Howdy, Stranger!
It looks like you're new here. If you want to get involved, click one of these buttons!
Quick Links
Categories
In this Discussion
Who's Online (0)
Adventures in painting

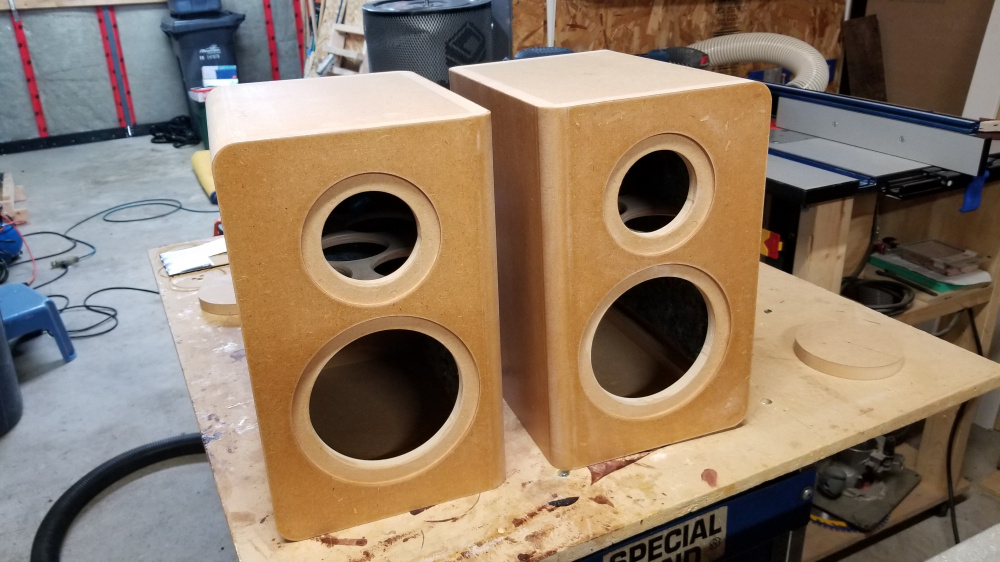
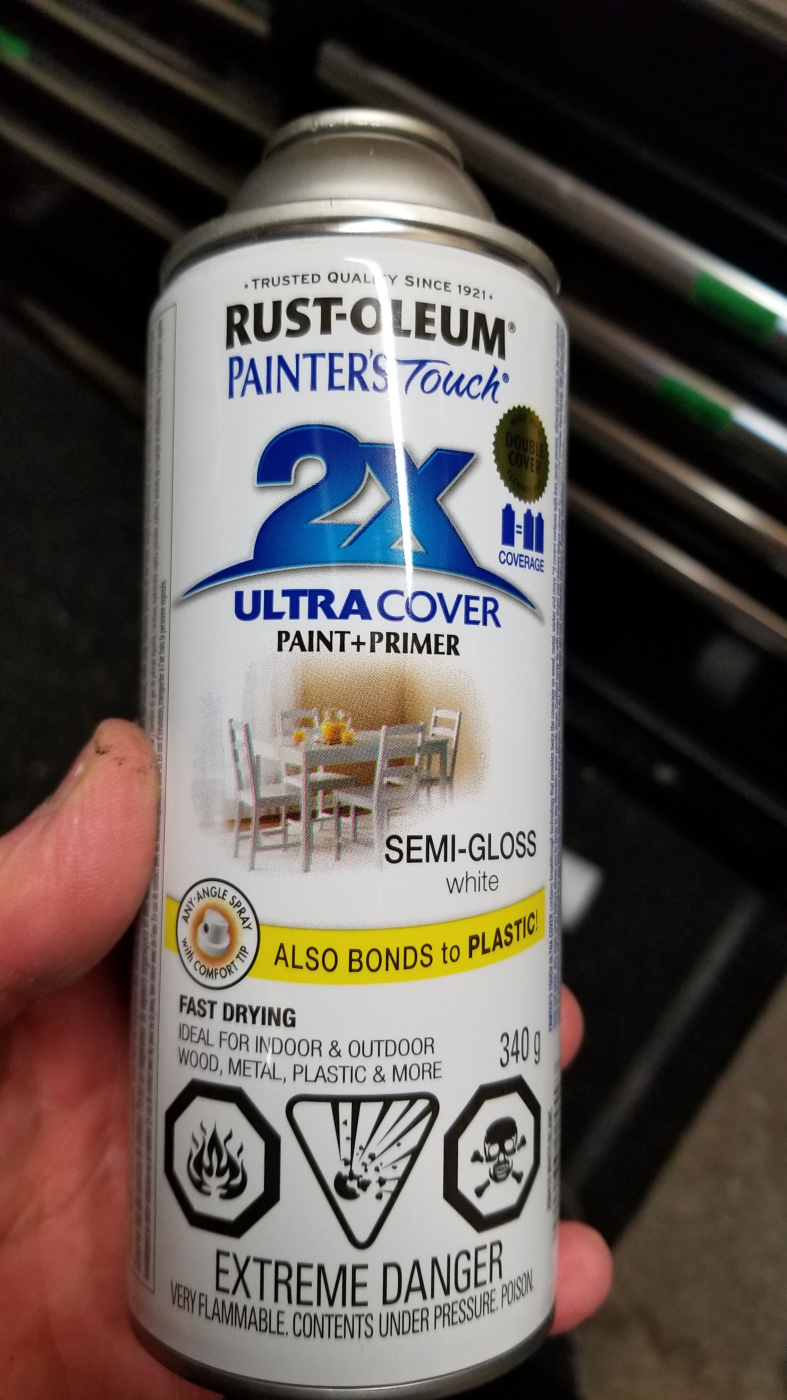
I have wanted to do a build that was half paint and half veneer - I have never done a painted box before so I decided to give it a go! Needless to say the results were terrible ![]() I prepped the boxes with about 4 coats of shellac and got some Rust-Oleum paint & primer - even with super light passes the paint would just run right down the boxes. After letting it sit and dry for about 4 days I tried to sand all the paint off but all it did was clog up the sandpaper and leave scratches in the surface. I don't know if I should have let it sit longer maybe but lesson learned - don't use the 2in1 paints. It worked ok on flat surfaces - like my test piece - but not on vertical.
I prepped the boxes with about 4 coats of shellac and got some Rust-Oleum paint & primer - even with super light passes the paint would just run right down the boxes. After letting it sit and dry for about 4 days I tried to sand all the paint off but all it did was clog up the sandpaper and leave scratches in the surface. I don't know if I should have let it sit longer maybe but lesson learned - don't use the 2in1 paints. It worked ok on flat surfaces - like my test piece - but not on vertical.
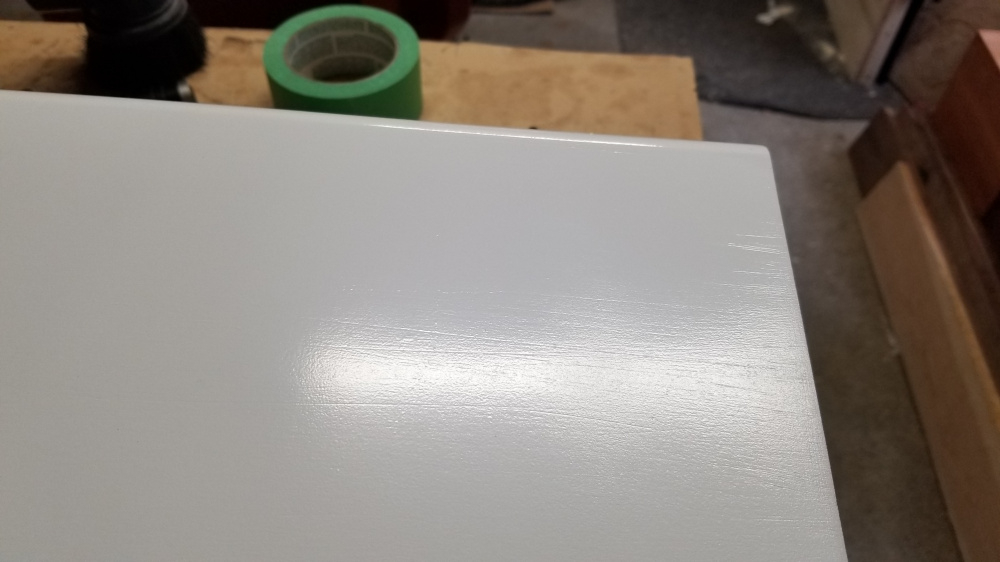
Next I tried some Duplicolor automotive paint and did a primer and top coat - turned out much better except you can see all the scratches and flaws in the old paint that I couldn't sand off. Oh well - at least I know what to do next time ![]() Moral of the story is don't rush the job (I'm pretty impatient when it comes to some things) and don't buy the 2in1 paints. Now off to work on the crosssover design for this speaker. Hopefully my veneer shows up tomorrow and I can get these wrapped up.
Moral of the story is don't rush the job (I'm pretty impatient when it comes to some things) and don't buy the 2in1 paints. Now off to work on the crosssover design for this speaker. Hopefully my veneer shows up tomorrow and I can get these wrapped up.
Comments
I don't know what you did to link those images, but it ain't right..let me fix that for you. In the order you posted above:
The 2x paint is a "quick fix" type of product, I don't think it was ever intended for fine furniture. I've used it before and didn't have any major issues but it does come out heavy and fast.
Not sure what your process was for sanding, but those appear to be some rather heavy scratches, was it just 80 grit? For paint removal I like to use chemical stripper to get the bulk of the paint off before sanding, as paint tends to clog up the paper in no time. Also use the fancy mesh paper to prevent clogging.
Assuming you've used clear shellac, I'd maybe give BIN shellac primer a try, I can't recommend it enough. Since it's white you can easy see the coverage and where you've sanded through, and being shellac you can coat and sand and re-coat and sand in very little time.
Thanks for that") - I sanded with some 80 grit and then tried some 120 - I just wanted to get them painted when the weather was nice for one day so I just rushed the job - lesson learned. I did use clear shellac - I wanted to use the Bin but they only had a gallon of it here at the Rona and it was almost $100. I do want to try that mesh sandpaper - just need to finish up what I have here and then I will try it.
- I sanded with some 80 grit and then tried some 120 - I just wanted to get them painted when the weather was nice for one day so I just rushed the job - lesson learned. I did use clear shellac - I wanted to use the Bin but they only had a gallon of it here at the Rona and it was almost $100. I do want to try that mesh sandpaper - just need to finish up what I have here and then I will try it.
I have done a fair amount of rattle can painting, mostly black(ish) baffles for veneered boxes. Really hate the Rustoleum stuff. If you ever want to try again, Krylon brand is my go-to.
2X on the 2X rattle cans. I had the same experience, goes on thick and fast and then gums up the sandpaper between coats. I initially used this on my Plumber's Delight build and had to scrap and sand it all off. Maybe because it goes on so thick, I didn't wait long enough between coats. Not sure. Will see if I can find a picture of the messed up speakers and post one.
It seems to work well if it is on a flat surface - my test piece looked good - just can't be vertical unfortunately.
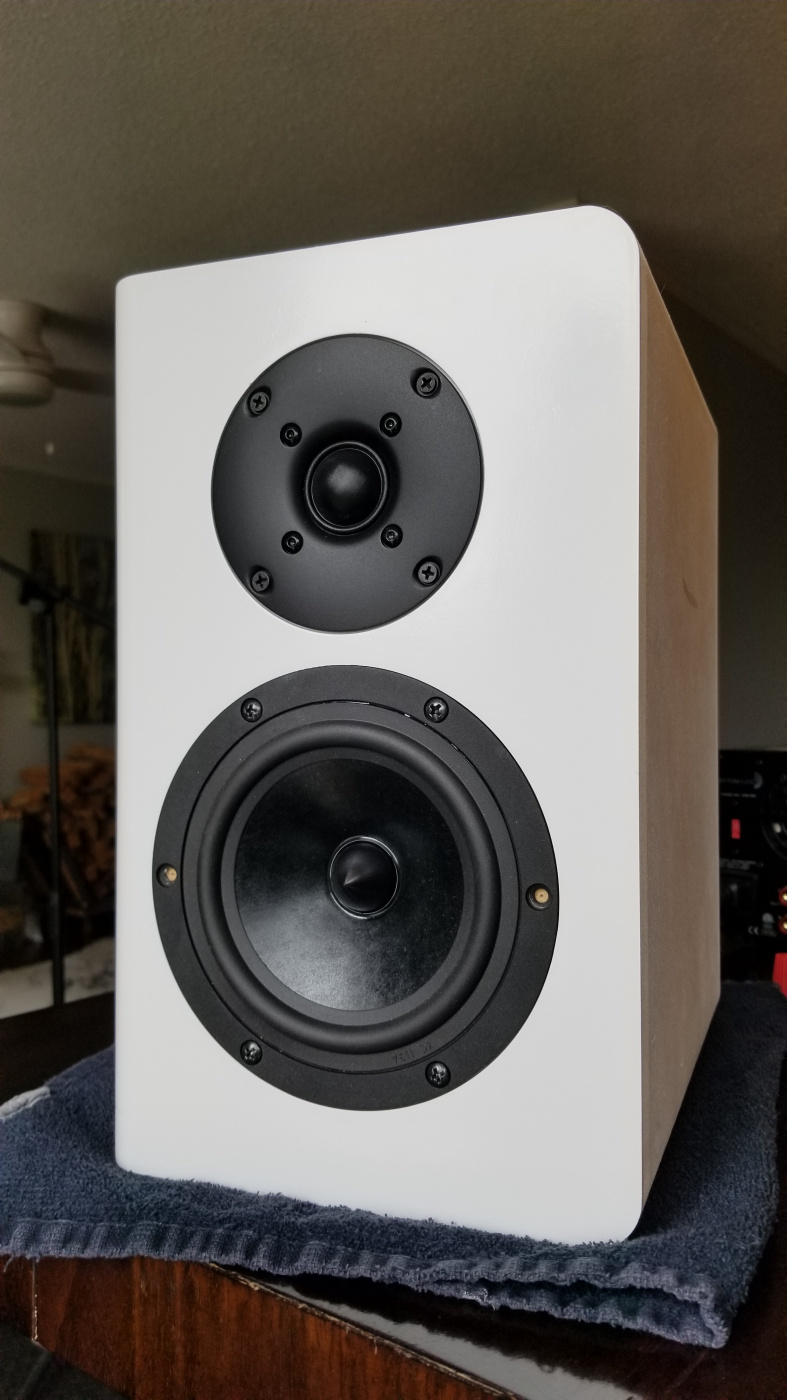
RS150P & SB26??? Whatever they are they look very nice together.
I too really don't like Rustoleum products but have used them a lot because sometimes they are the only ones in stock and are usually cheap.
+2 or is it +3 on the BIN shellac primer. Great stuff!
You can always sand the scratches out, and repaint them, but sand the cabinets down to 400 before the repaint.
FWIW I find a sponge sander works very well with the BIN primer.
..........Or the correct color. I prefer Krylon/Duplicolor too.
InDIYana Event Website
Yes - Sb26stc004 and the 8 ohm RS150P - should be a good combo - I made a set of these for a guy as his rear surrounds but they were sealed due to space limitations. > @ugly_woofer said:
I'm kind of past that point now - I just want to get them finished. Plus I have spent enough on paint and primer the last few weeks")
Very nice driver combo!
It's be a while since I painted my Plumber Delight's, but I found the old, empty Rust0leum 2X rattle can that I used. It was the 2X Gray Primer (280704), not the semi-gloss white Paint + Primer that you used. The can has the same 2X Ultra Cover coverage label and says "also bonds to Plastic" just like your photo above. As I recall, I did not have a problem with vertical runs. I sprayed both flat and vertical with no problem. I just noticed that it went on very thick with fast coverage for a rattle can. The can says it dries to the touch in 20 minutes, to handle in 1 hour, and fully dry in 24 hours. But it was still soft after 24 hours and gummed up my sandpaper. You can see the sanding scratches in the attached picture where I tried to fix the cabinet. I can still remember what a gummed up mess it was.
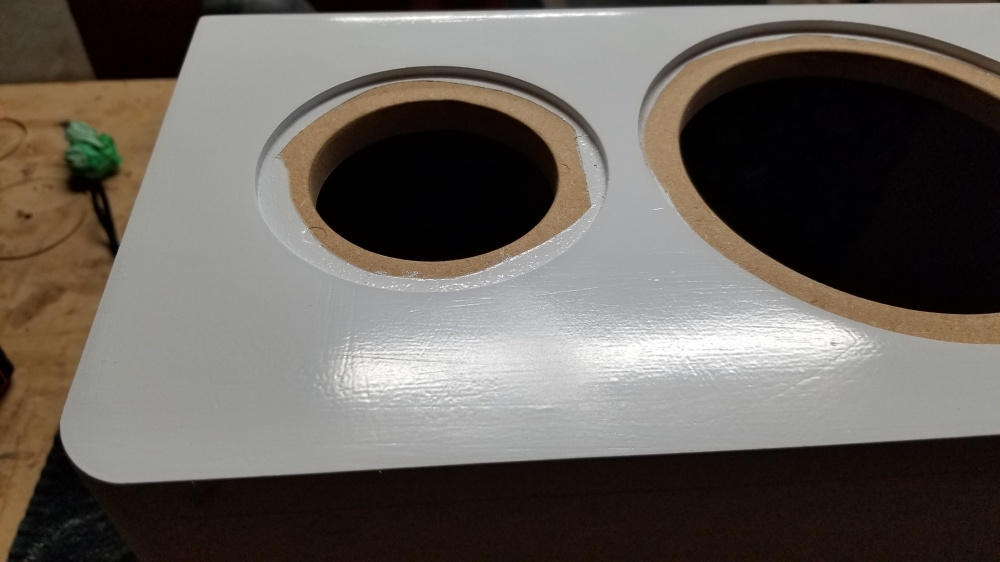
Close up of facet:
I will just have to remember to stay away from the 2x Ultra Coverage cans I guess")
Cool cabinets.
They will look much better once I get the veneer on them. Hopefully tomorrow 👍
The only real successes I've had with Rustoleum is when I've cured it in an oven. Luckily we have industrial ovens at work. I would NEVER use our family oven. Not even sure how well it would work since it's just a sealed box with electric heating coils. Our ovens at work bring in a certain amount of fresh air, heat it with a natural gas burner, and exhaust the baked out solvents up and out a stack on the roof.
Got some veneer on and a few coats of poly - final crossover work next")
Nice! The opposite edge roundovers look very interesting. Have not seen that before; looks really cool. Draws my eye around the speaker to examin every detail.
I saw another build on social media somewhere where they had done this - thought it looked cool so I gave it a go")
Asymmetric Baffle Edge Diffraction . . .")
Some beauty shots from out in the sun")
Crossover point ended up being a little higher than I thought it would at 3k but it had good phase response and the rev null was pretty deep. Pretty happy with how they turned out - just can't look to close at the paint job
Looks like modern architecture")
Nicely done!
InDIYana Event Website
Yeah, those are really cool looking🤘🏼
Cool! So, how do they sound? Do you listen to them with the two rounded edges toward the listener or away from the listener? Just wondering, as this feature would provide a good test of how roundovers affect the stereo imaging (or not at all).
Place them with the rounded edges to the inside of the listening spot for best/smoothest sound.
They look great, man.
Thanks guys! I have not tried a back to back listening test yet - will have to try that this week and see if I can hear a difference.