Site Links
Howdy, Stranger!
It looks like you're new here. If you want to get involved, click one of these buttons!
Quick Links
Categories
In this Discussion
Who's Online (0)
Picking up an old project again.

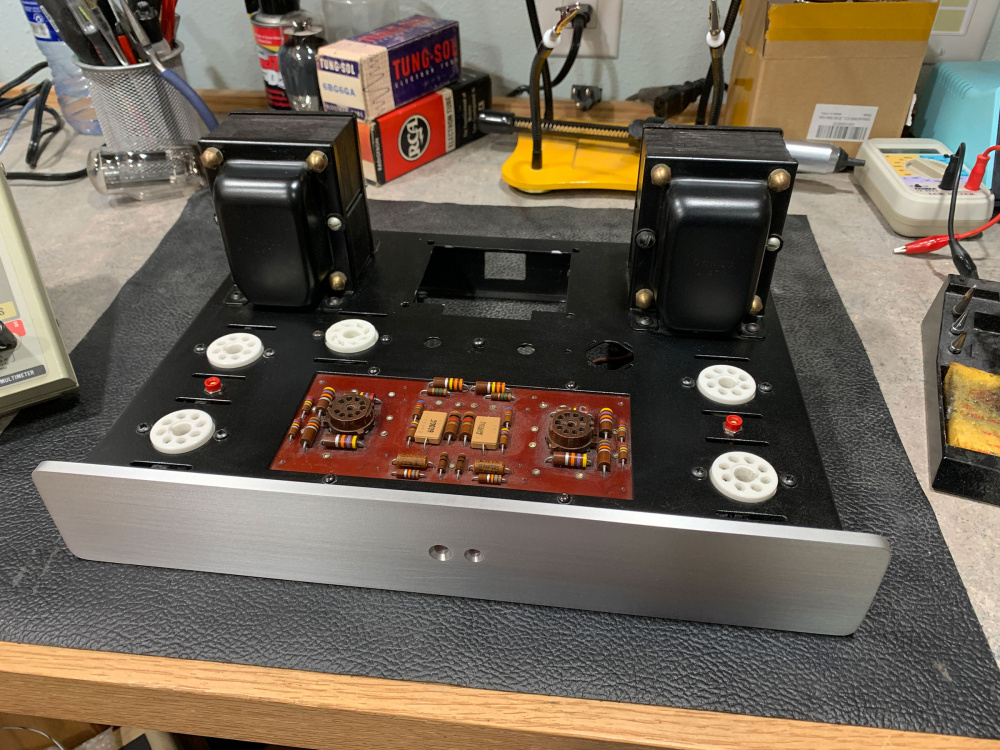
Our oldest son gave me a little tube buffered headphone amp for Christmas. I scrounged around the boxes of tubes to see if I had any subs for the stock tubes and came across this Dynaco ST-70 rebuild I had been hoping to finish last year. My wife gave me the VTA board kit last Christmas and I was going to order an upgraded power transformer, but never got around to it. Life (and work!) gets in the way sometimes. So here we are a year later & I'm going to start soldering & wiring tomorrow. I'll order the power transformer from Triode Electronics on Monday.


Comments
well ... um, yeah ... you know I'm interested in this ...
Hi Tom, is this a specific kit?
Yes - it's from tubes4hifi.com. I'm going to have to read up on it again, but it has a constant current source on the phase splitters and I think it moves the bias circuit to the board and might be a little better regulated.
KB - I knew you would be interested!
If this turns out well, I may try to convert one of my other ST-70s to a PP 6B4G. Those are octal indirect-heated version of a 2A3 tube, which used to be one of my favorite tubes to work with.
That VTA upgrade and pwr xformer upgrade should really improve the sound. Not that a ST-70 sounds bad to begin with.
Do I spy some Audyn Q4 caps? For DC coupling?
I really like that thick front aluminum panel. Did you make it?
Yeah - Q4's for the coupling caps. Who would have thought that's what would be in the kit? I did make the front panel. Back panel is some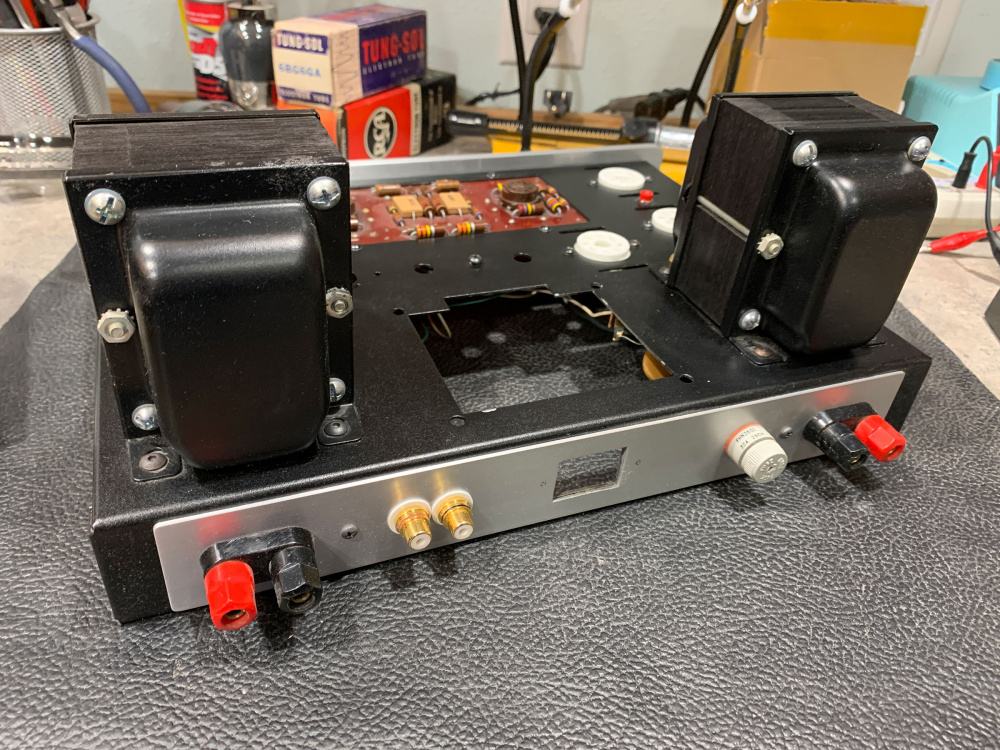
thinner stuff. Just some surplus sheet stock I used to be able to find at Rockwell's surplus outlet. Too bad they closed it to the public.
Looks like I'm going to have to repaint this thing. I didn't prep it well enough and it's flaking off every time I turn a screw. Buddy of mine says he does an acetone scrub, then sand, prime, sand again, and then 2 color coats. I might just get it powder coated if it's not too expensive. I can have my son sandblast it at work, so that might help keep costs down.
I like that you put the rca's on the back, a really pretty amp.
Powder coating something small like that will be pretty cheap.
Some of my engine building friends use high temp paint and bake it for a very tough cure. I have done this before (i have access to an industrial oven) and the finish was super hard when done. You can also try the paints made for appliances.
Thanks! I always hated having inputs on the front of the ST-70s. And that goofy power switch on the back will be moved up front too. I'm also going to make some thin wood side panels to hide the holes the previous owner made. Maybe walnut - we'll see what I can find in the shop. Wish I had a before picture - this one was a real rust bucket. I have another that was pretty bad too. Just painted that one black. Maybe I should make a front panel for it too.
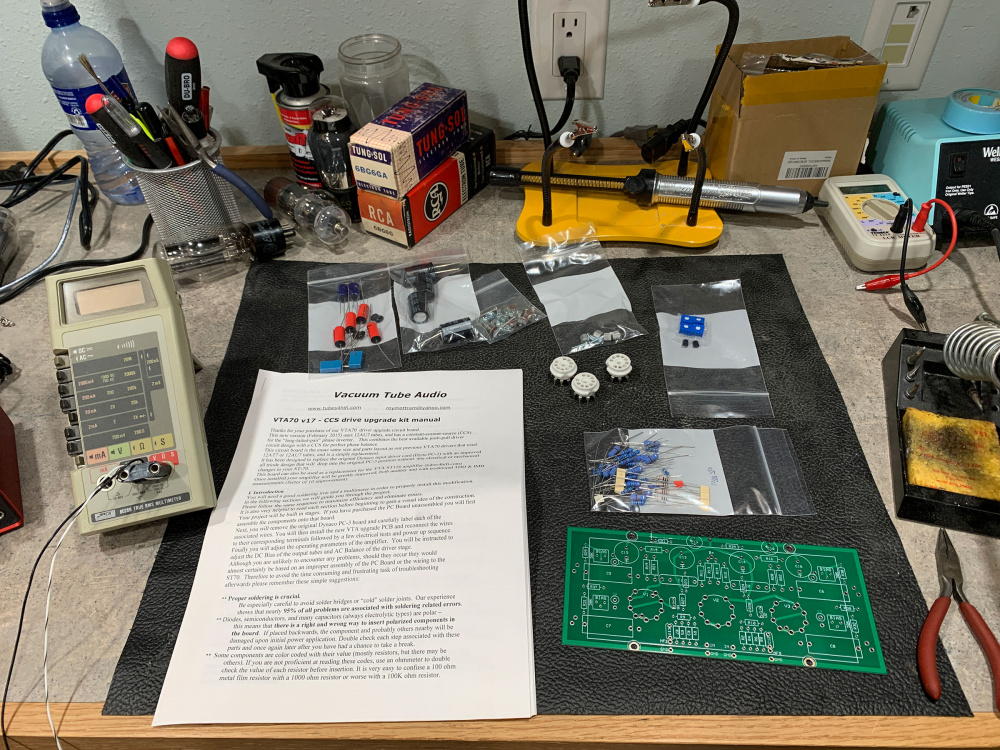
Got the new power transformer in the mail today. Wow! This thing is a beast. You can see the original in the background is about half the size. I'm lead to believe this particular amp was one of the early kits with a small (undersized?) power transformer. My two other ST-70s have slightly larger PTs than this one, indicating they were later models. But they're still not nearly the size of this upgraded transformer from Triode Electronics.
ST-70 #2 of 3. Stock driver/splitter board.
I've been working little by little on this. I had my son sandblast the chassis at work for me. I ended up using some self-etching primer that I found on the shelf, then 2 coats of Rust-Oleum Hammered Metal. I like the look, but this paint is still soft and tearing under the screw heads even after letting it cure for a week. I should have sanded more.
I found a bottom plate that fits perfectly inside the lip along the bottom. It stuck out a bit on the sides, so I made some walnut end panels with a rabbet for the extra width. I had planned on screwing them on from the inside - until I realized once the bottom panel is in place I wouldn't be able to get to the screws. Duh! So now I have inset screws to hold them in place - I suppose I can live with that. I had to order a 1/4-40 tap to mount the power switch in the front panel. I'm still waffling on the LED color for the indicator light.
I'm taking my sweet time on wiring this one. The heater connections are almost finished. I'm waiting on some safety caps and need to find some standoffs to raise some little terminal lugs above the sockets for the cathode resistors. I'm going to bring each one back to the star ground point, rather than rely on the chassis to carry all that current. The switches will toggle between each tube's cathode to measure bias. A line from each side will come up to the test points where the old pots used to be.
Wow, that is turning into a work of art. I have no idea what anything is, but it's beautiful.
TomZ
**ZARBO AUDIO ** https://www.youtube.com/channel/UCEZUyvobRaFQSTl6NdOwgxQ
I've had some success curing Rust-Oleum paint in an industrial oven (here at work). Air dry for 15 minutes then 150F for an hour makes it nice and hard. Obviously too late for that now.
Beautiful aesthetics and execution. Almost makes me want a tube rig.
All electronics can be cooked to 85c without failure (Comon practice for drying). Some can even operate at 85c or up to 125c. If you take the sides off and bake it, your electronics will be fine.
That's interesting! I didn't know you could bake whole pc boards. I guess it makes sense, especially for tube gear.
I work in a lab that builds automotive electronics. We bake everything and verify that it is working at 85c. Even consumer grade electronics are rated to be stored at 85c. For low grade consumer electronics that might be their upper limit for operation. The circuit boards themselves are rated for mutch higher temps and would idealy be heated before you even solder them.
Solder a board that is already at 180c and your joints will look amazing. Just don't touch it...
One step forward...and a bit of paint chips off around a screw hole!
I'm back to a bare chassis. I pulled everything off and my son will sandblast it again. Then I'm going to bite the bullet and have it powder coated. I think it will be worth the wait and added expense in the end. At this rate, the Pass F6 chassis I just ordered might show up before this one is back from the paint shop.
I dropped the chassis off at the powder coat shop yesterday. Going to have them do a subtle texture - black was what looked best on their sample pieces. They should have it done in a week or less. $40 plus tax.
Seems very reasonable $ for a one off piece.
That's cheap! I had no idea
I think this shop does a lot of custom work - guns, car & motorcycle parts. They don't do any traditional painting, just powder coating and hydro dipping.
http://tammiscustomcoating.com/
I have a guy local that does stuff cheap. They make a lot of money doing stuff for Ford, but help the "little guy" out. He charged me $25 a piece for my calipers with me supplying the powder.
I want to try a home kit, it's not hard to do, the biggest issue is the the part has to be spotless clean. Oh, and you need an old oven, otherwise your wife will be ...... umm.....upset.
Also the kit Eastwood sells is great. I used it for years, paid for itself and made some nice side money.
Got the chassis back on Monday. They did a great job - much better than I could have done!
I'm now a little further along with the wiring, but it's going slow thanks to some new test equipment being delivered.
I added some diodes to the rectifier socket that should save it from arching over in case of a power dip.
Looking great Tom! Very solid soldering work