Site Links
Howdy, Stranger!
It looks like you're new here. If you want to get involved, click one of these buttons!
Quick Links
Categories
In this Discussion
Who's Online (0)
The Replacements
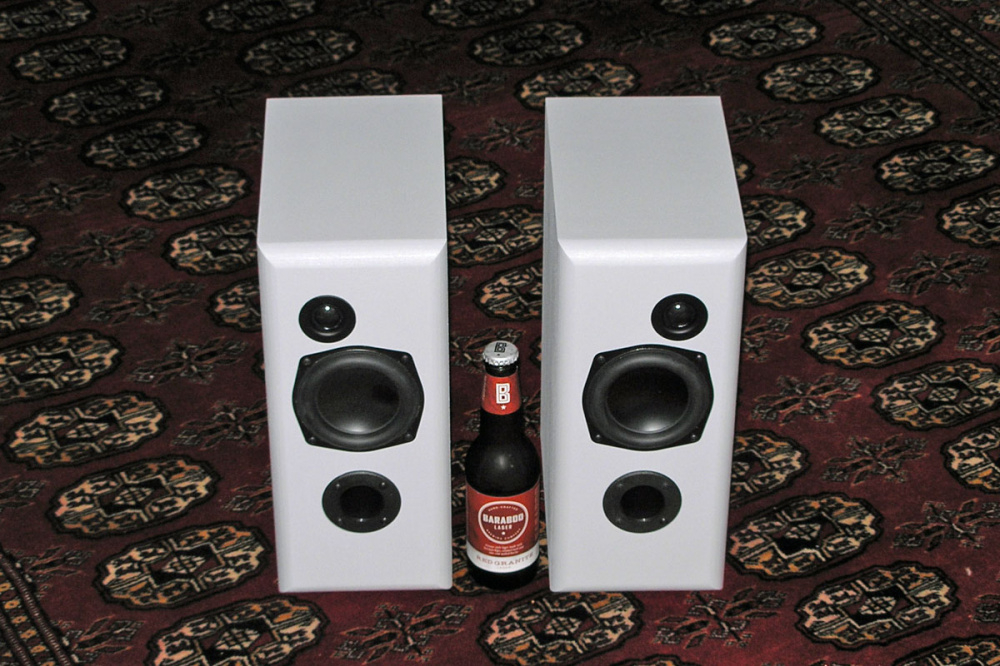
In 2015 I built a pair of speakers for the daughter of some best friends while she was attending Amherst. The speakers I built for her were small 2-ways built around the Dayton ND105-4 neo woofers and finished with a mix of white and black Duretex that came out as a bluish gray.
Small two ways.
She absolutely loved them and claimed she had the best sounding speakers in the dorm. Fast forward and she's got her PHD and she and her boyfriend can work remotely and they plan to travel for an extended period of time. She puts everything she owns in storage except for her speakers because she doesn't want anything to happen to them because they are so precious to her. She leaves the speaker with a girlfriend for safe keeping. While she's on the road her girlfriend breaks up with her boyfriend and he takes the speakers and she can’t get them back.
So, it's time for some replacements.
A Krystal.
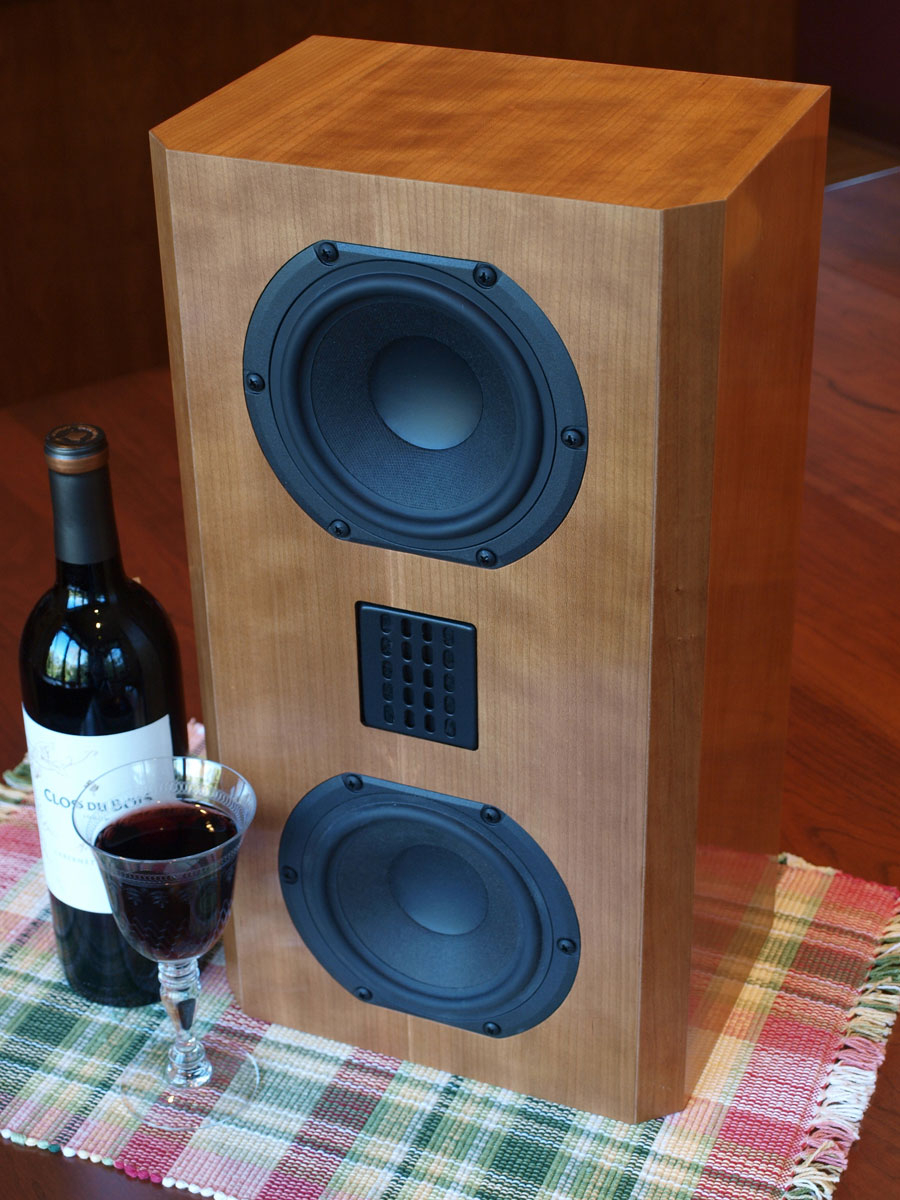
I know it's sacrilege but the Krystal's were built for a 5.1 system and the surround receiver died and I gave a pair away which left me with a singleton.
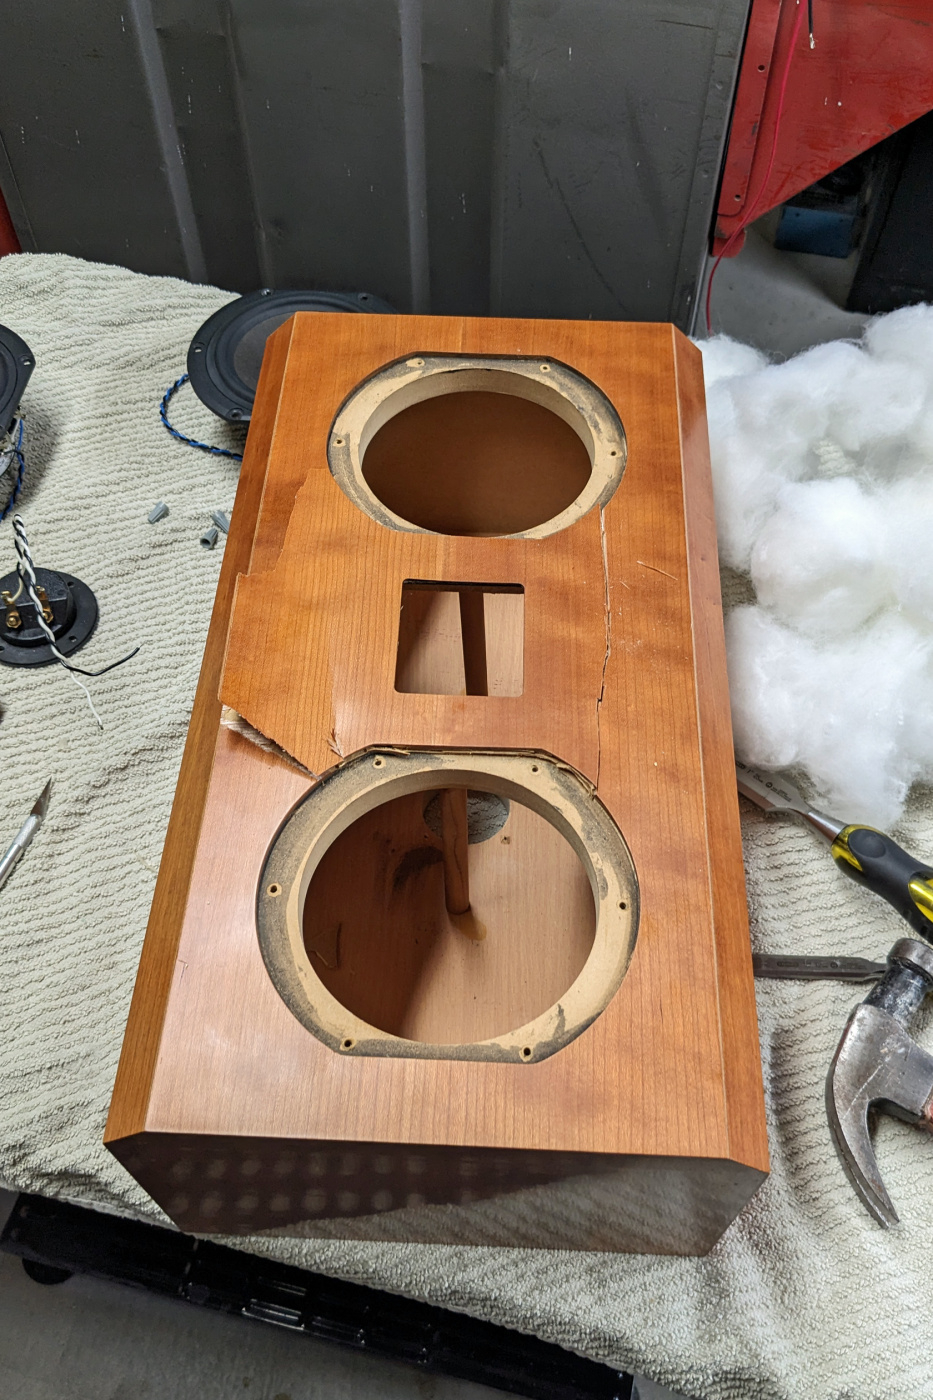
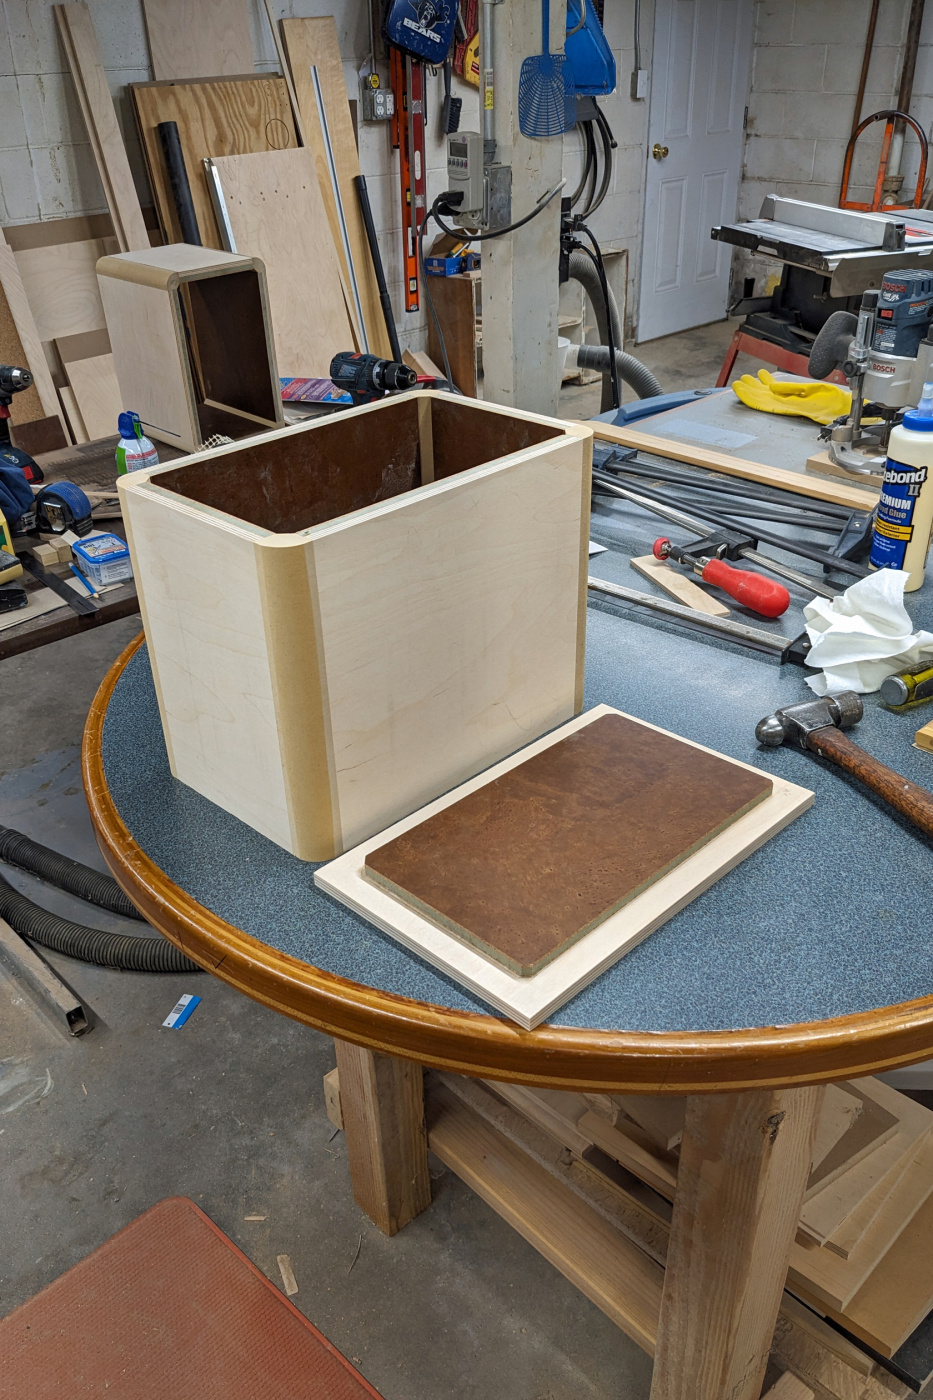
Time to recover the NLA Peerless woofers and BG tweeter.
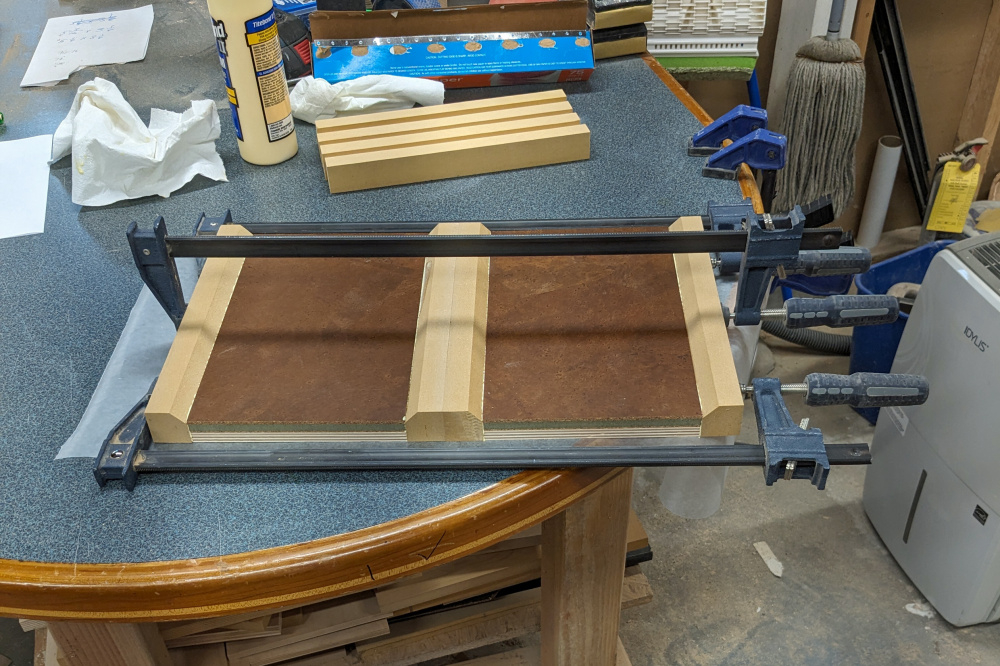
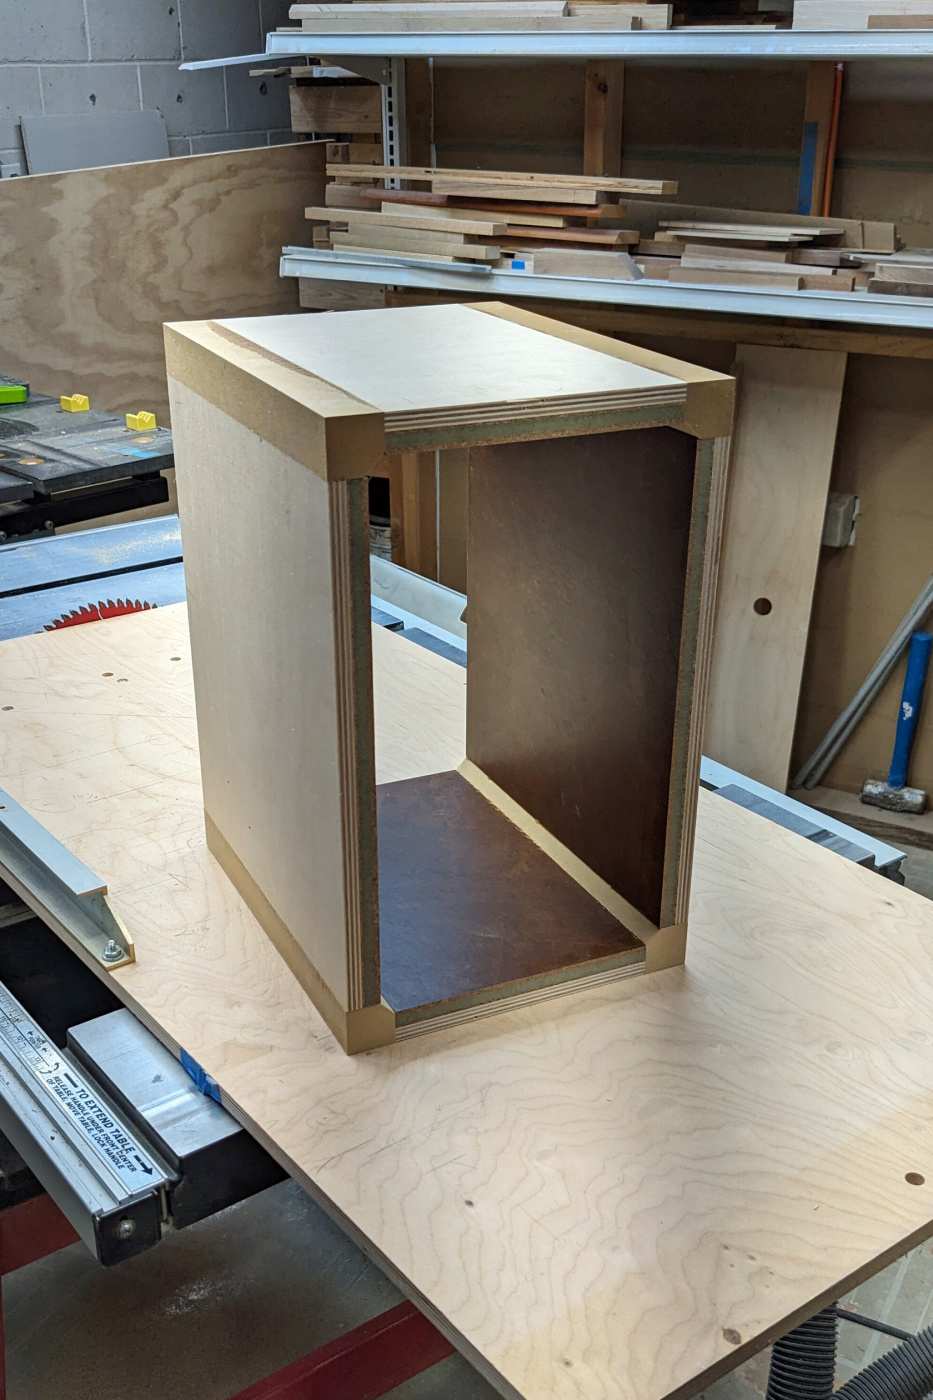
Cut tops, sides, and 1 1/8" MDF corners.
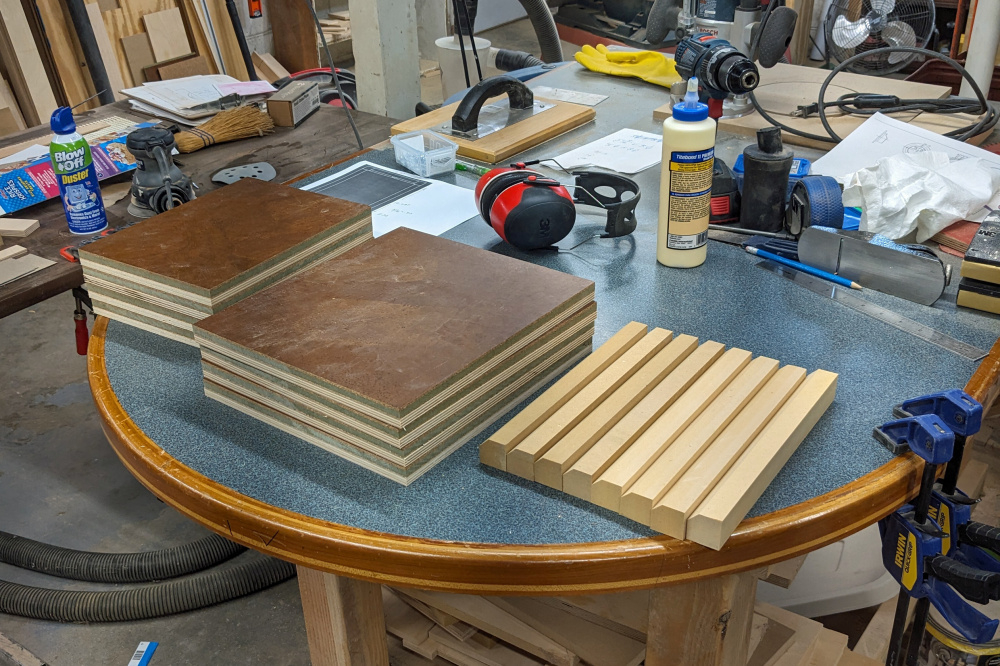
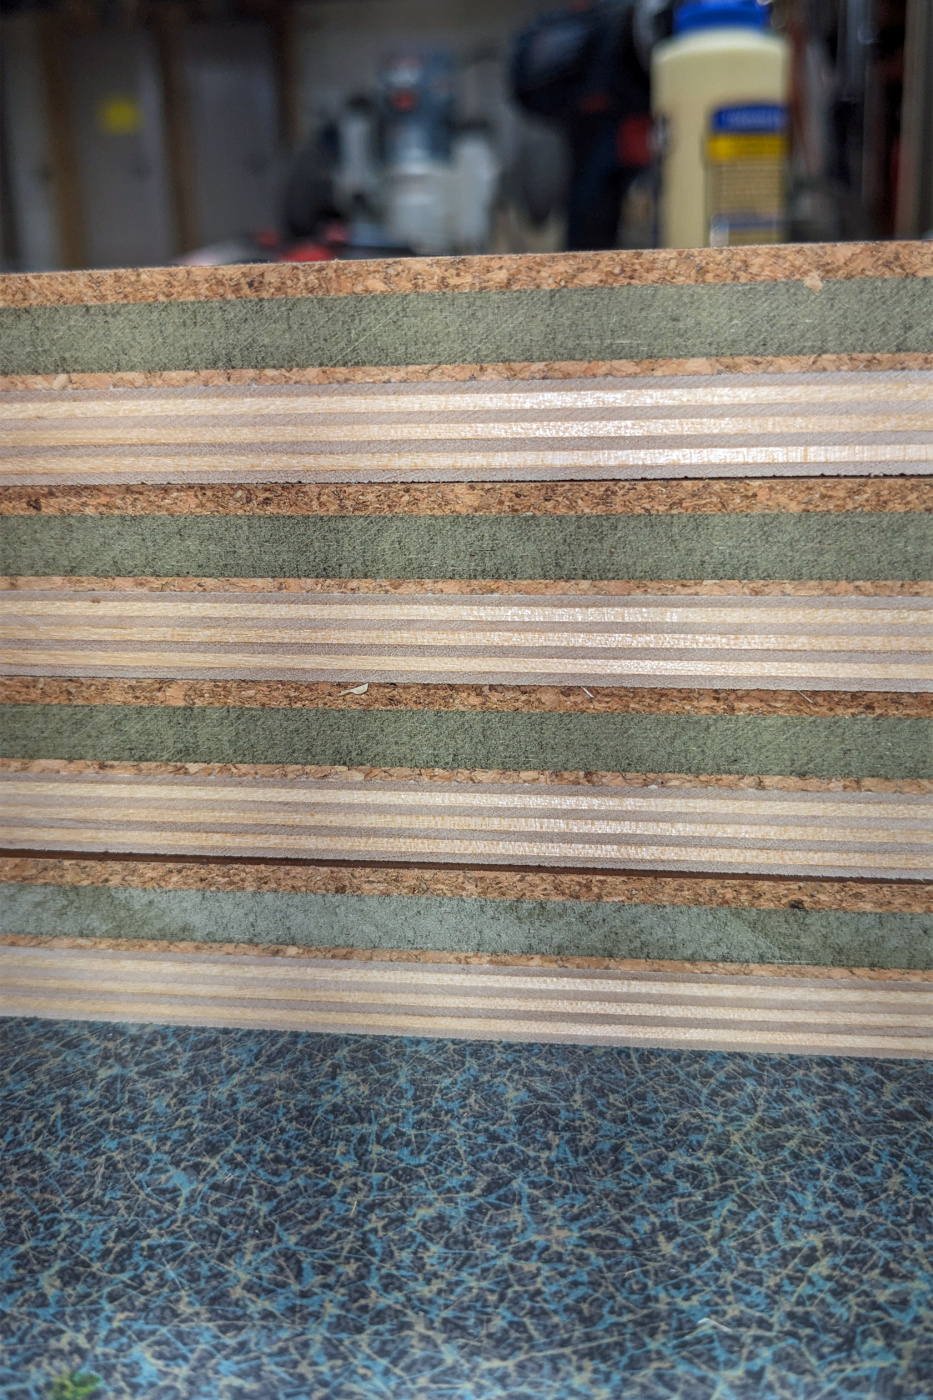
Panels are made of sandwich of 3/8" Baltic Birch and 3 layer cork flooring.
Gluing corners to top and bottom panels
Gluing a side to a top panel.
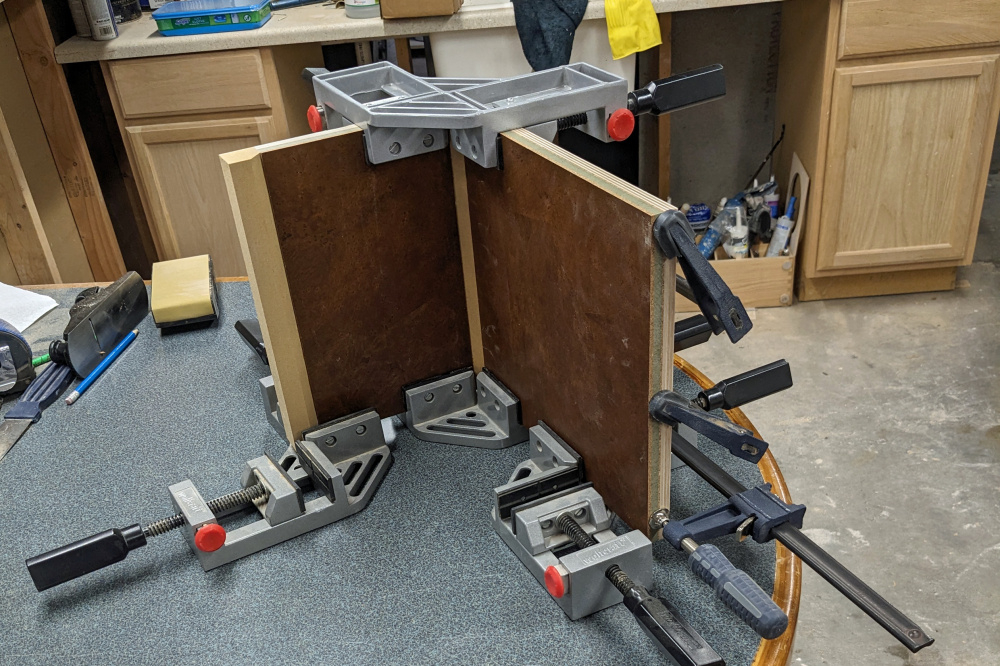
Gluing a side and top panel to another side and bottom panel.
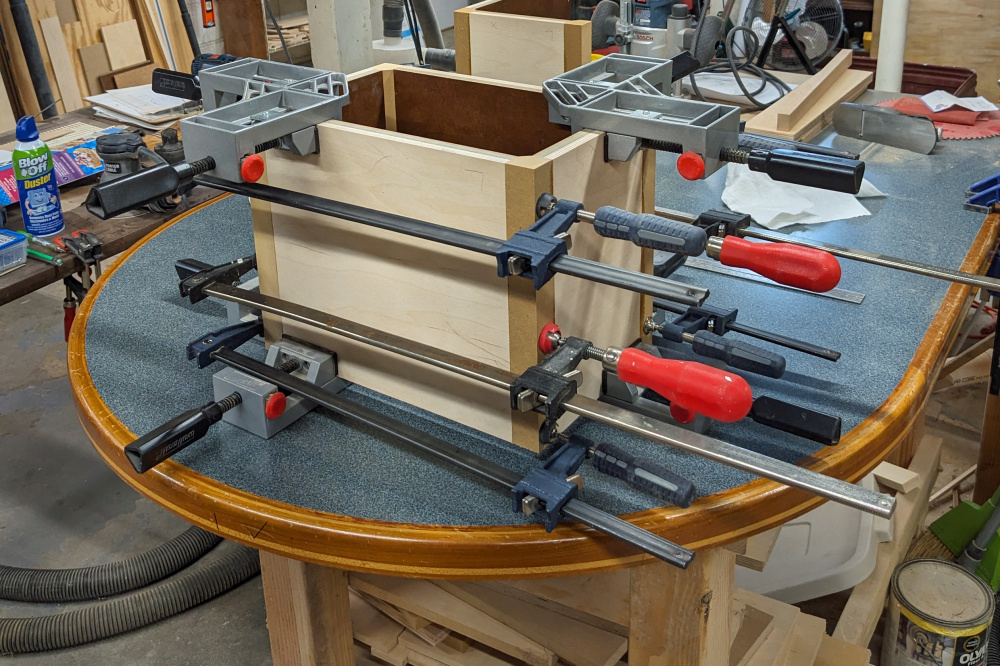
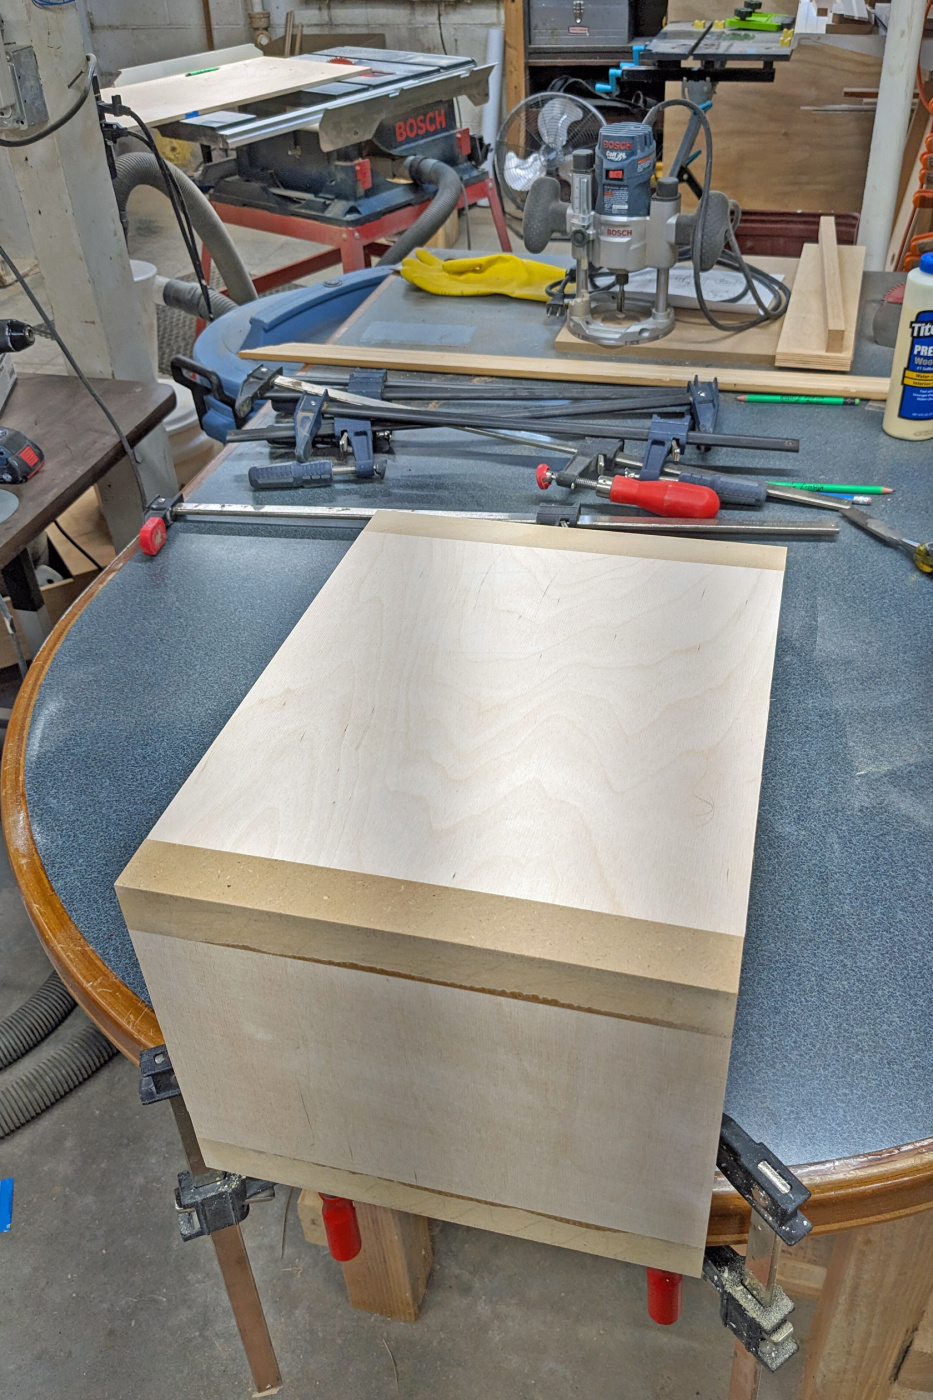
Finished sides and top and bottom.
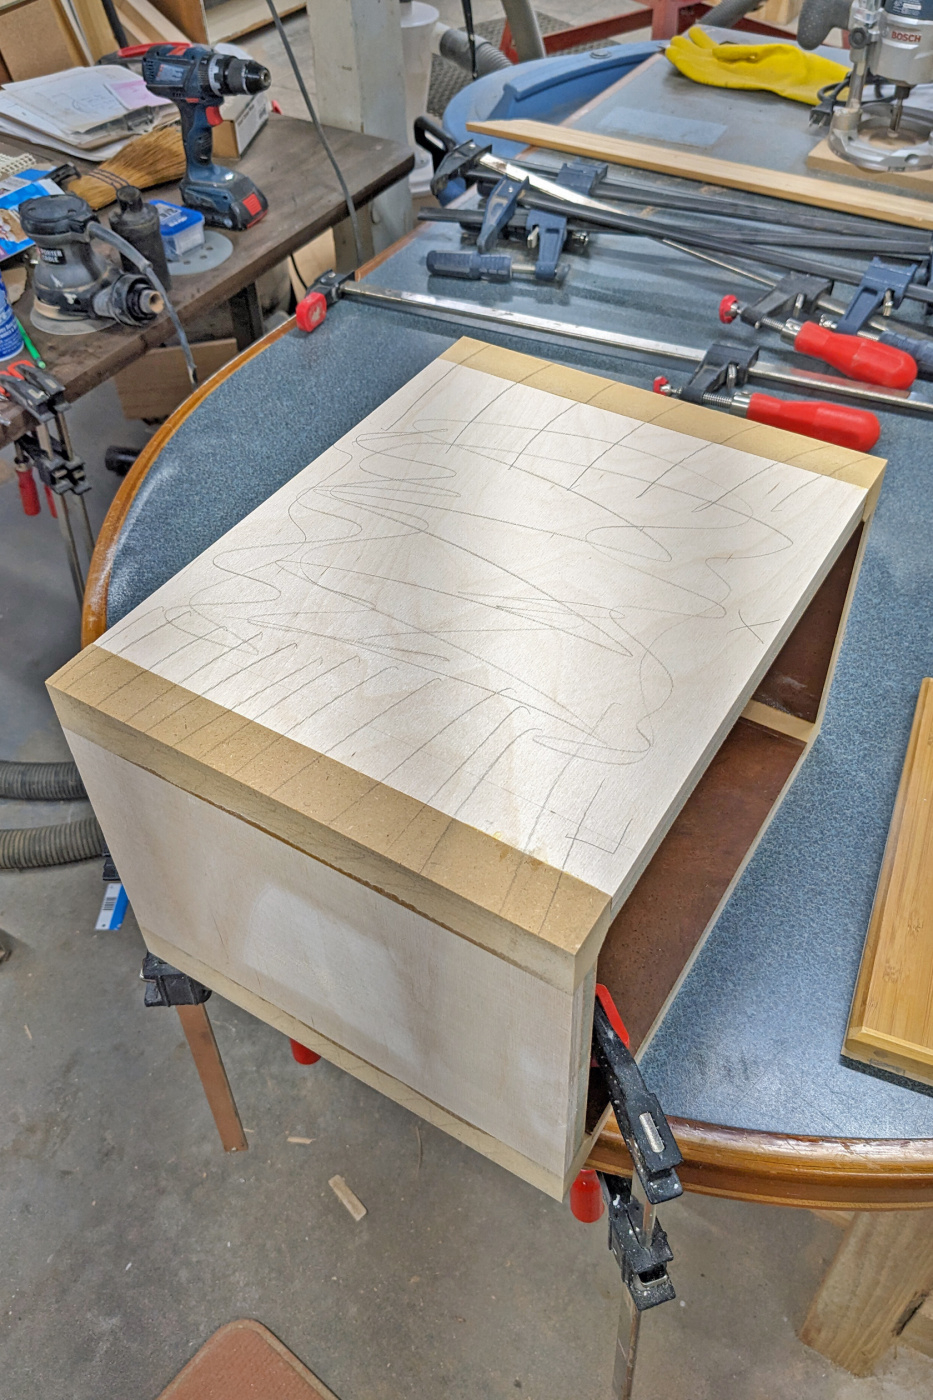
Leveling up the outside of the box. I scribble the side with pencil.
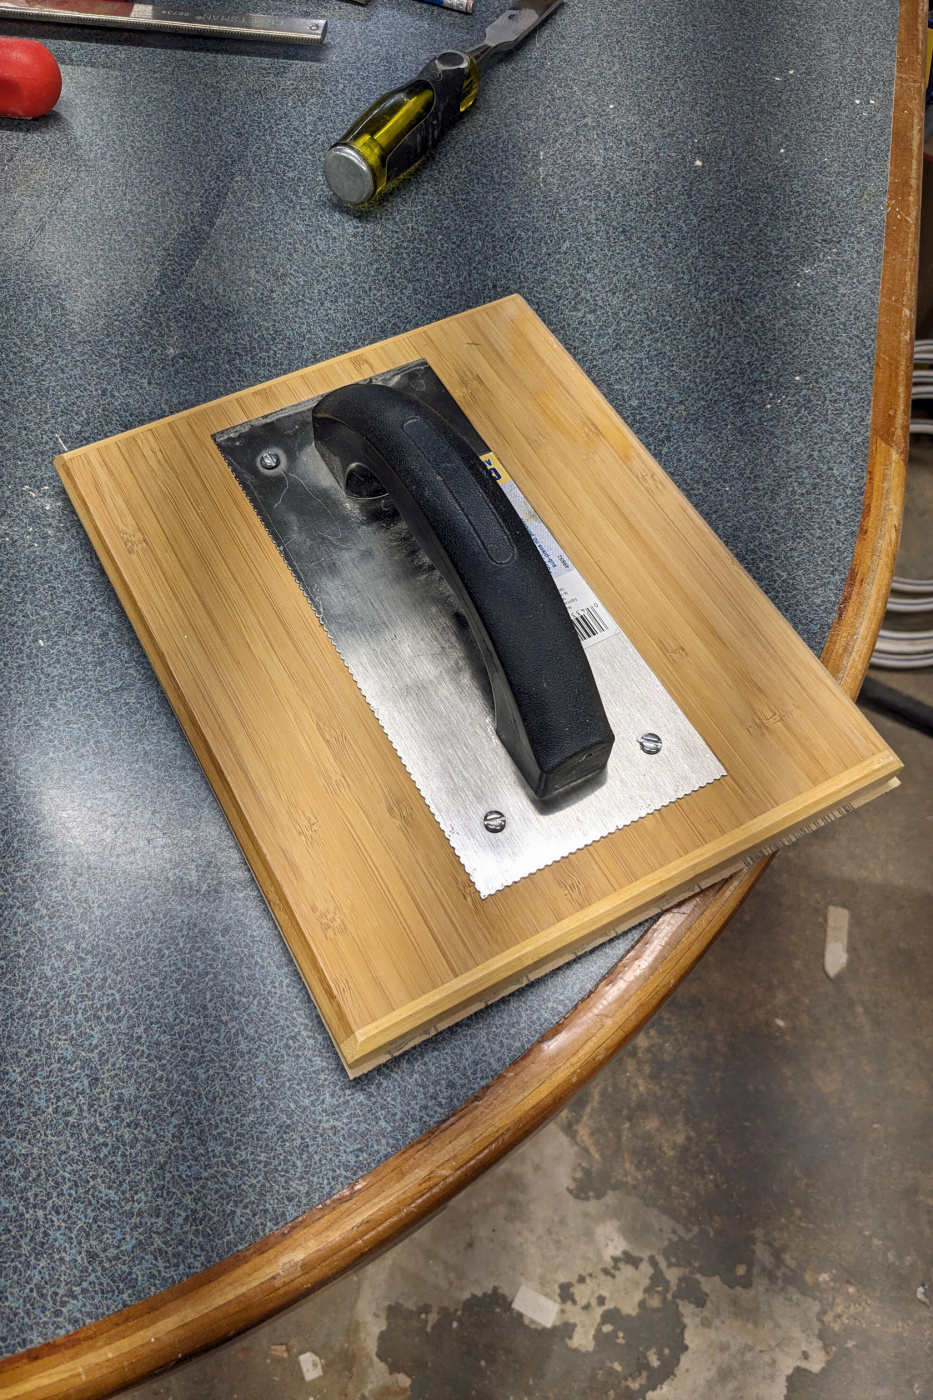
I use a sanding block made from a trowel as a handle and a bamboo cutting board with a sheet of course sandpaper attached with spray adhesive.
Here the pencil marks start to disappear.
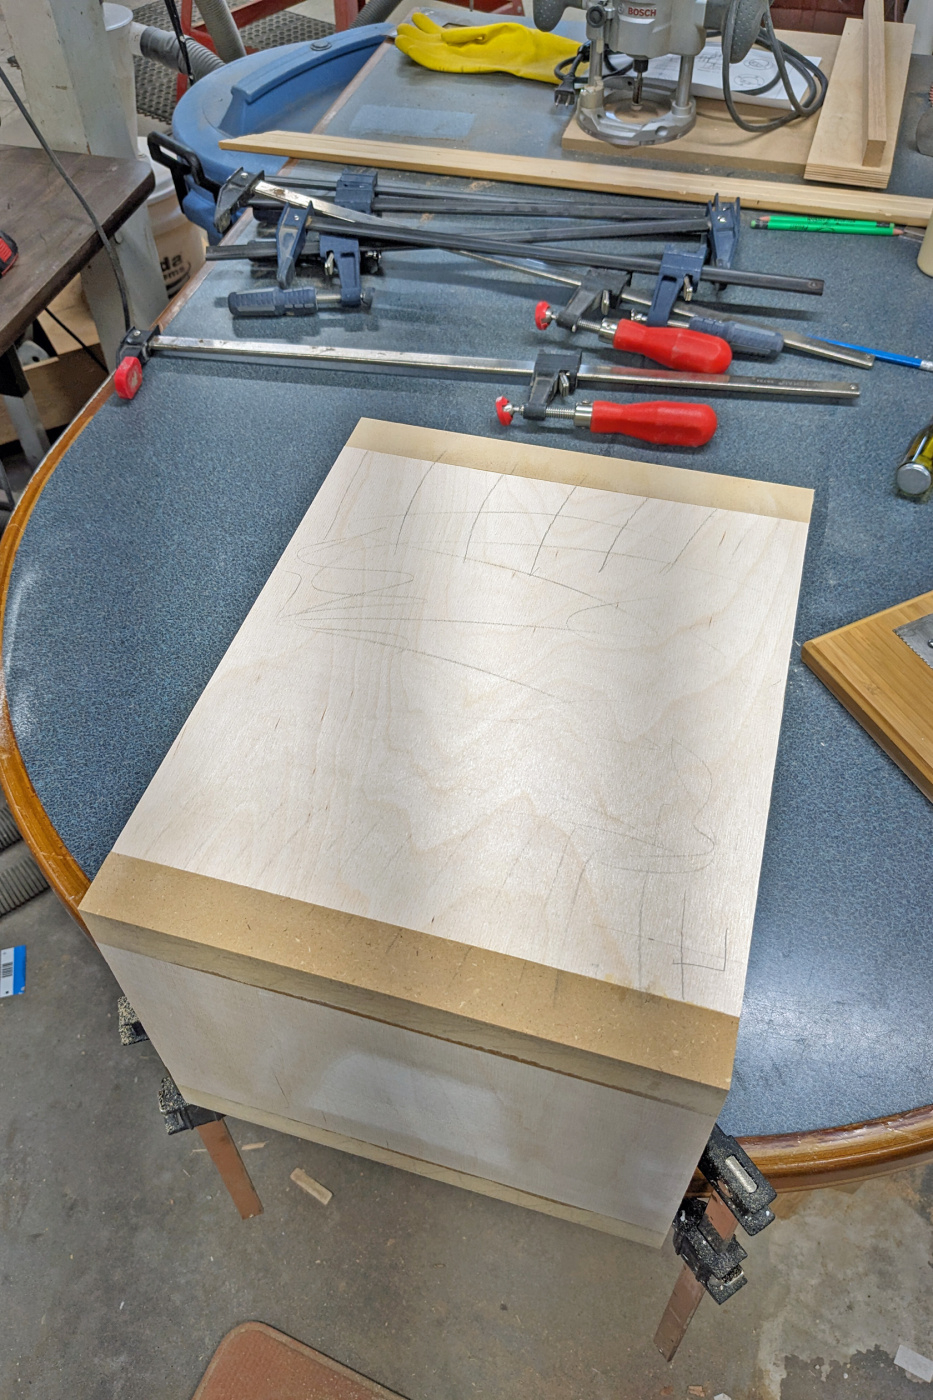
I'm done when the pencil marks are gone.
I routed the corners with a 1" router bit and making three passes. The MDF block was a test block and I used it to push the box so there would be no tear out coming off the bit.
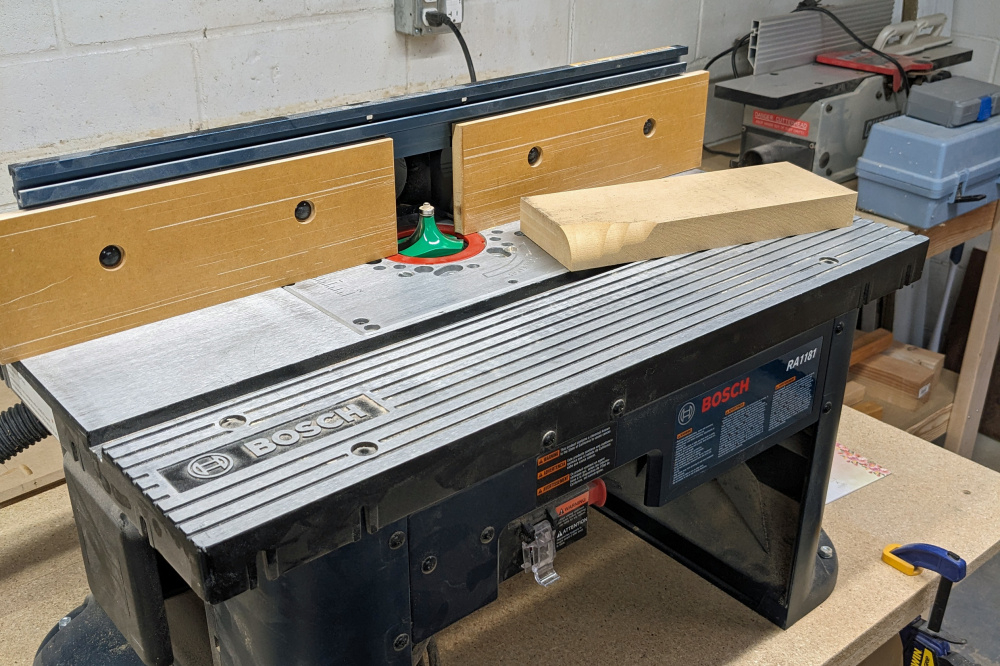
Rounded corners.
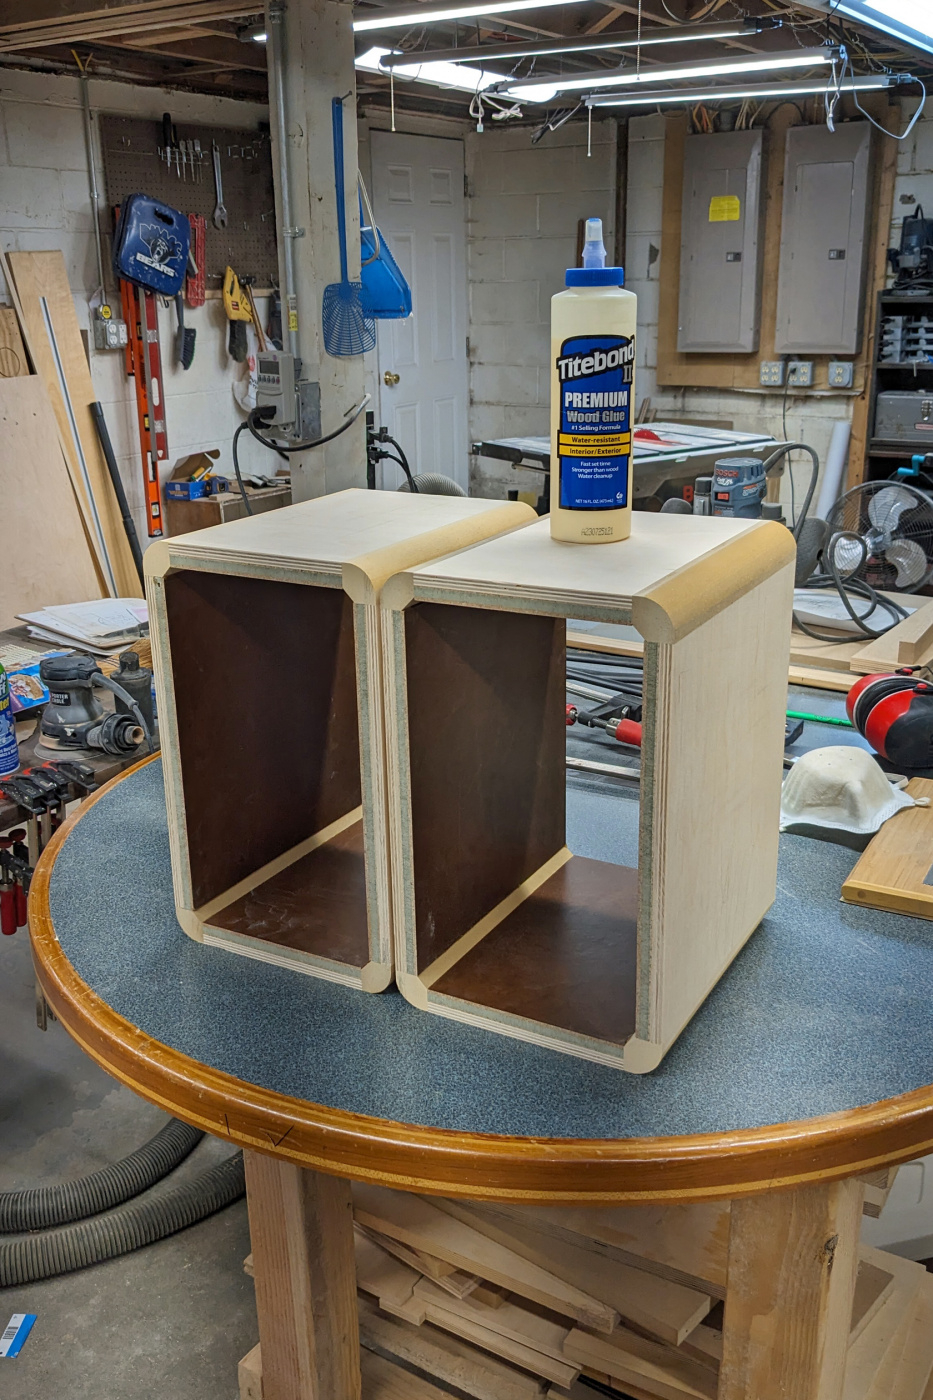
Gluing up the backs and cork flooring with contact cement.
Assembled back panel.
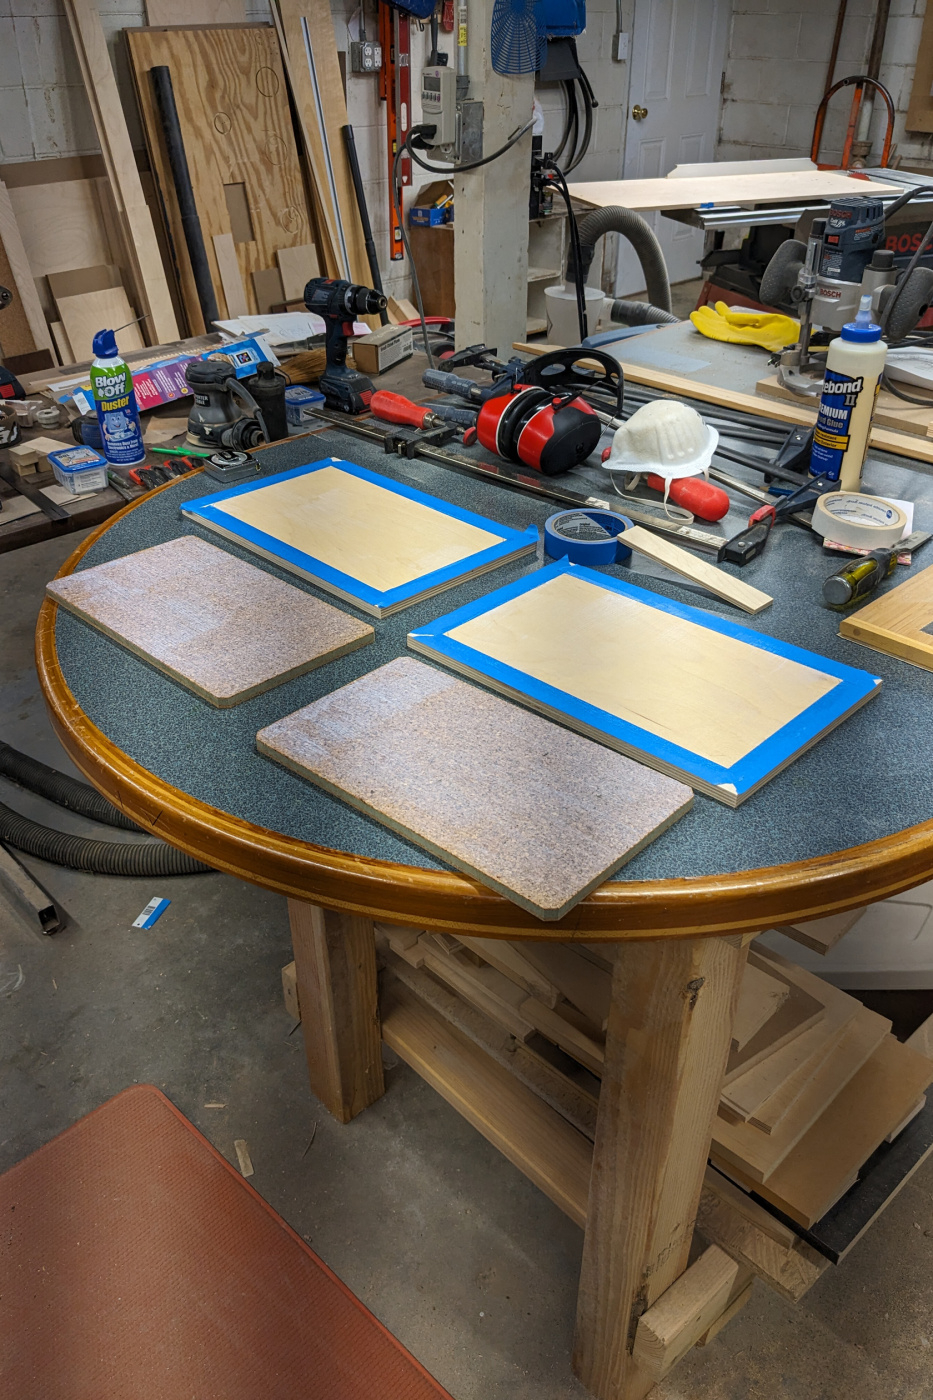
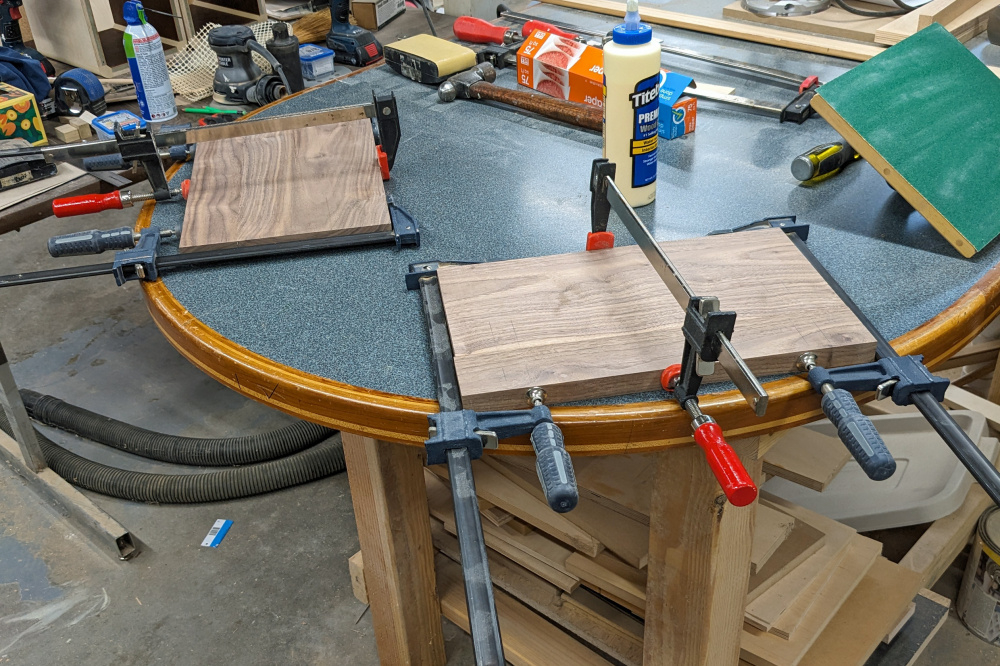
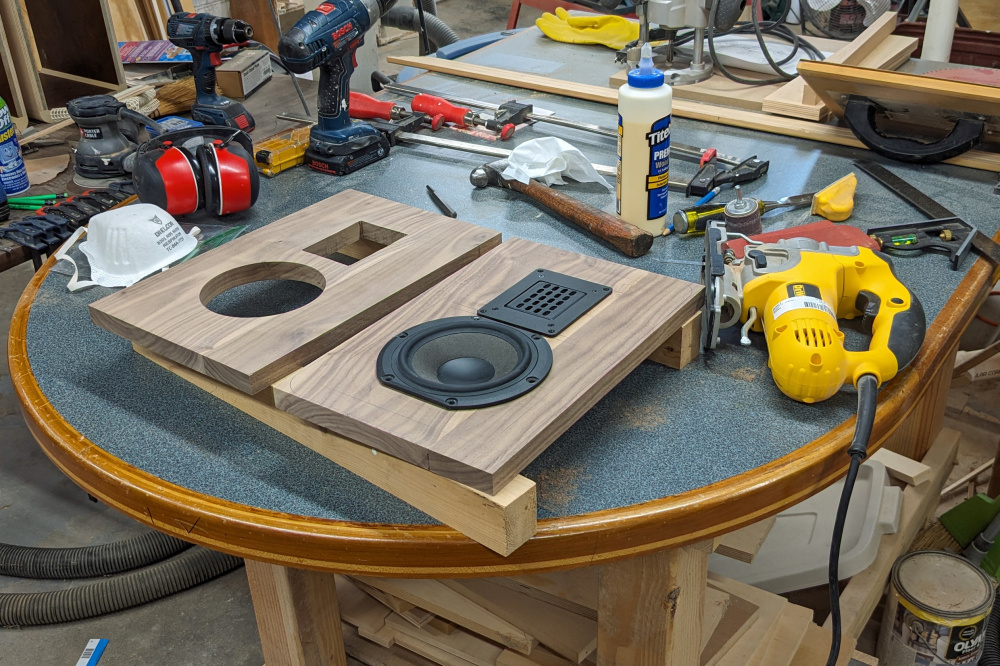
Gluing up the solid walnut front panels.
The woofers will be the NLA Peerless 823873 5 1/4" Nomex driver and I plan to use the GRS Neo3 clones for the tweeters. The boxes will be wrapped with quarter sawn walnut veneer.
Ron


 and 1 other.
Comments
She’ll be thrilled.
And I like your sandwich construction- reminds me of a refined way of the old use of roofing materials for damping.
I thought this thread was going to be about the band. Now, as much as I really like The Replacements, this build thread is better!
Holy crap man. This is going to be sweet.
Your work always amazes with clean, wonderful lines. Thanks for the detailed explanation of the process.
How did you get that walnut baffle flat without cauls during glueup?
Likely not necessary for a relatively narrow board with only one joint.
>
I used a jointer on the glued edge and put a biscuit joint towards each end. I put the end clamps on first and since they were flat to the bench there was no tendency for them to bow the 2 pieces away from flat.
Ron
Routing woofer cutouts.
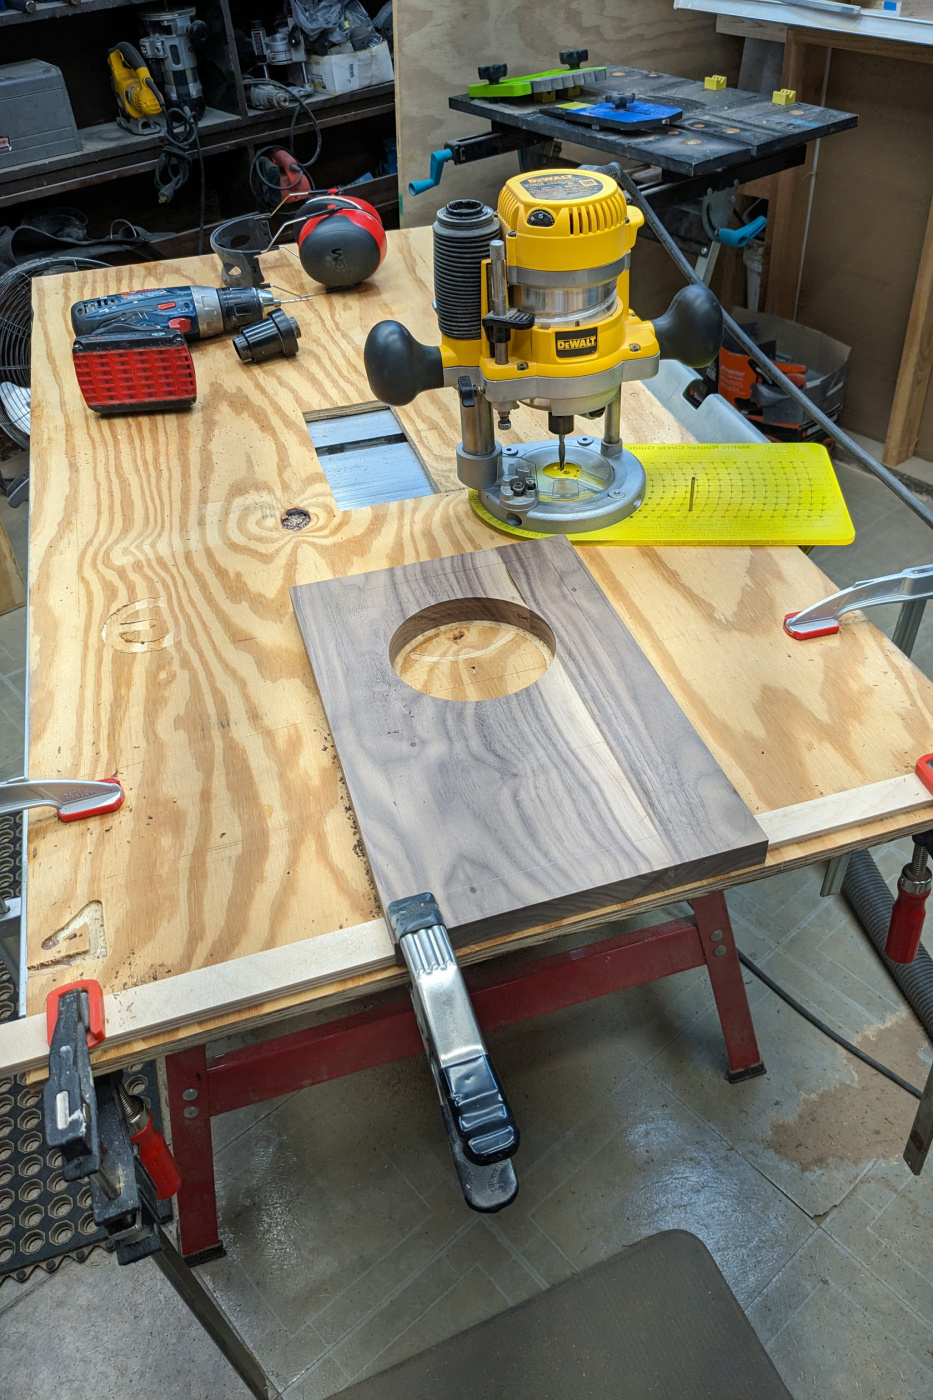
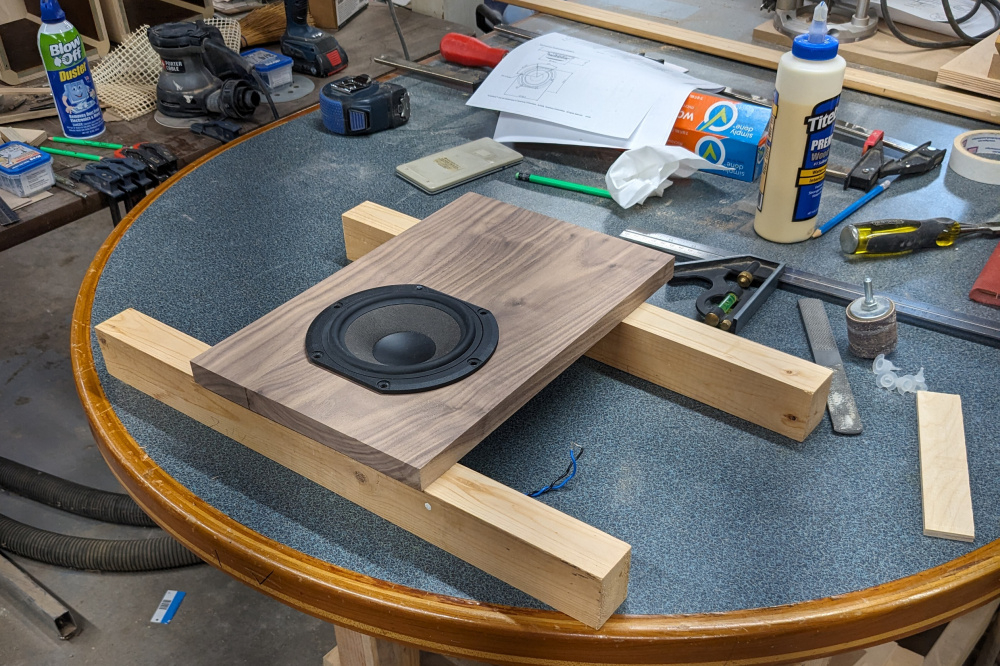
Test fitting woofer.
I'm glad I made a test cutout before I cut holes in the baffles. I used Jasper's metric jig and discovered there's a reason it says to add 1 mm if you're using a 6.5mm bit. 6.5mm is .255 inches and I was using a 1/4" bit and my test cutout was oversized. The jig is designed for a 6mm bit.
Ron
I made the tweeter cutouts with a jigsaw.
I 3D printed templates for the tweeter and woofer rebates. It took a while to figure out how to make a truncated circle in FreeCAD. After a few test prints I got the size dialed in so the drivers are an easy slip fit.
Ron
I fasten the drivers to the front panel with a couple of screws and attach the router template over the driver with double stick tape. Then I remove the driver. I set the depth on the plunge router with a wire size drill bit.

I did the same thing for the woofer.
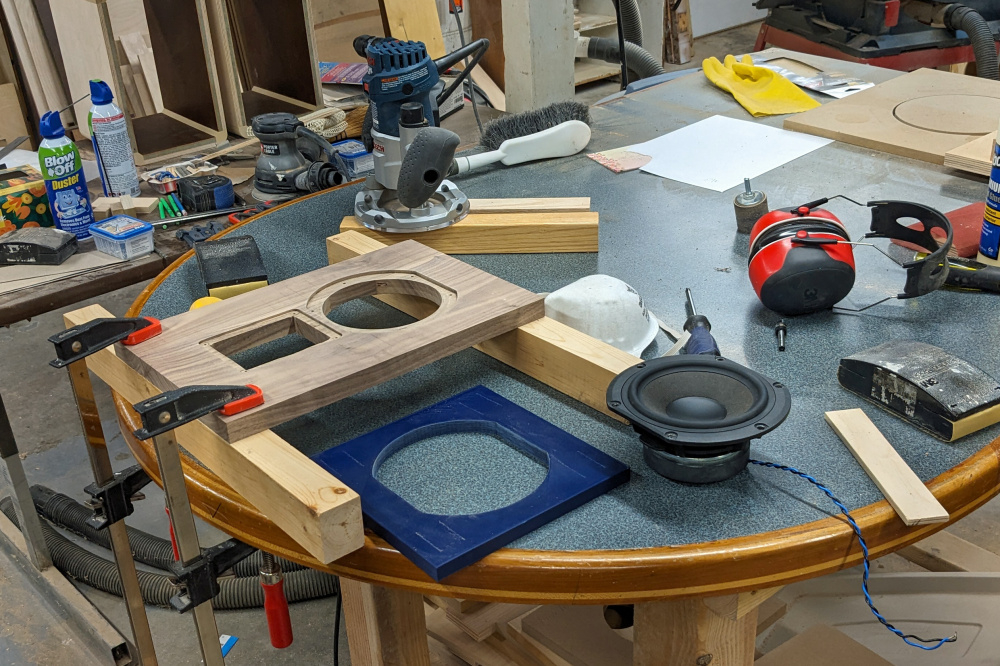
The 3D printed templates worked perfectly. The drivers just drop in.

I need to make a correction about the drivers I'm using. I thought the tweeters I had were GRS clones but it turns out they are actually BG Neo3 PDRW's. I found the pair laying on the step in the garage where my nephew the speaker fairy left them.
Ron
good process for odd shaped flanges! What's a " wire size drill bit"
hmmm... how do we use this? I got standard sized drill bits and not so many. use the thickness of the drill bit to inset between the router pluge stop to set the depth? Also, what this drill set called?
Yep.
InDIYana Event Website
Numbered bits Ani, they run from 1 downward, so 1 is bigger than 2, and so on.
Big set of #1-60 bits plus fractional bits and more
https://www.harborfreight.com/cobalt-drill-bit-set-115-piece-61886.html?utm_source=google&utm_medium=cpc&utm_campaign=12126402660&campaignid=12126402660&utm_content=118355022713&adsetid=118355022713&product=61886&store=428&gad_source=1&gclid=CjwKCAjw65-zBhBkEiwAjrqRMGcEaFwpCMmPCpHwVlervSnHAPVjw0c4iiKHRYsFusbnpYbctFOCDhoCFVwQAvD_BwE
Thanks, will get a set. I have a usual drill bit set, that's enough to make different screw holes, but not this many and in such fine increments.
Hobo Freight FTW!
You set the router with a top bearing bit on the template and plunge it until the bit hits the baffle. You then use a drill bit to set the stop to plunge to the depth you want. I think my bit set is 60 pieces (#1 to #60) and the box has a guide for what size bit to use to drill tap and through holes for various size screws.
Ron
what the cutting depth of your template bit? I assume it's a shallow one. I think mine is around 1" which i use for flush trimming, need to get a shallow one 1/2" or so
I have a shallow Freud meant for mortising that works well, as well as an over/under Whiteside trim bit; in half inch shanks.
InDIYana Event Website
I used this Amana bit. The radius of the bit needs to be equal to or smaller than the radius of the corners of the template when cutting rebates for square drivers.
https://amanatool.com/45475-s-carbide-tipped-flush-trim-plunge-template-3-8-dia-x-1-4-x-1-4-inch-shank-with-2-upper-ball-bearings.html
Ron
My drill index's tap and drill size chart.
Aligning the back to the box with some small blocks and double stick tape.
Gluing on the back.
Flush trimming the back with a top bearing bit on the router table.
Ron
I started veneering the backs with quarter sawn walnut.
Wow!!! You do some amazing work Ron. Beautiful!!!
Thanks Mike. Haven't seen you around these parts for while.
I started wrapping the cabinets with veneer. I put 2 coats of thinned Titebond II glue on the cabinet and the veneer so I could iron it on. I had marked the center of the piece of veneer and the center of the top of the cabinet on both sides. I laid the veneer over the top of the cabinet and lined up the center lines and clamped it in place.
I draped the veneer over the top using the other cabinet as a stand so the ends of the veneer would have somewhere to go. Once I was sure the veneer was on strait I ironed the top and 1/2 way down on the top round overs.
Once the top was fastened I put a spring clamp on one loose end so I could lay the cabinet on it's side and finish ironing on the top round over and the side along with 1/2 the bottom round over.
Then I turned the box over and did the same thing for the other side.
I put the box on it's top to make a seam on the bottom. I put 3 bamboo skewers under the flap of excess veneer on one side and cut the seam with a strait edge and utility knife. I used the skewers because the heat of the iron will cause the veneer to shrink and it will leave a gap at the seam. I butt the edges together and ironed down the seam and then ironed down the rest of the veneer and bottom round overs.
Once everything is ironed down the seam is virtually invisible.
I use a flush cut tool with a cardboard spacer to rough cut the veneer overhang down before I used a big chisel to trim the veneer flush. I'd used some wooden blocks under the back of the box so I could clamp the box to the bench while I trimmed the front.
I should mention that the reason the excess veneer doesn't match at the seam is because when I cut the veneer it came out wider at one end than the other. I gave the veneer plenty of excess because it doesn't take much misalignment to get the veneer to run off center when wrapping the box. When I was done the narrow end came within 1/8 inch or being too short.
One down and one to go. This picture is with the bottom side up
Ron
Awesome looking wood working skills as always Ron.
Do you ever just throw together a crappy pair of particle board boxes just to hear how some drivers sound or do you always go all in and build freakin awesome enclosures and trust that the drivers will gel together. Just curious because I'm too much of a cheap skate (and lazy to boot) to buy and veneer enclosures before I've had a chance to measure and voice the project.
I do build test boxes for woofers. I didn't for these because it's the 12th set of 2-ways I've build using this woofer. (0ne of those builds used this tweeter) I have also put mids and tweeters on a baffle and measured them before I commit to using them. One of the advantages of DIY get togethers is you get to hear a lot of drivers and there's plenty of advice on forums like this one about what sounds good. So if I hear someone's build that sounds good I assume I can get the same sound quality in a finished box using a driver they used. That seems to have worked out pretty well over the years.
Ron
Hey Ron, I lurk more than anything now. I retired about a year ago and have kept myself busy with many woodworking and yard projects. I have one or two speaker projects in mind once the weather is no longer nice enough to enjoy working outside. I ordered a pair of drivers from the U.K. the other day. I've been wanting to get them but put it off too long and now they're NLA in the US. They're for a two-way Mark Audio set: MA A12PW and MA A-7P. The cabinet looks a little complex with a few angles that will make the whole thing a new experience for me. Too bad Iowa and North Dakota are so far away; I'm sure I could glean a lot from you and your woodworking skills. I also plan on working on developing crossover-building skills. We'll see how that goes")
Hi Mike. Good to see you posting. Congrats on making it to the finish line (retirement).