Site Links
Howdy, Stranger!
It looks like you're new here. If you want to get involved, click one of these buttons!
Quick Links
Categories
In this Discussion
Who's Online (0)
3D Printing

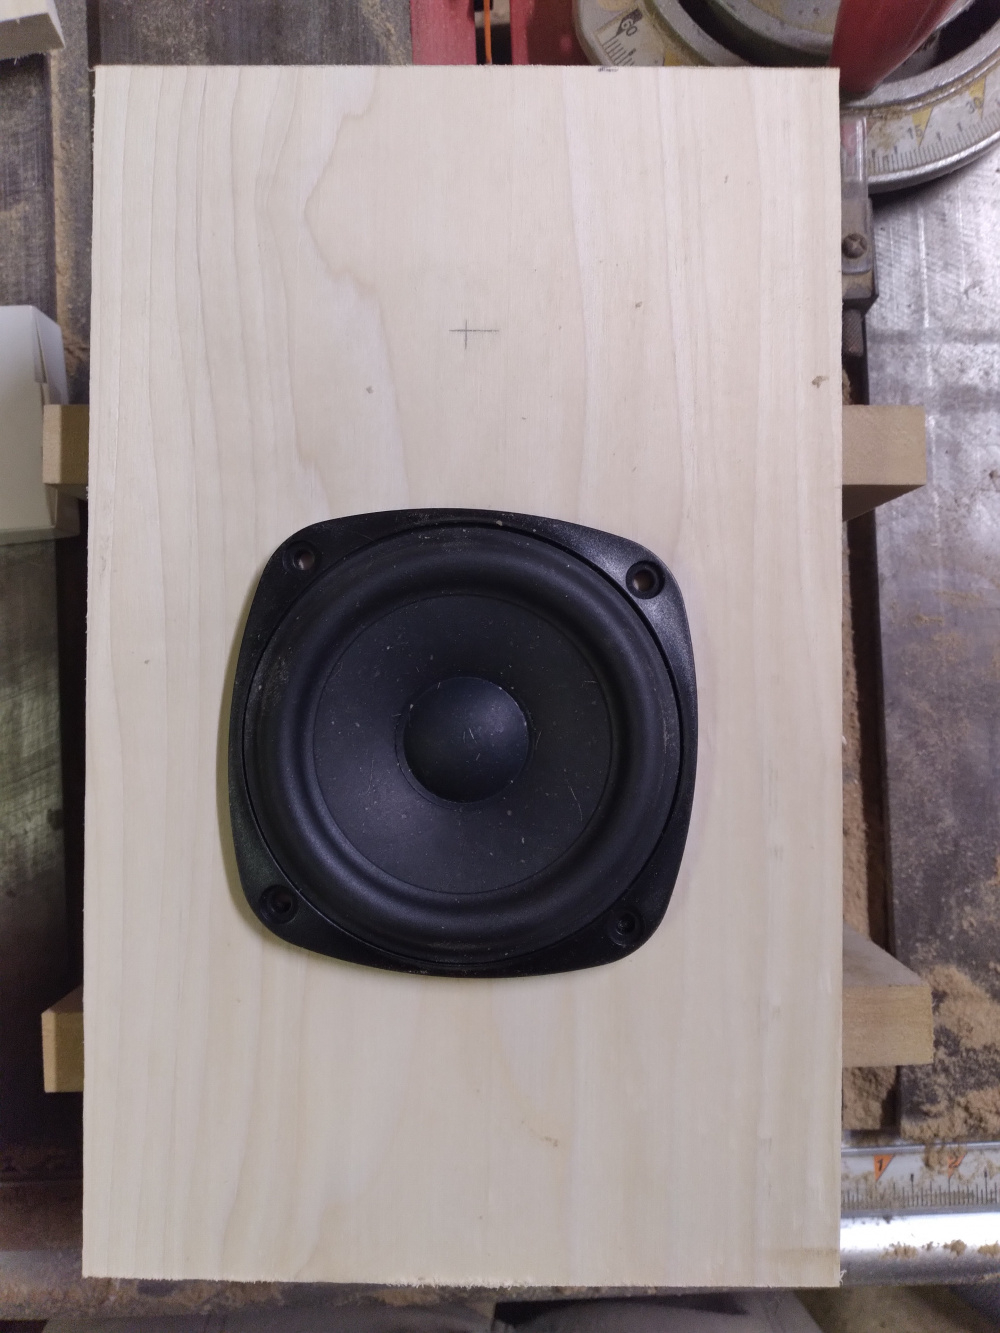
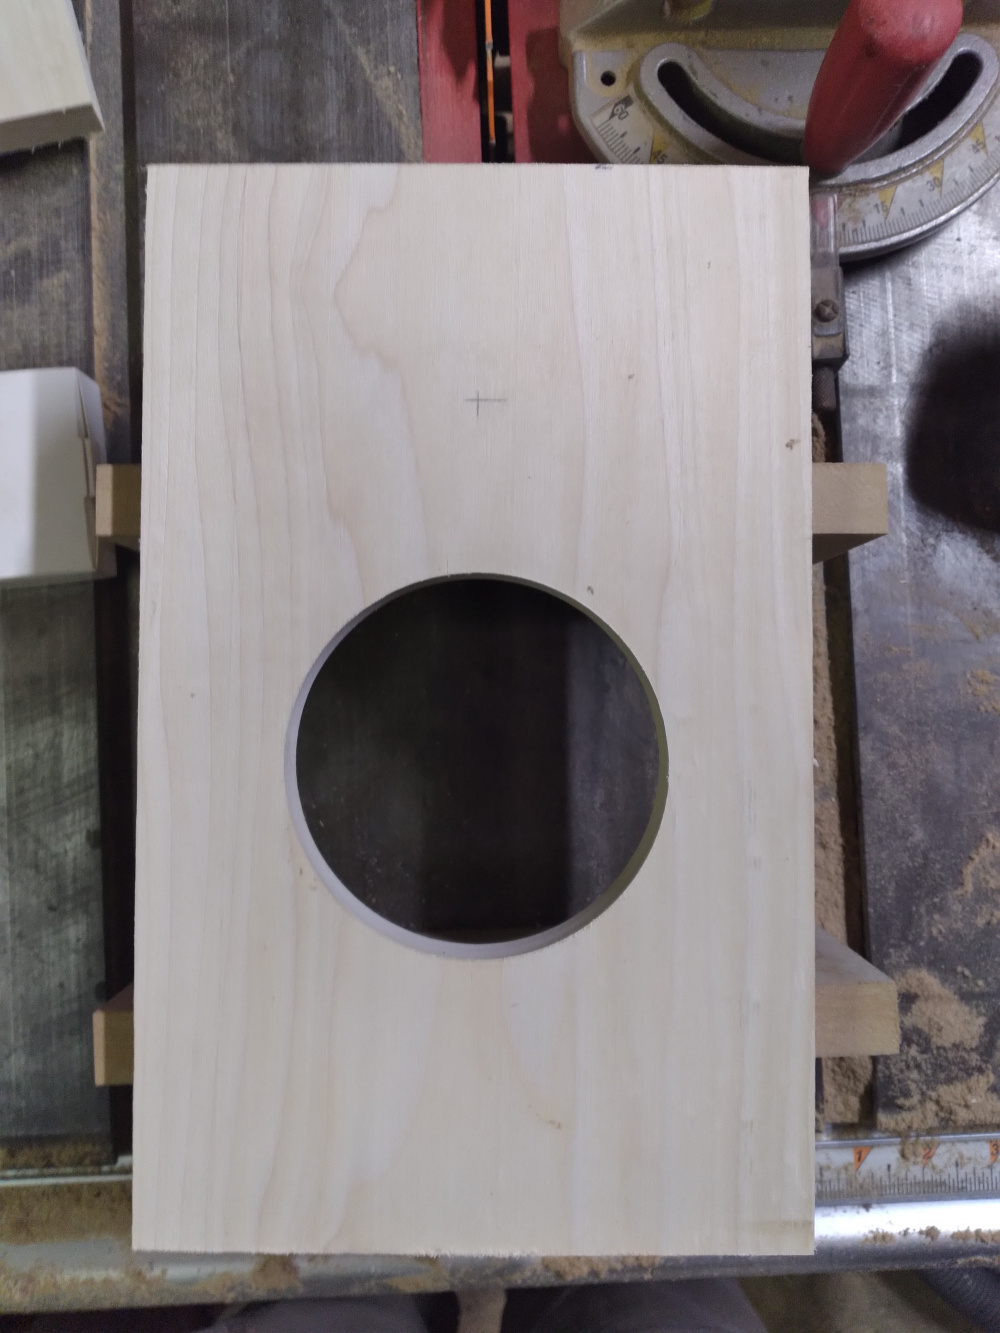
I bought a 3D printer last fall and finally got around to trying to print something of my own design. The plan is to print the front and rear panels of a small box. I'll make the sides out of Baltic birch because it's faster. The drivers will be the Dayton TD20F-4 tweeter and the Tectonic 3.5" BMR woofer. I made a test print yesterday and I'm pretty happy with how it came out. The only flaws are some very slight curly on the tips of the corners on the face and some delamination around the hole on the inside. I'm using AutoCad's Fusion 360 which is free for noncommercial use. It's really powerful stuff but the learning curve has been pretty steep for my old mind. The test print is 5.5 inches square with .5 inch walls and is .5 inches tall. The hole is 108.5 mm and is a nice slip fit for the woofer. It took about 20 hours to print. I'm using and Ender-5 Pro printer.
I can see myself 3D printing my own ports in the future.
Ron


Comments
Time to start experimenting with waveguides")
is this a 60 x 40 ? hard to tell from the angle
It's an Augerpro design for the CSS LD22. Freely available for anyone to print, he's provided designs for a few different tweeters:
https://www.somasonus.net/waveguides
My desire is to print trim rings. Maybe after I retire again.
JH, do you have a 3D printer yet? If not, I also have the Ender 5 pro and should have it up and running this weekend or next. I'd be glad to print anything for you as appreciation for all your help on the forums. One of the first things I'm going to do is a test of a trim ring with some modifications that may effect diffraction. I'll take measurements and post on PETT in the next month.
Regrading Ron's initial post - Granted, it's been a while since I've even had my Ender 3 plugged in, but 20 hours seems like a long time to print something of that size. Does that seem about right to you guys who have printers? I know infill & wall settings can drastically change print times.
3d printing is slow. 20h is high but a lot of the print time is infill settings.
If anyone needs help with fusion designs I may be able to help.
Something I have always expected to see but has not yet come to pass is an entrepreneurial soul who 3D prints router template guides for known/popular non-round speaker recesses such as the boxy SB drivers.
Anyone feel like making one for each of the SB-PFC series starting with the SB12?
For a fee plus shipping, of course . . .
David thank you, maybe if I have an urgent need. I'd like to learn how to which looks like fun. I'm a former 2-D AutoCAD user so I'm hoping Fusion is not to difficult.
Ken - what infill pattern & amount would you use on a piece like Ron made?
I doubled the shell thickness to 2.4 mm and the fill was set at 50%. The slicer predicted 18 hours with those settings. If I back the settings off to the stock 1.2 mm shell and 25% fill it drops to 12 hours.
Ron
Something like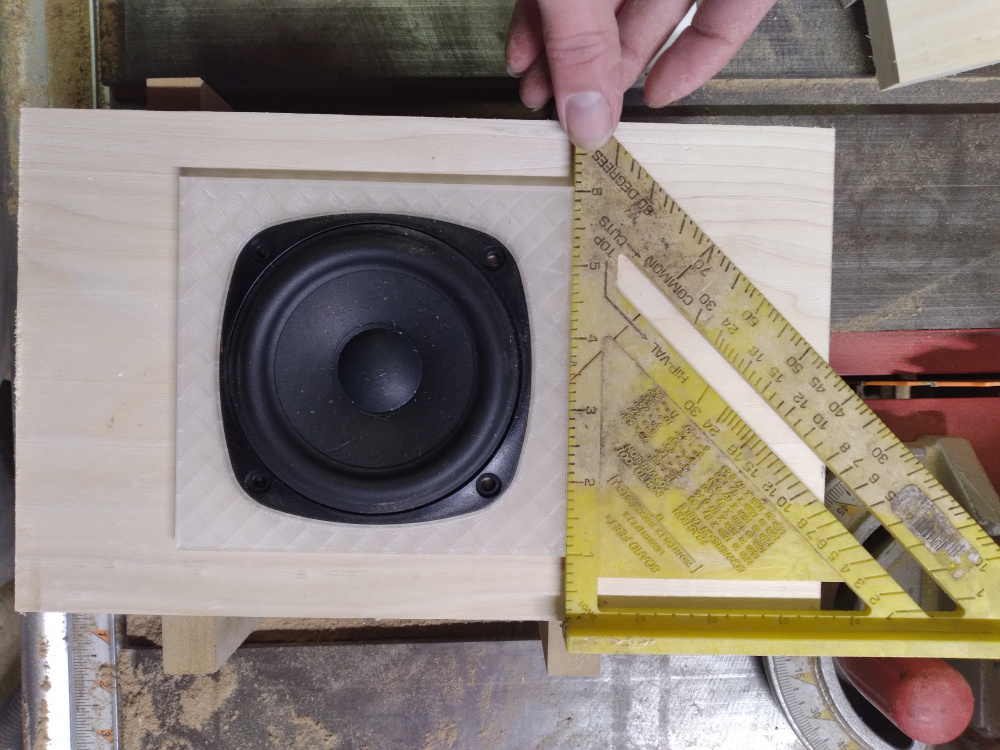
")
Thi
S?
I printed a small 1/2 x 1/2 x3/4 inch block with a screw hole in it as a test this afternoon. The height was off .0015, the width was off .006 and the length was off .010.
Ron
Those tolerances are pretty good. Might be able to tune the length a little more.
I don't have a 3D printer either. But I have been thinking about getting one too. I was looking at the Ender 5 Pro verses the Ender 5 Plus. The Plus gives you a print size of 350x350x400 verses the 220x220x300 for the pro. If I get the plus, I could print trim rings for 12 inch woofers. And big 12 inch waveguides.
Really? Is that normal tolerances for 3D printing?
Printing Precision: ±0.1mm for the Ender 5 Pro.
Depends on the type of printer, filament, setup, room temp... There are a ton of variables that can change accuracy. We are also talking about a belt driven value oriented printer. There are ways to make a more accurate 3d printer, SLA can beat FDM easily. SLA can also be a pain and is more expensive for a large format printer. Remember FDM is basically a glorified glue gun.
What's I've found is that 3d printing is as much tweaking and craft as it is science. This is somewhat infuriating if you want the machine to be a reliable, repeatable precision tool. The tolerances depend on the quality of the printer, but also quite a bit depends on how well you've 'dialed in' the settings for your machine in the software.
All that said, if you take the time to the appropriate mechanical calibration for your machine, do regular 'tune-ups' on the hardware side, and carefully calibrate e-steps (once for a given extruder) and flow rate + retraction settings (every time you change nozzle or filament) on the software side, you can get very good tolerances.
Some dimensional errors can be caused by the slicer (software); there are max allowed complexity settings and max deviation settings. And some gross dimensional errors can be accounted for there as well; for example, you can add a global % modifier for x or y horizontal scale to account for a consistent error in one dimension, or do a global % modifier to hole diameters with a tolerance threshold to trigger it above/below a certain size. Vertical error is usually a first layer/bed leveling issue, but vertical tolerance is of course constrained by chosen layer height.
Good info guys. Not sure if I'm ready to jump into 3D printing. I really don't enjoy having to tinker with things too much. I'd probably frustrate myself to death with one of the entry level printers and I can't justify spending what it would probably take to get a higher level performer.
I don't want to make it seem too dire. If you buy a decent entry-level model, just focus on the ones that are reviewed as pretty good out-of-the-box (eg minimal modification recommended), and have a good community around it. You can get decent results by following a hardware tuning guide specific to your printer, and using a software profile someone has tweaked for it in stock form. If you stick to a single brand & 'model' of filament, you can dial it in once, and get fairly consistent results. It's usually when things deteriorate mechanically after a few months, you require better tolerance/quality than 'decent', or you start switching filaments a lot that you have to tweak heavily. And I should mention that a LOT of surface quality issues can instead be addressed on the 'post-processing' side; touch up with putties, sanding, painting, etc. Good examples of this in the thread above.
But definitely DO think of it as more of an ongoing hobby than a woodshop tool like a router or table saw, or even something more complex like a laser cutter or CNC. It does help to see the humour in the process, sometimes... on the frustrating days this thread is pretty accurate")
As far as the entry-level/high-end spectrum, I have used 4 FDM printers; a cheap cartesian, a midrange delta (anycubic predator), a midrange cartesian (sidewinder x1), and the 'gold standard' of consumer-level printers (prusa i3). These range from $250-750 or so. All of them benefitted from quite a bit of tweaking. And while the sidewinder and prusa were quite good out of the box, I would not recommend either to someone expecting a tool. I'm told if you step up to the more professional models (formlabs, makerbot, ultimaker, etc) and materials this gets better and more reliable/repeatable, but you're into the thousands of dollars at that point.
Finished printing my first rear panel today. The dimensions are all good and the holes all line up. The bed had some leftover residue from test prints with white filament that stuck to the print. It took just over 49 hours to print using high quality settings. I wish the bed side finish was better. The flash made it look worse than it is. The rear panel is 5 1/2 x 8 1/4 inches with a 1 3/8" port 4 1/2 inches long.
Ron
Do you have the standard bed or a glass bed?
It's a flexible magnetic bed with a textured finish.
I use a mirror and ezabl and love the combo.
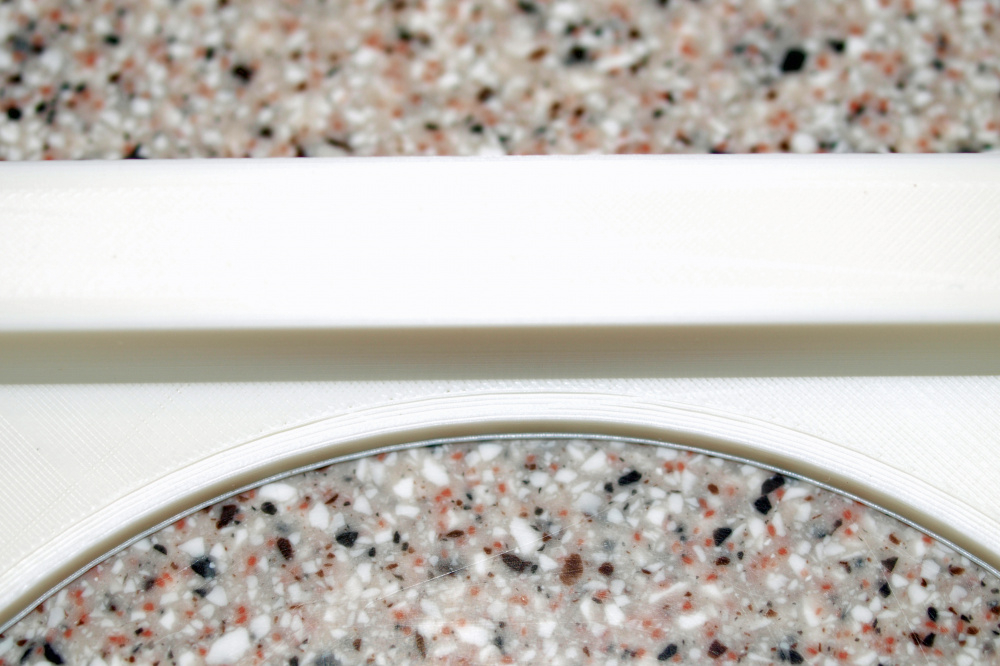
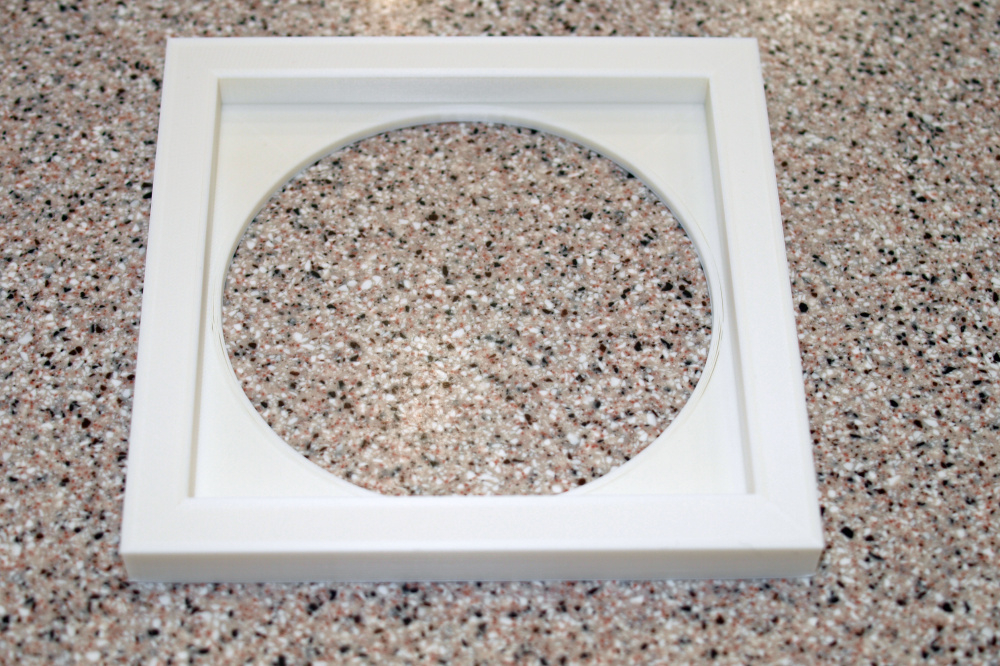
I managed to get a good front panel printed. The first print I tried was with a matte black filament and it had issues with one edge delaminating so I went back to gloss filament which looks better with the drivers anyway.
Ron
That looks great Ron. Are you going to sand and paint these?
I will play with trying some of the techniques you can use to smooth 3D prints. These are for some young people to use as computer speakers so if I can't get them to look good I may just go for an industrial look with 3D warts and all. I intend to try some vinyl wrap over the BB wood box for the rest of the enclosure. If I'm not happy with the vinyl maybe I'll tint some Duratex and paint everything. The edges of the fronts and backs look great.
Ron
I've not tried it yet, but I hear ABS sands easily. Maybe a little too easily! With a fine grit on the random orbit sander, you might end up with a nice matte look.
Well this has been an adventure. I was refining my settings and getting some reasonably good prints and my spool of filament was getting low. I switched spools and everything went to hell (*). I assumed something was wrong with the second spool and I ordered more of a different brand. It was better but I was still fighting getting a good first layer. I decided to get a glass bed and was still having problems (probably related to retraction settings). I spent lots of time on the web looking for trouble shooting hints and videos, tweaking settings and printing test prints . I found these two sites to be most helpful.
https://simplify3d.com/support/print-quality-troubleshooting/
https://teachingtechyt.github.io/calibration.html#intro
The first has examples of all kinds of problems and recommendations for fixing them. The second gives you step by step instructions on how to set up and test your printer. It has a number of test prints that are generated by inputs you enter and it creates g-codes files for you to print. The second site let me finally get a handle on getting a good first layer. Part of that was switching from the slicer that Creatlity supplies and going to Cura. The Creality slicer is a subset of Cura and doesn't have much support and Cura lets you set everything.
I'm pretty happy with the prints I've been getting. I'm printing the front and rear panels face down and working on getting the support settings to release better on the driver rebates.
I don't know that I've seen it anywhere but getting a panel this size to release from the bed is a problem. I decided to try putting the glass bed (cooled to room temp) with the print in the freezer for 15 minutes. The panel will just pop right off.
Ron
*A friend gifted me my first two spools of filament from Amazon. I made the assumption that they were both the same kind of plastic. They weren't and the second spool needed to have the temperature settings cranked up.